Scooter Variator and Clutch
A typical feature of motor scooters is the variator, an ingeniously simple means of achieving continuously variable power transmission. Proper maintenance and correct adjustment of the variator will improve the road performance of your scooter.
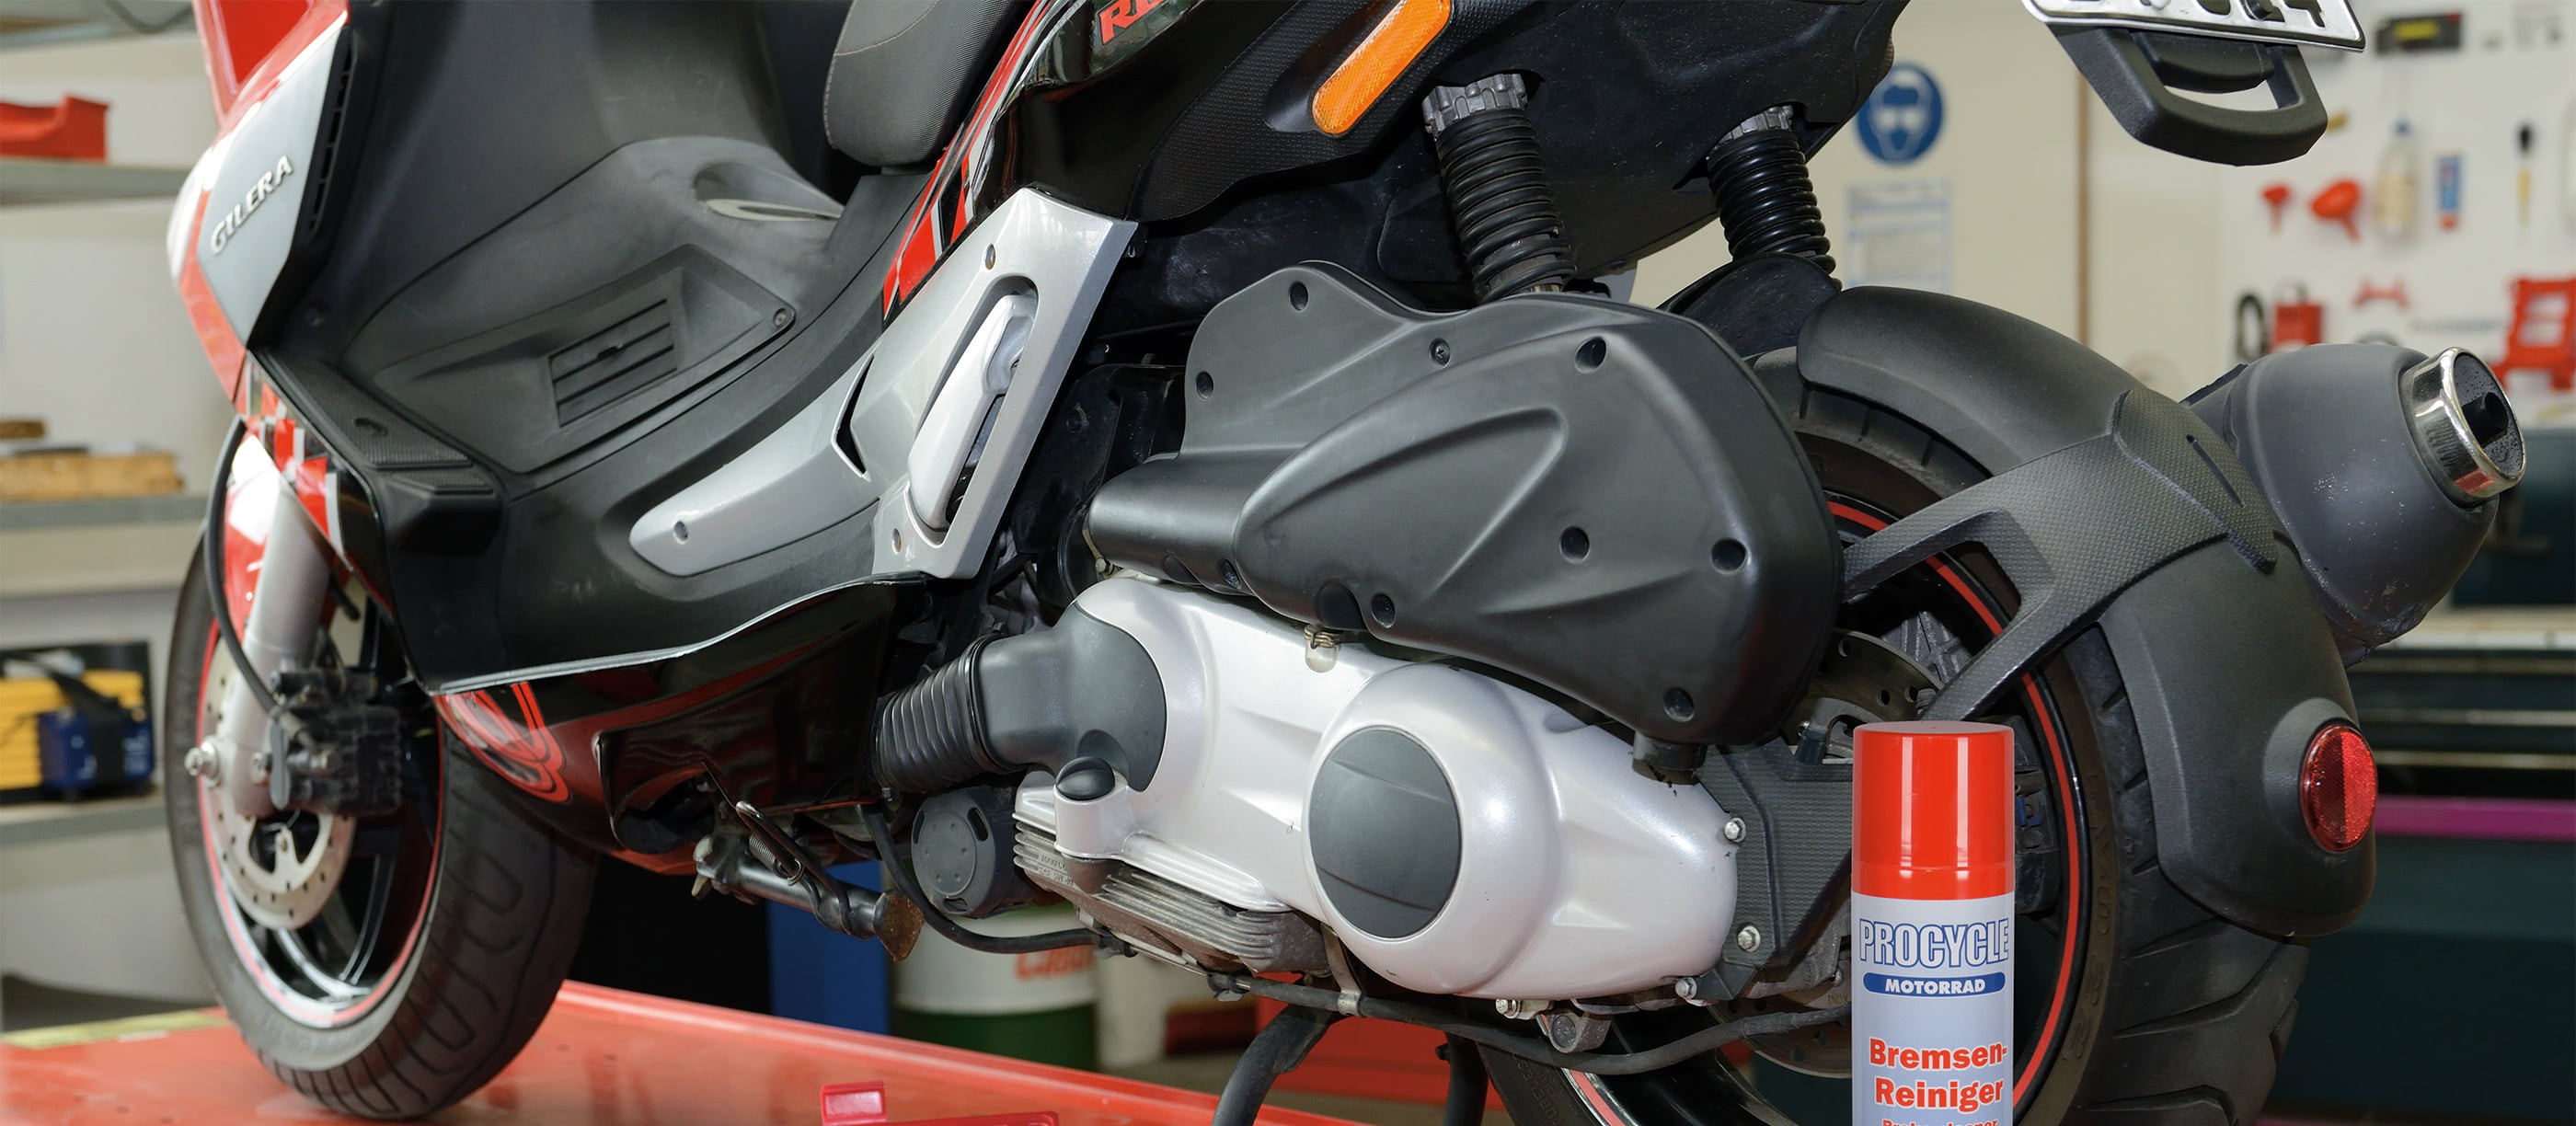
- Scooter Variator and Clutch Maintenance
- How it works
- Maintenance – What needs to be maintained?
- The drive belt
- Pulleys
- Variator rollers
- Clutch bell housing and springs
- Preparation
- Inspection, maintenance and assembly – now let's get started
- Accessing the variator
- 01 – Luftfilterkasten lösen
- 02 – Take off the spray guard
- 03 – Undo the nut of the rear drive shaft
- 04 – Loosen the variomatics cover
- Inspecting and maintaining the drive belt and variator rollers
- 05 – Remove the variomatics cover
- 06 – Remove the front pulley
- 07 – The drive belt
- 08 – The variator rollers
- 09 – Put variator assembly onto the shaft.
- 10 – Press pulleys halves apart
- 11 – Mount spacer washer
- 12 – Put on all washers and the central nut
- Inspecting and maintaining the clutch – now let's get started
- 13 – Removing the clutch
- TIP! You can create a spindle with a threaded rod
- 14 – Fit new clutch linings with new circlips
- Tuning
- Street-legal
Scooter Variator and Clutch Maintenance
A special feature of the motor scooter is its final drive via the variator. This is an ingeniously simple continuously variable transmission, made up of just a few components, which transmits the engine power to the rear wheel. The variator is ideal for smaller engines and is a weight- and cost-saving alternative to the gearbox and shaft or chain drive used on the majority of motorcycles. The variator was first installed on a scooter in the late 1950s by the German manufacturer DKW, in the "DKW Hobby", a scooter with a 75cc two-stroke engine that powered it to an impressive top speed of nearly 60 km/h (40 mph).
When it comes to the maintenance and tuning of your scooter, you'll find that the variator is pretty much at the top of the agenda. This is because, on the one hand, its components are subject to a certain degree of wear and tear, and on the other hand, a badly tuned variator can cause sluggish engine performance.
How it works
To understand the workings of your variator, think of the transmission of a bicycle with several chain rings and sprockets (such as a mountain bike), which most of us are familiar with. When you move off, you use a small sprocket at the front and a large sprocket at the back. Then, as your speed increases and you have to overcome less resistance (e.g. on a downhill stretch), you shift the chain to a larger sprocket at the front and a smaller one at the back.
The variator works in a similar way except that it uses a drive belt instead of a chain, is continuously variable and is controlled automatically via centrifugal force adjustment, depending on the speed of rotation.
The drive belt runs in the gap between two V-shaped pulley halves, which are a variable distance apart on the crankshaft. The front inner pulley half also acts as the housing for the variator roller centrifugal weights, which run along precisely calculated curved paths.
A contra spring presses the rear pulley halves against each other. When you move off, the drive belt runs close to the shaft at the front and at the outer rim of the rear pulley. When you open the throttle, the rotational speed of the variator increases and the centrifugal force pushes the roller weights outwards. They in turn press the movable half of the pulley outward, so the gap between the two pulleys becomes smaller, and the drive belt is forced upwards to a larger radius, i.e. it moves outwards.
As the drive belt does not have much stretch, it presses the springs apart at the other end and moves inwards. The end position of the belt is the exact opposite to its starting position, so you now have a high (speed-increasing) gear ratio instead of a low (speed-reducing) ratio. Of course, the variator scooter must also be able to idle. An automatic centrifugal clutch has the job of disconnecting the rear wheel from the engine at low speed, and connecting it as soon as you twist the throttle and the engine speed increases to a certain level. For this purpose, there is a clutch bell housing on the drive of the rear wheel. At the rear of the variator, spring-loaded centrifugal weights, which are fitted with friction linings, rotate in this housing.
Idling
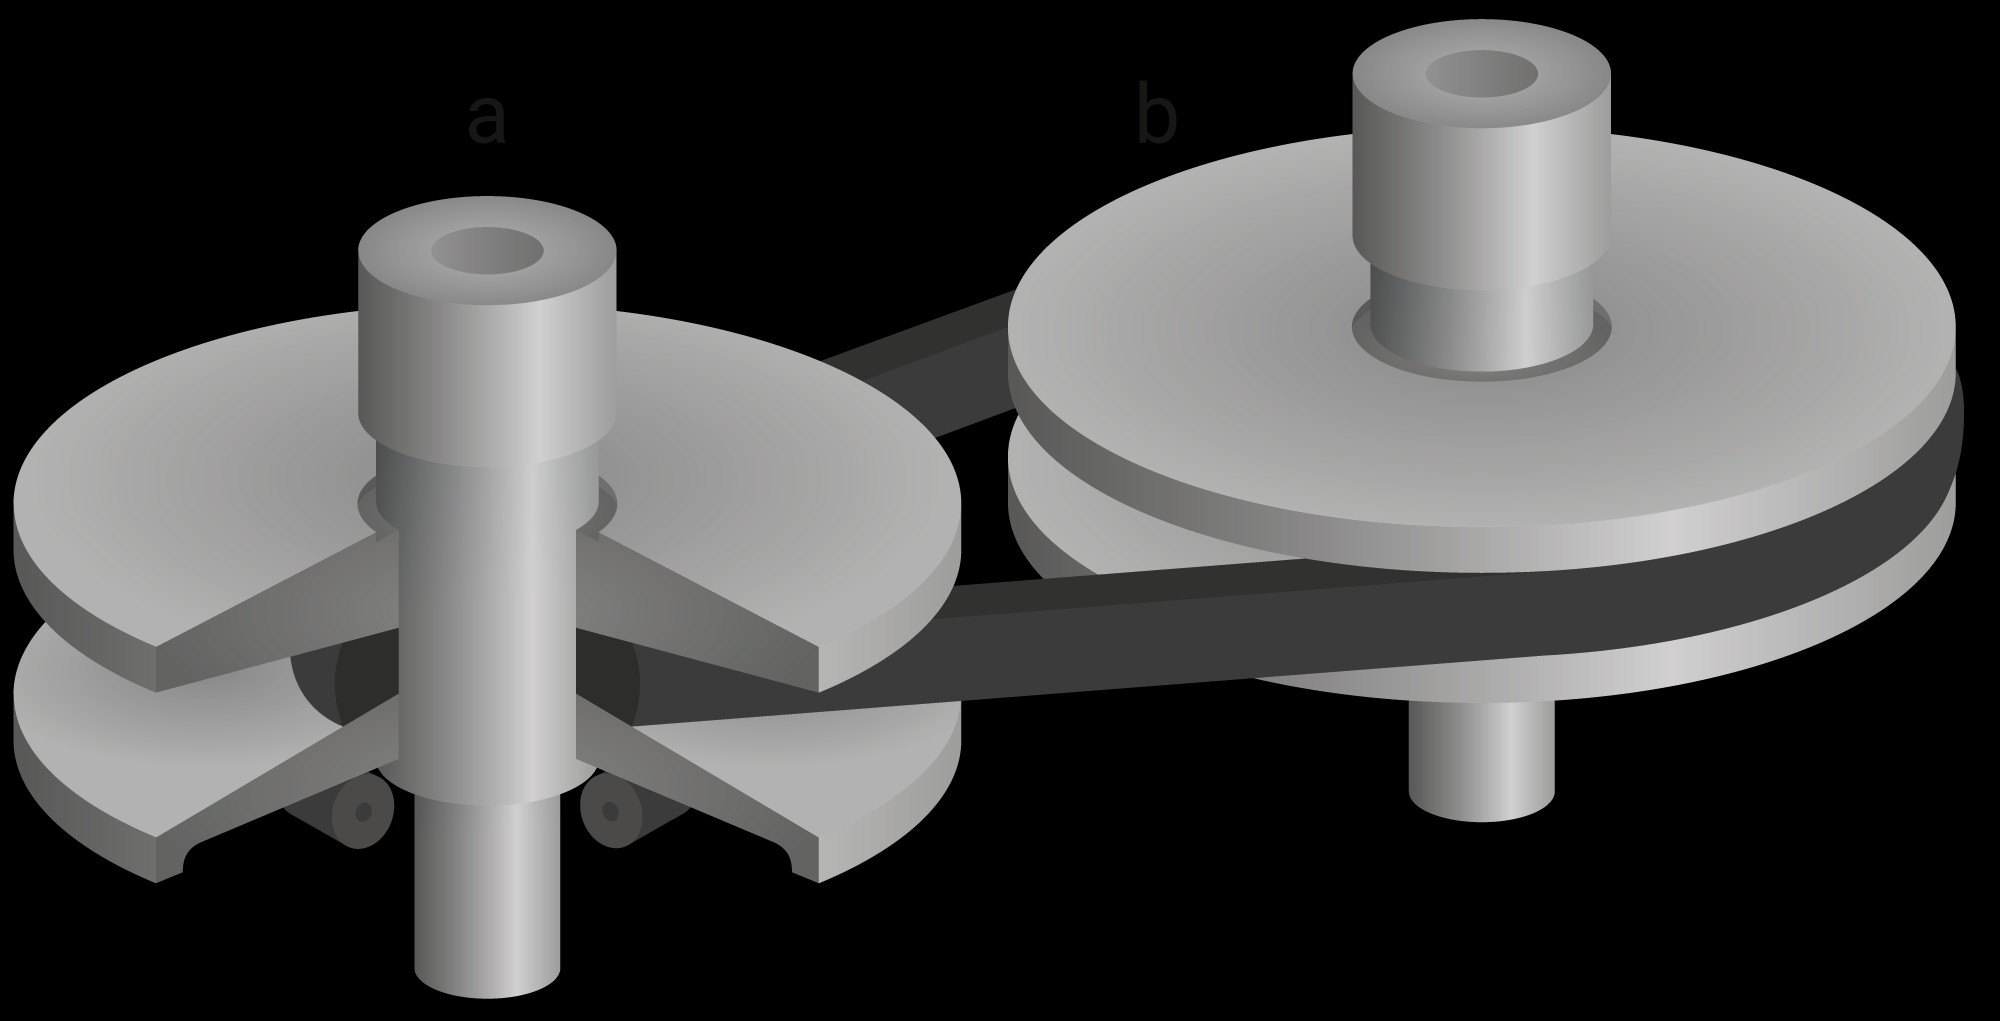
a = Engine, b = Final drive
The speed is low, the variator rollers are running close to the axle and there is a large gap between the front pulleys
At speed
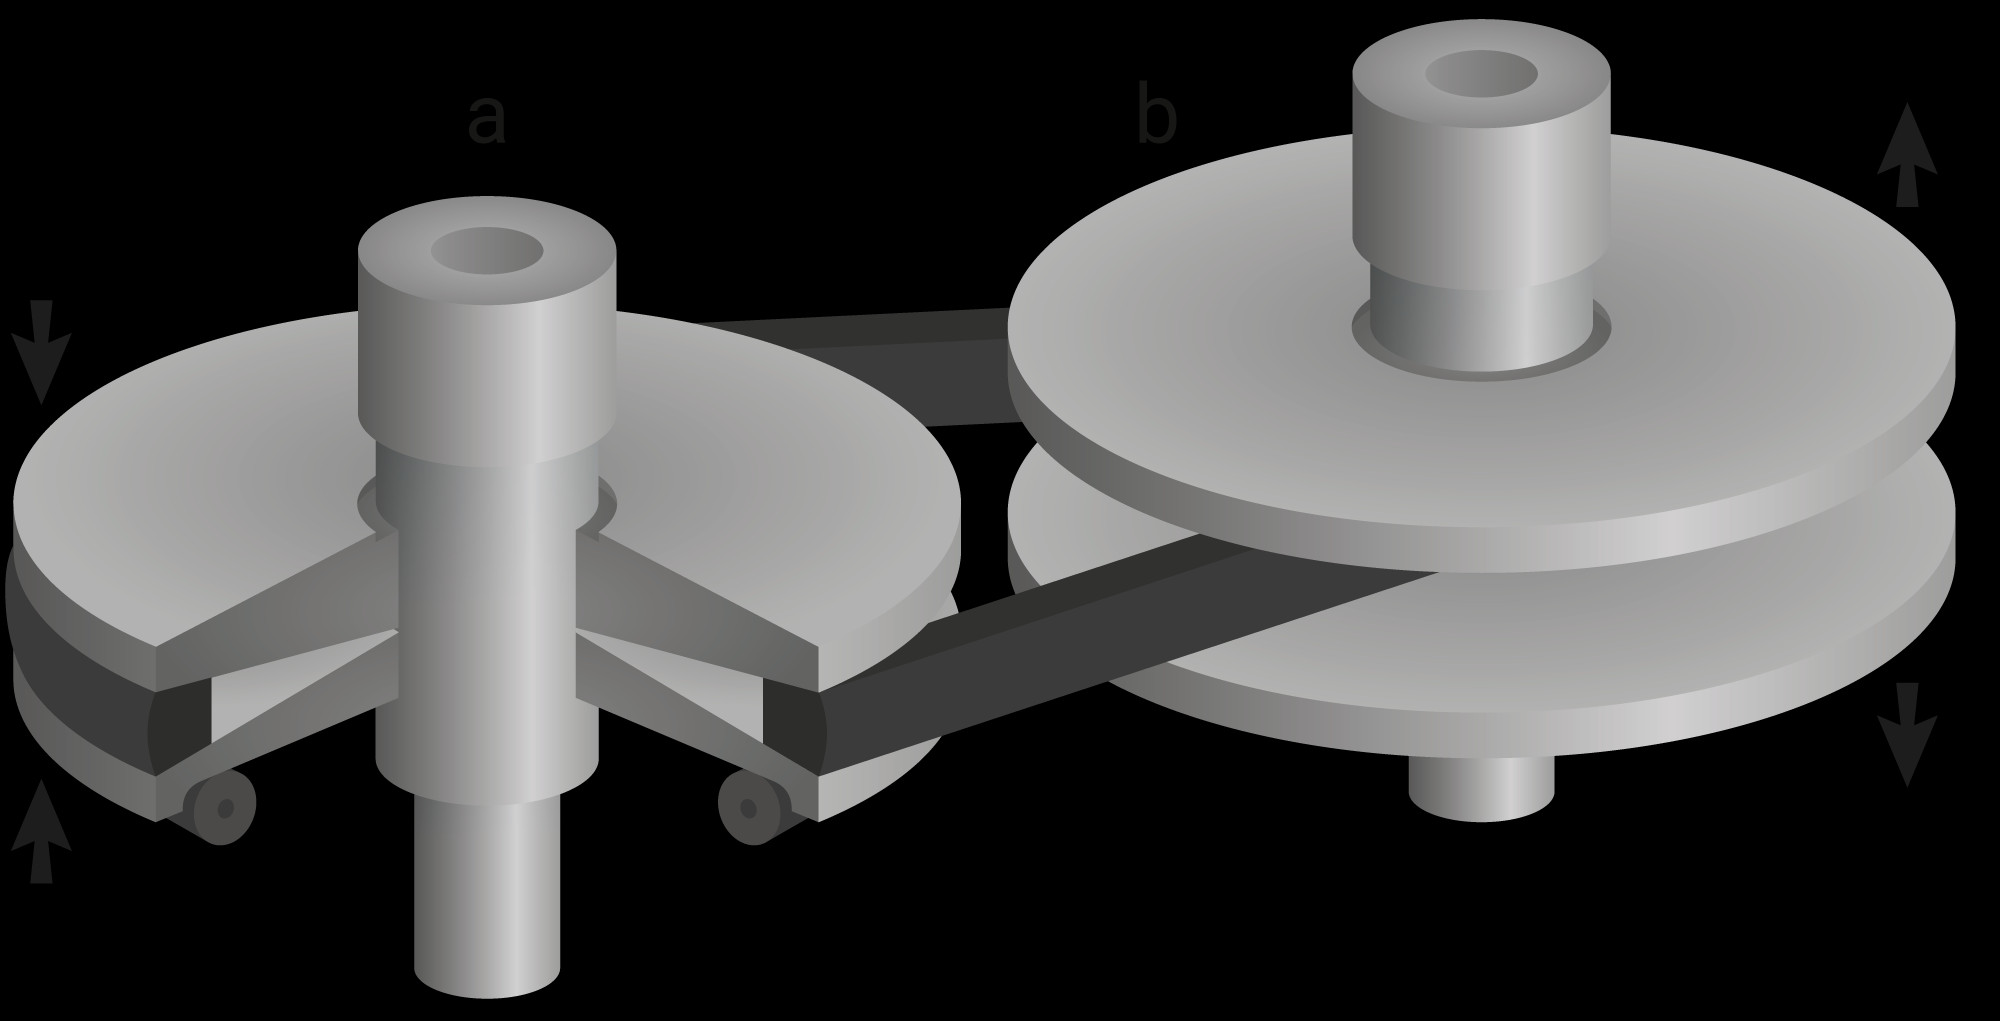
a = Engine, b = Final drive
The variator rollers move outwards, which presses the front pulley halves together, the radius of the belt increases
The point at which the centrifugal weights with their friction linings "grab" the clutch bell housing depends on the strength of the springs – weak springs engage at quite a low speed, while stronger springs offer more resistance to the centrifugal force, and the engagement is delayed until a somewhat higher engine speed. So it is important for the springs to match the engine characteristics if the scooter is to move off at optimal engine speed. If they are too weak, the engine would stall; if they are too strong, your scooter would only be able to move off with the engine howling.
Maintenance – What needs to be maintained?
The drive belt
The drive belt on your scooter is a wearing part that must be replaced at regular intervals. Failure to do so may cause the belt to break without warning – which would certainly bring you to a sudden standstill. And if you're unlucky, the belt might jam in the housing, which could result in further damage. For the precise maintenance interval, please refer to your owner's manual – it will depend on the engine size, for example, and is usually between 10,000 and 30,000 km (5,000 and 20,000 miles).
Pulleys
Over time, grooves develop in the pulleys caused by the movement of the belt, which can impair the functionality of the variator and reduce the service life of the drive belt. It is therefore important to replace any grooved pulleys.
Variator rollers
The variator rollers will also wear with time and develop flat spots – at which point they must also be replaced. Worn rollers will adversely affect performance and cause jerky acceleration. A rattling sound coming from your scooter is also often a sign that they need replacing.
Clutch bell housing and springs
On the clutch, the linings are also subject to regular wear and tear from friction. Over time, this will cause the clutch bell housing to become worn and grooved. At the latest, these parts will need to be replaced when the clutch starts slipping, i.e. it cannot deliver power to the wheels. Because they stretch, the clutch springs eventually wear out, which can cause the clutch linings to start rattling and the scooter will move off at too low an engine rpm. So it's always best to replace the springs at the same time as you are servicing the clutch.
Preparation
Before dismantling the variator, find somewhere clean and dry to work – preferably a place where you can leave your scooter undisturbed if you should need to get new parts. Before you start, make sure you have the following tools to hand: a good socket wrench set, large and small torque wrenches (the variator nut requires 40-50 Nm), a rubber mallet, circlip pliers, some grease, brake cleaner, a rag or wiper roll set and, most importantly, the gripping and locking tools described in the following section. It's always a good idea to put a large towel or sheet of cardboard on the floor so that you have somewhere clean to place dismantled parts.
Tip: Take a photo with your smartphone before you dismantle the variator. This will save you a lot of head scratching when it comes to putting the parts back together.
Inspection, maintenance and assembly – now let's get started
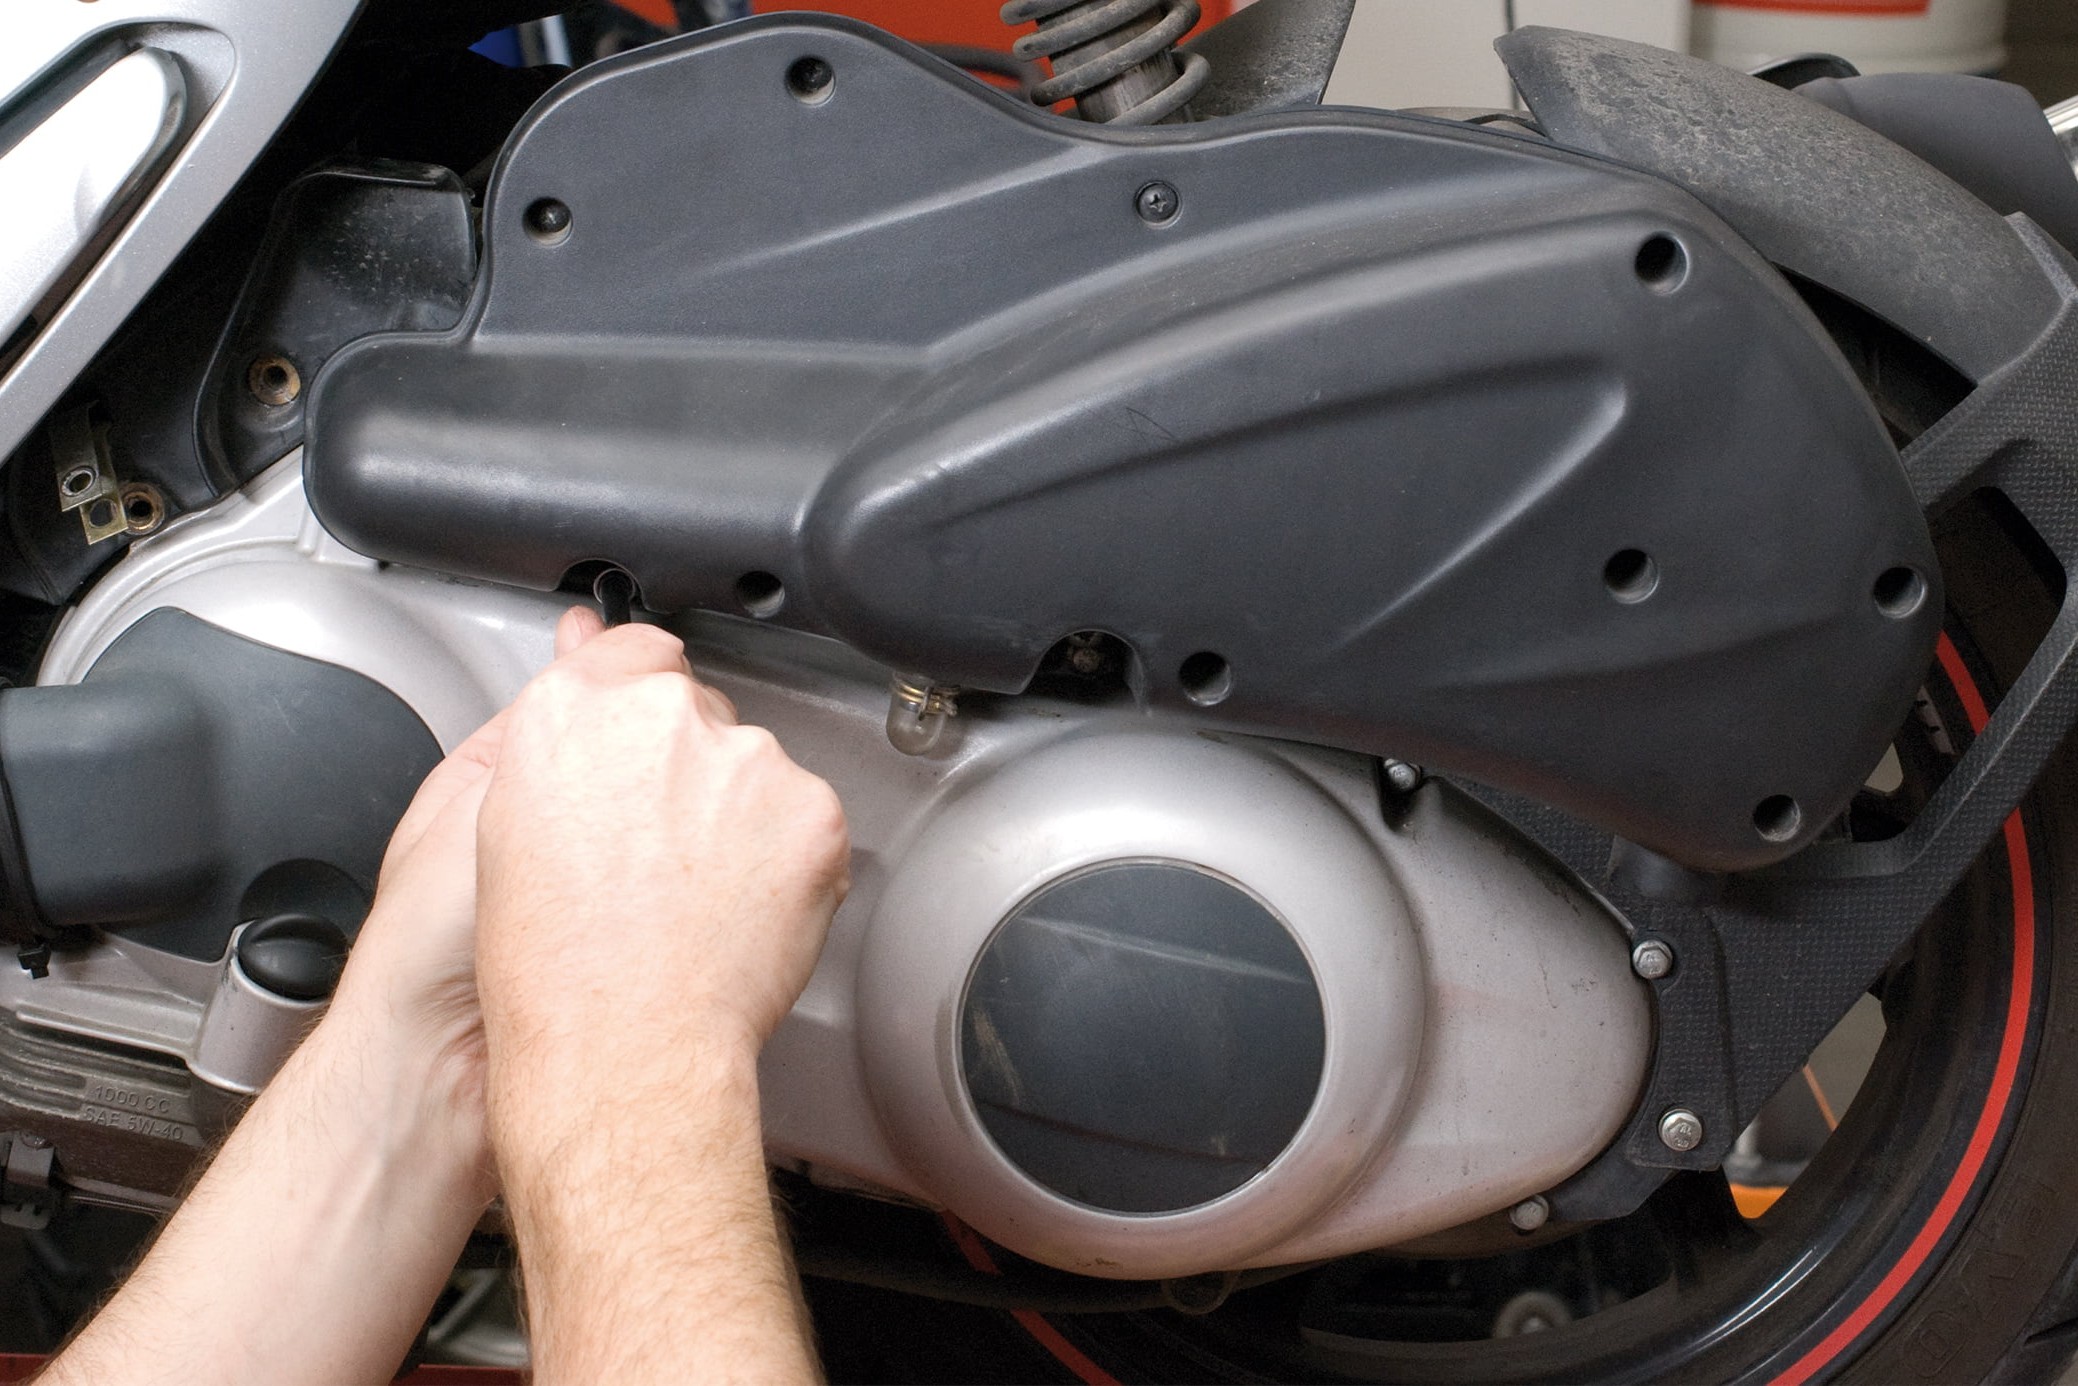
Step 1, Fig. 1: First remove the airbox, ...
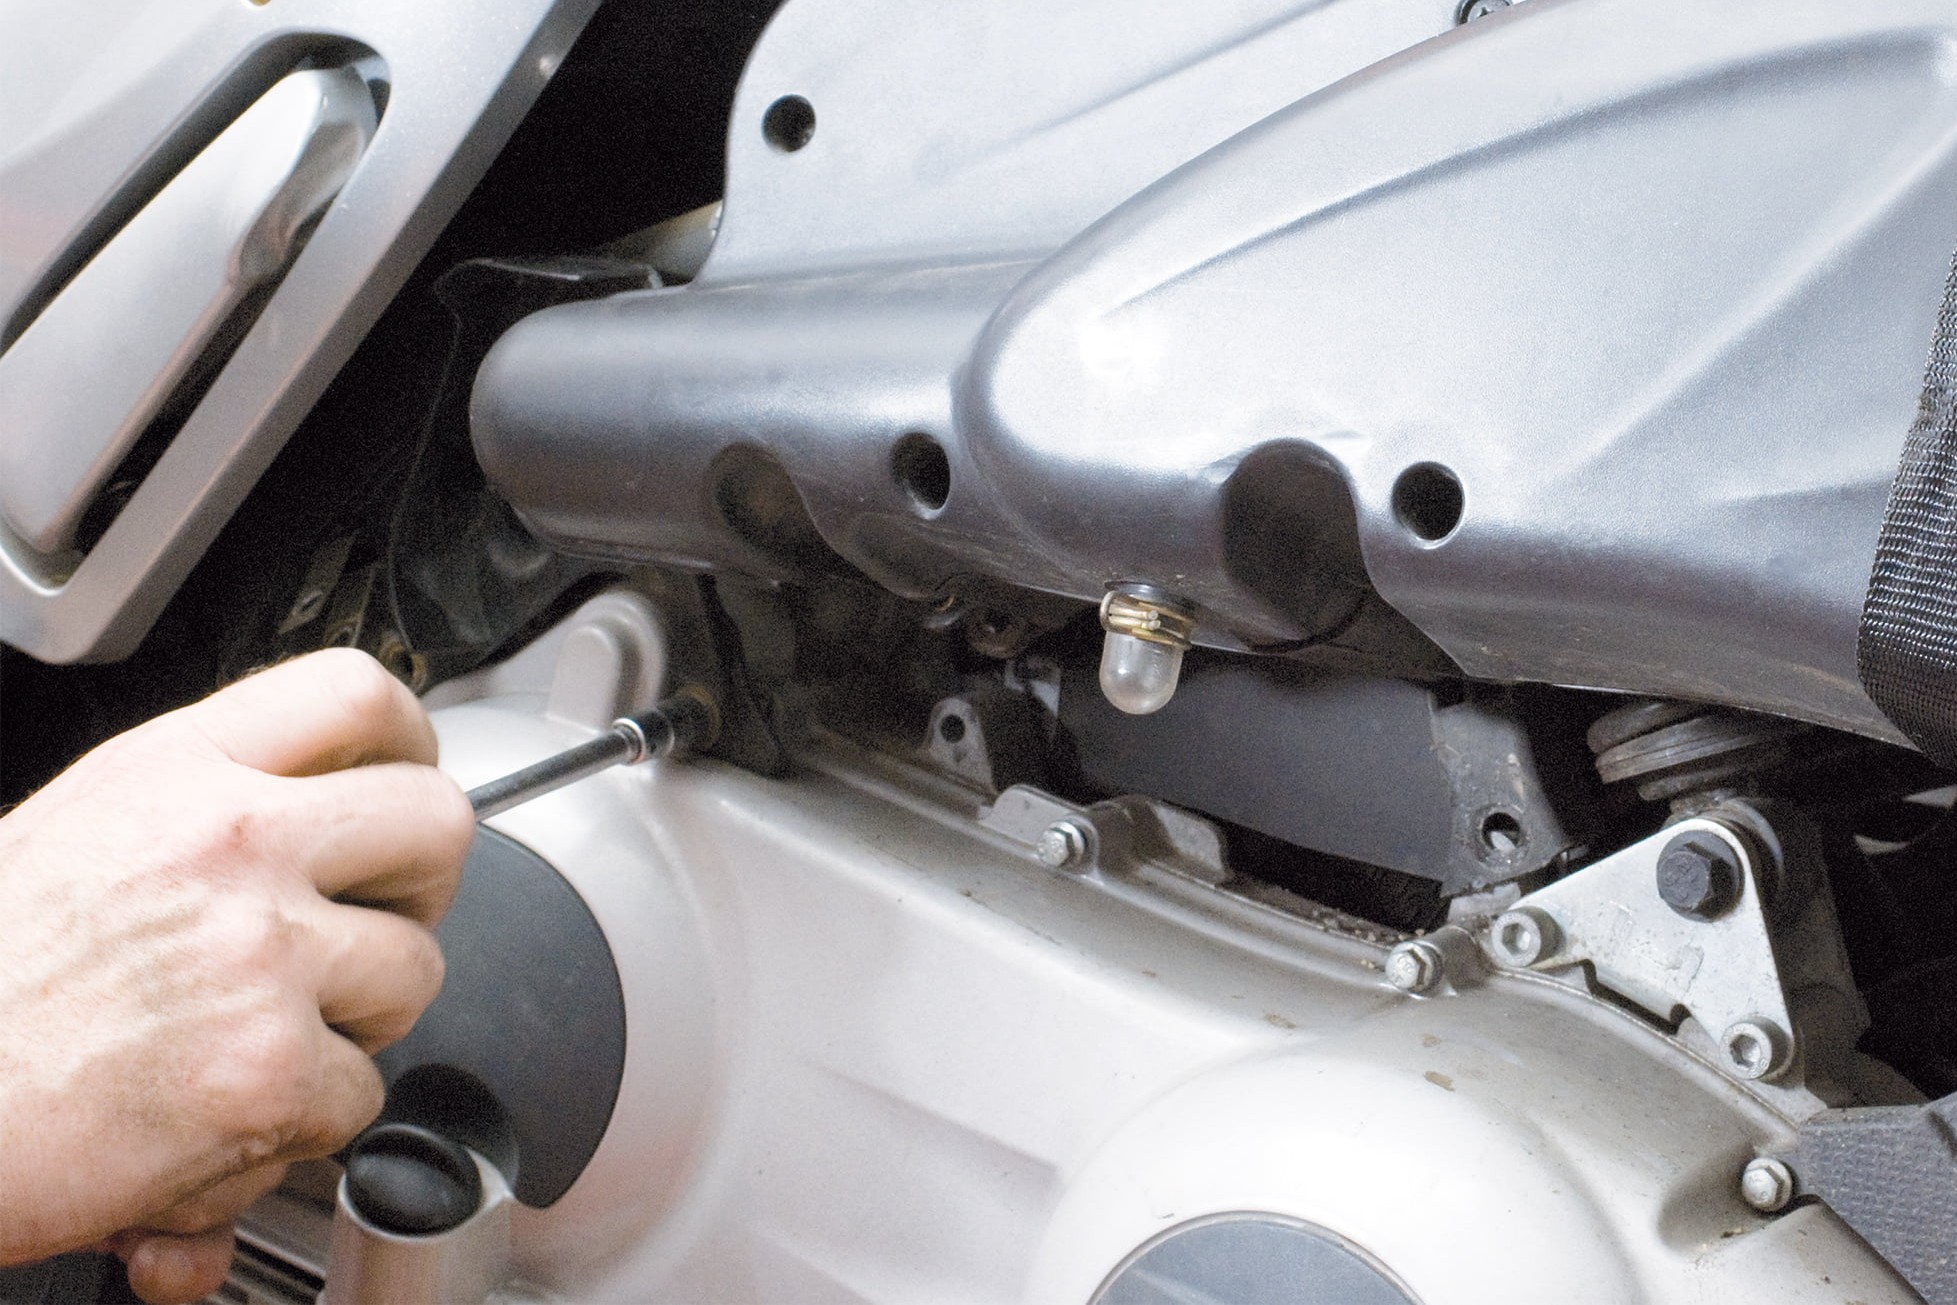
Step 1, Fig. 2: … and then tie up the airbox so that you can get at the bolts
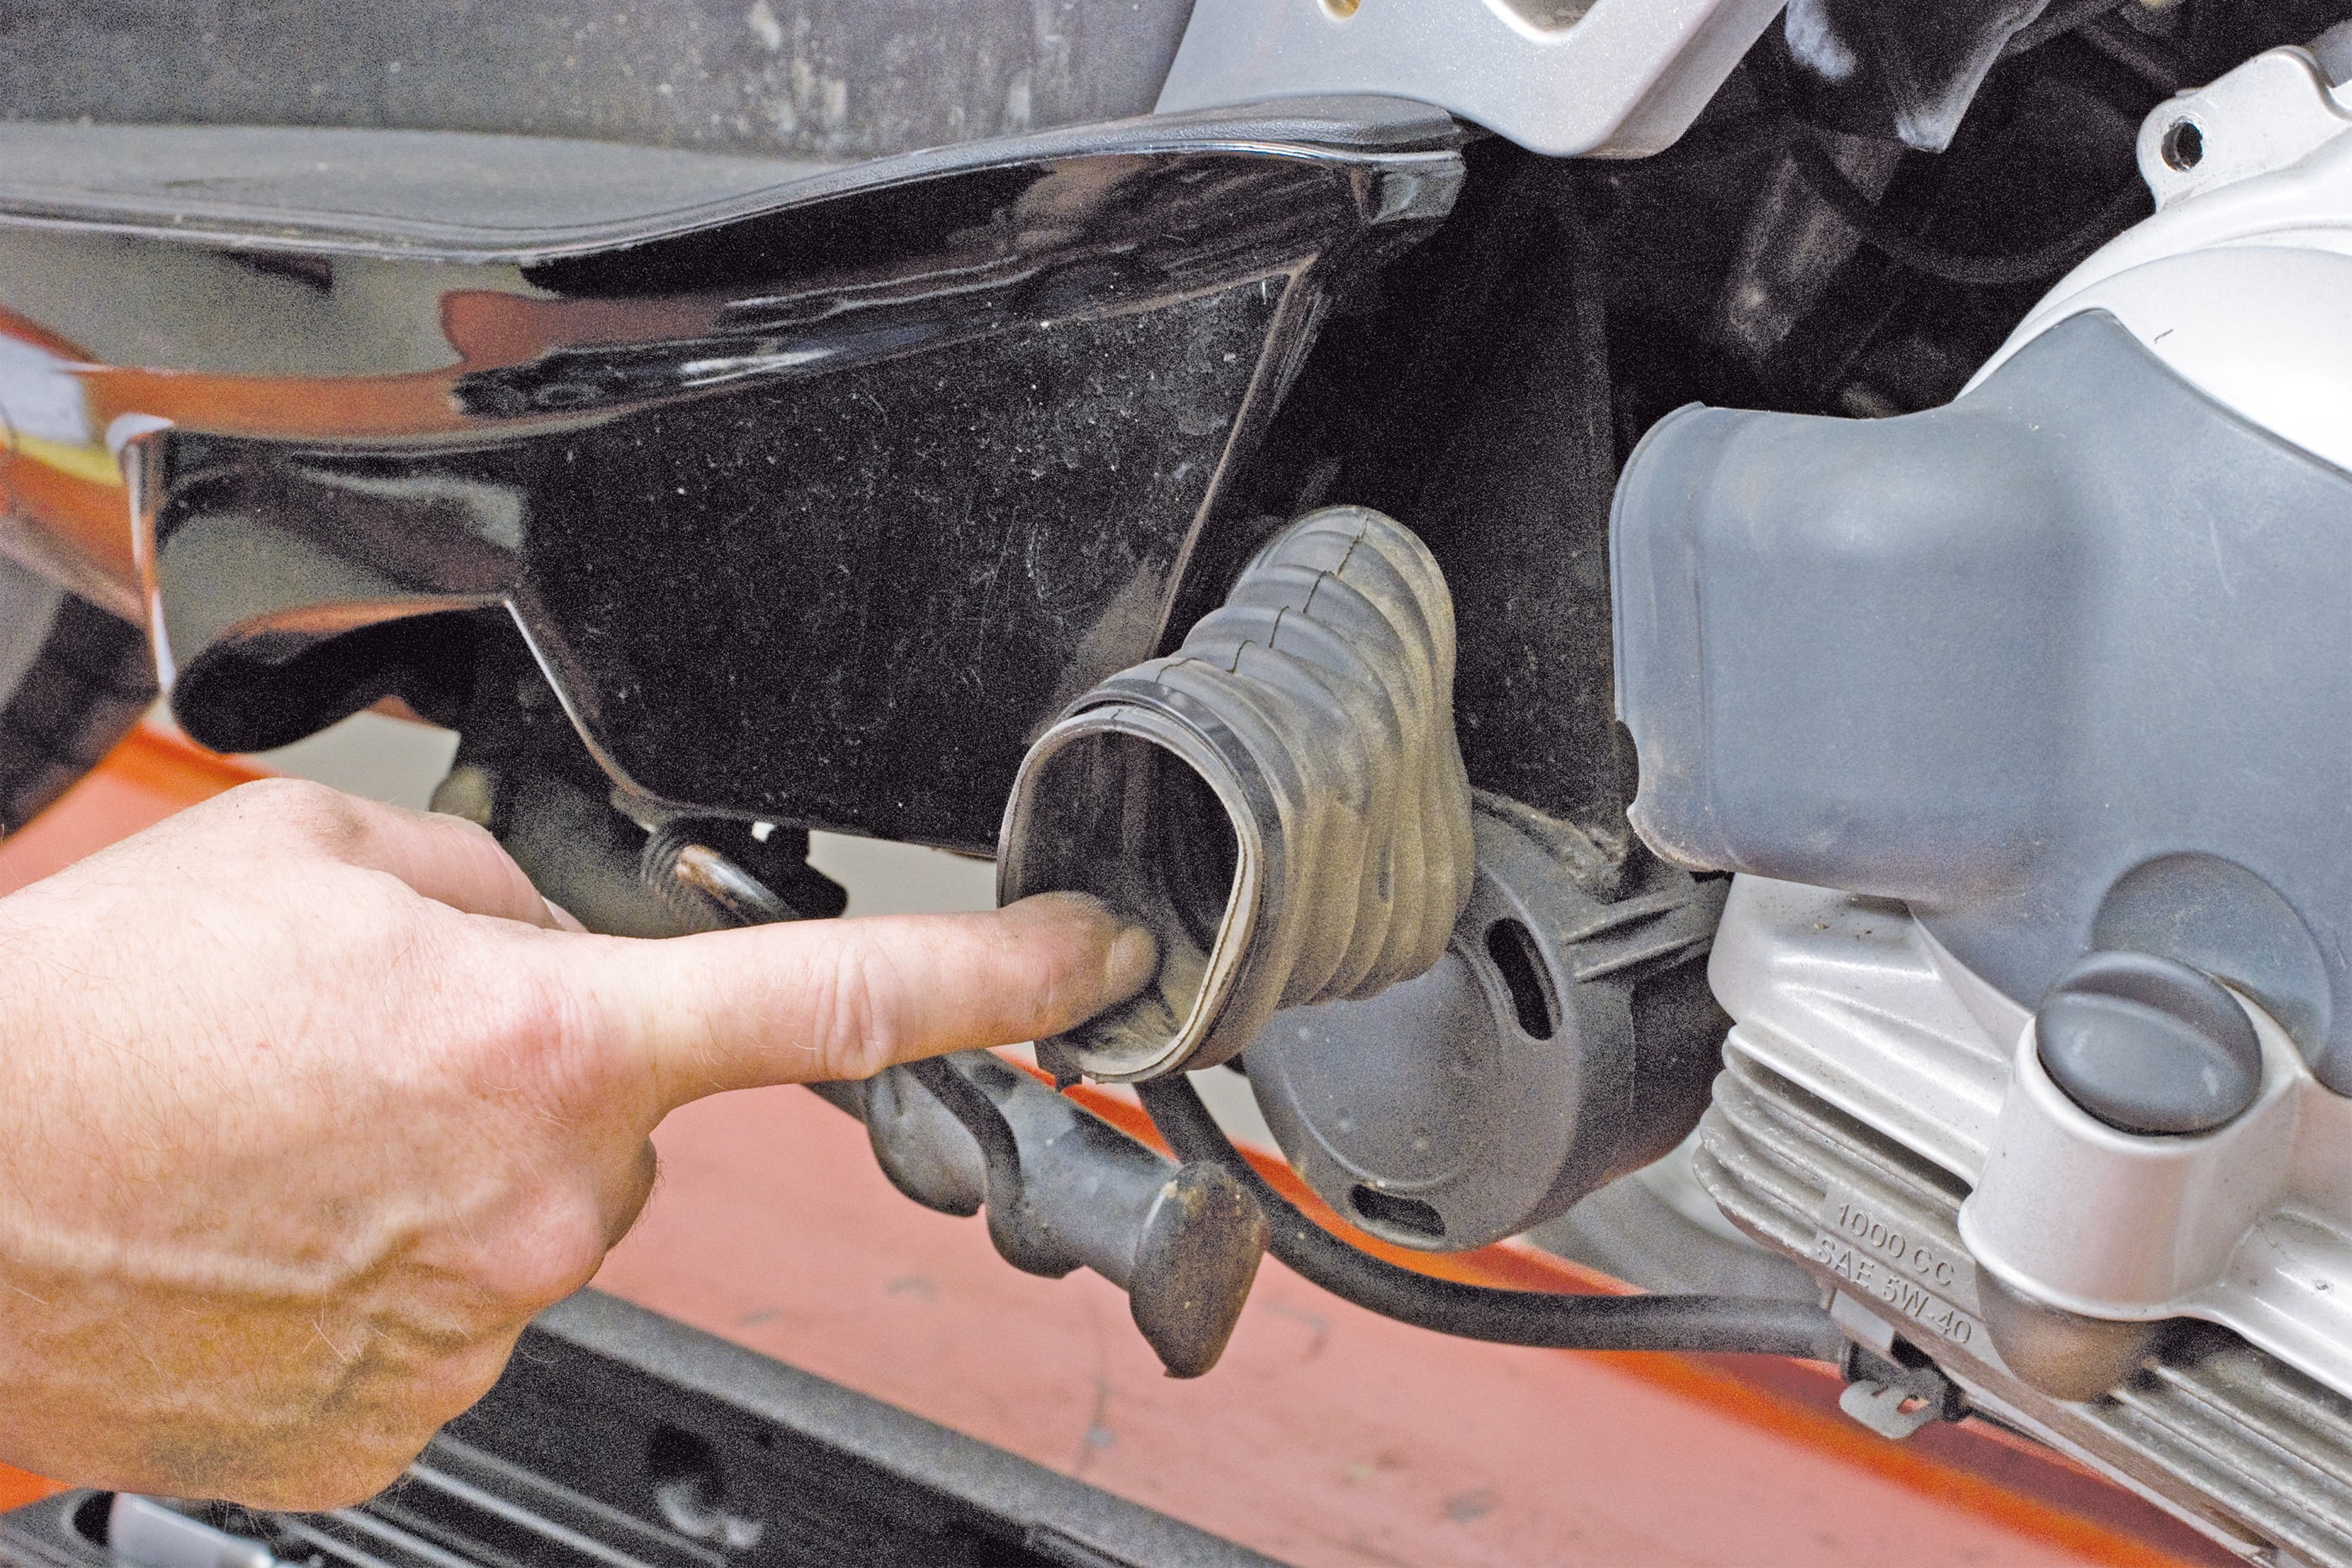
Step 1, Fig. 3: Remove the rubber sleeve
Accessing the variator
01 – Luftfilterkasten lösen
To access the variator, you will first need to remove the variator cover. Start by cleaning the outside of the cover, and also check which components you need to remove in order to access the variator. It's possible that the rear brake line is fixed to the bottom of the cover, or the kick starter is in the way. On some models of scooter, as in our example, you will also need to remove the intake pipe of the fan cooling system or the airbox.
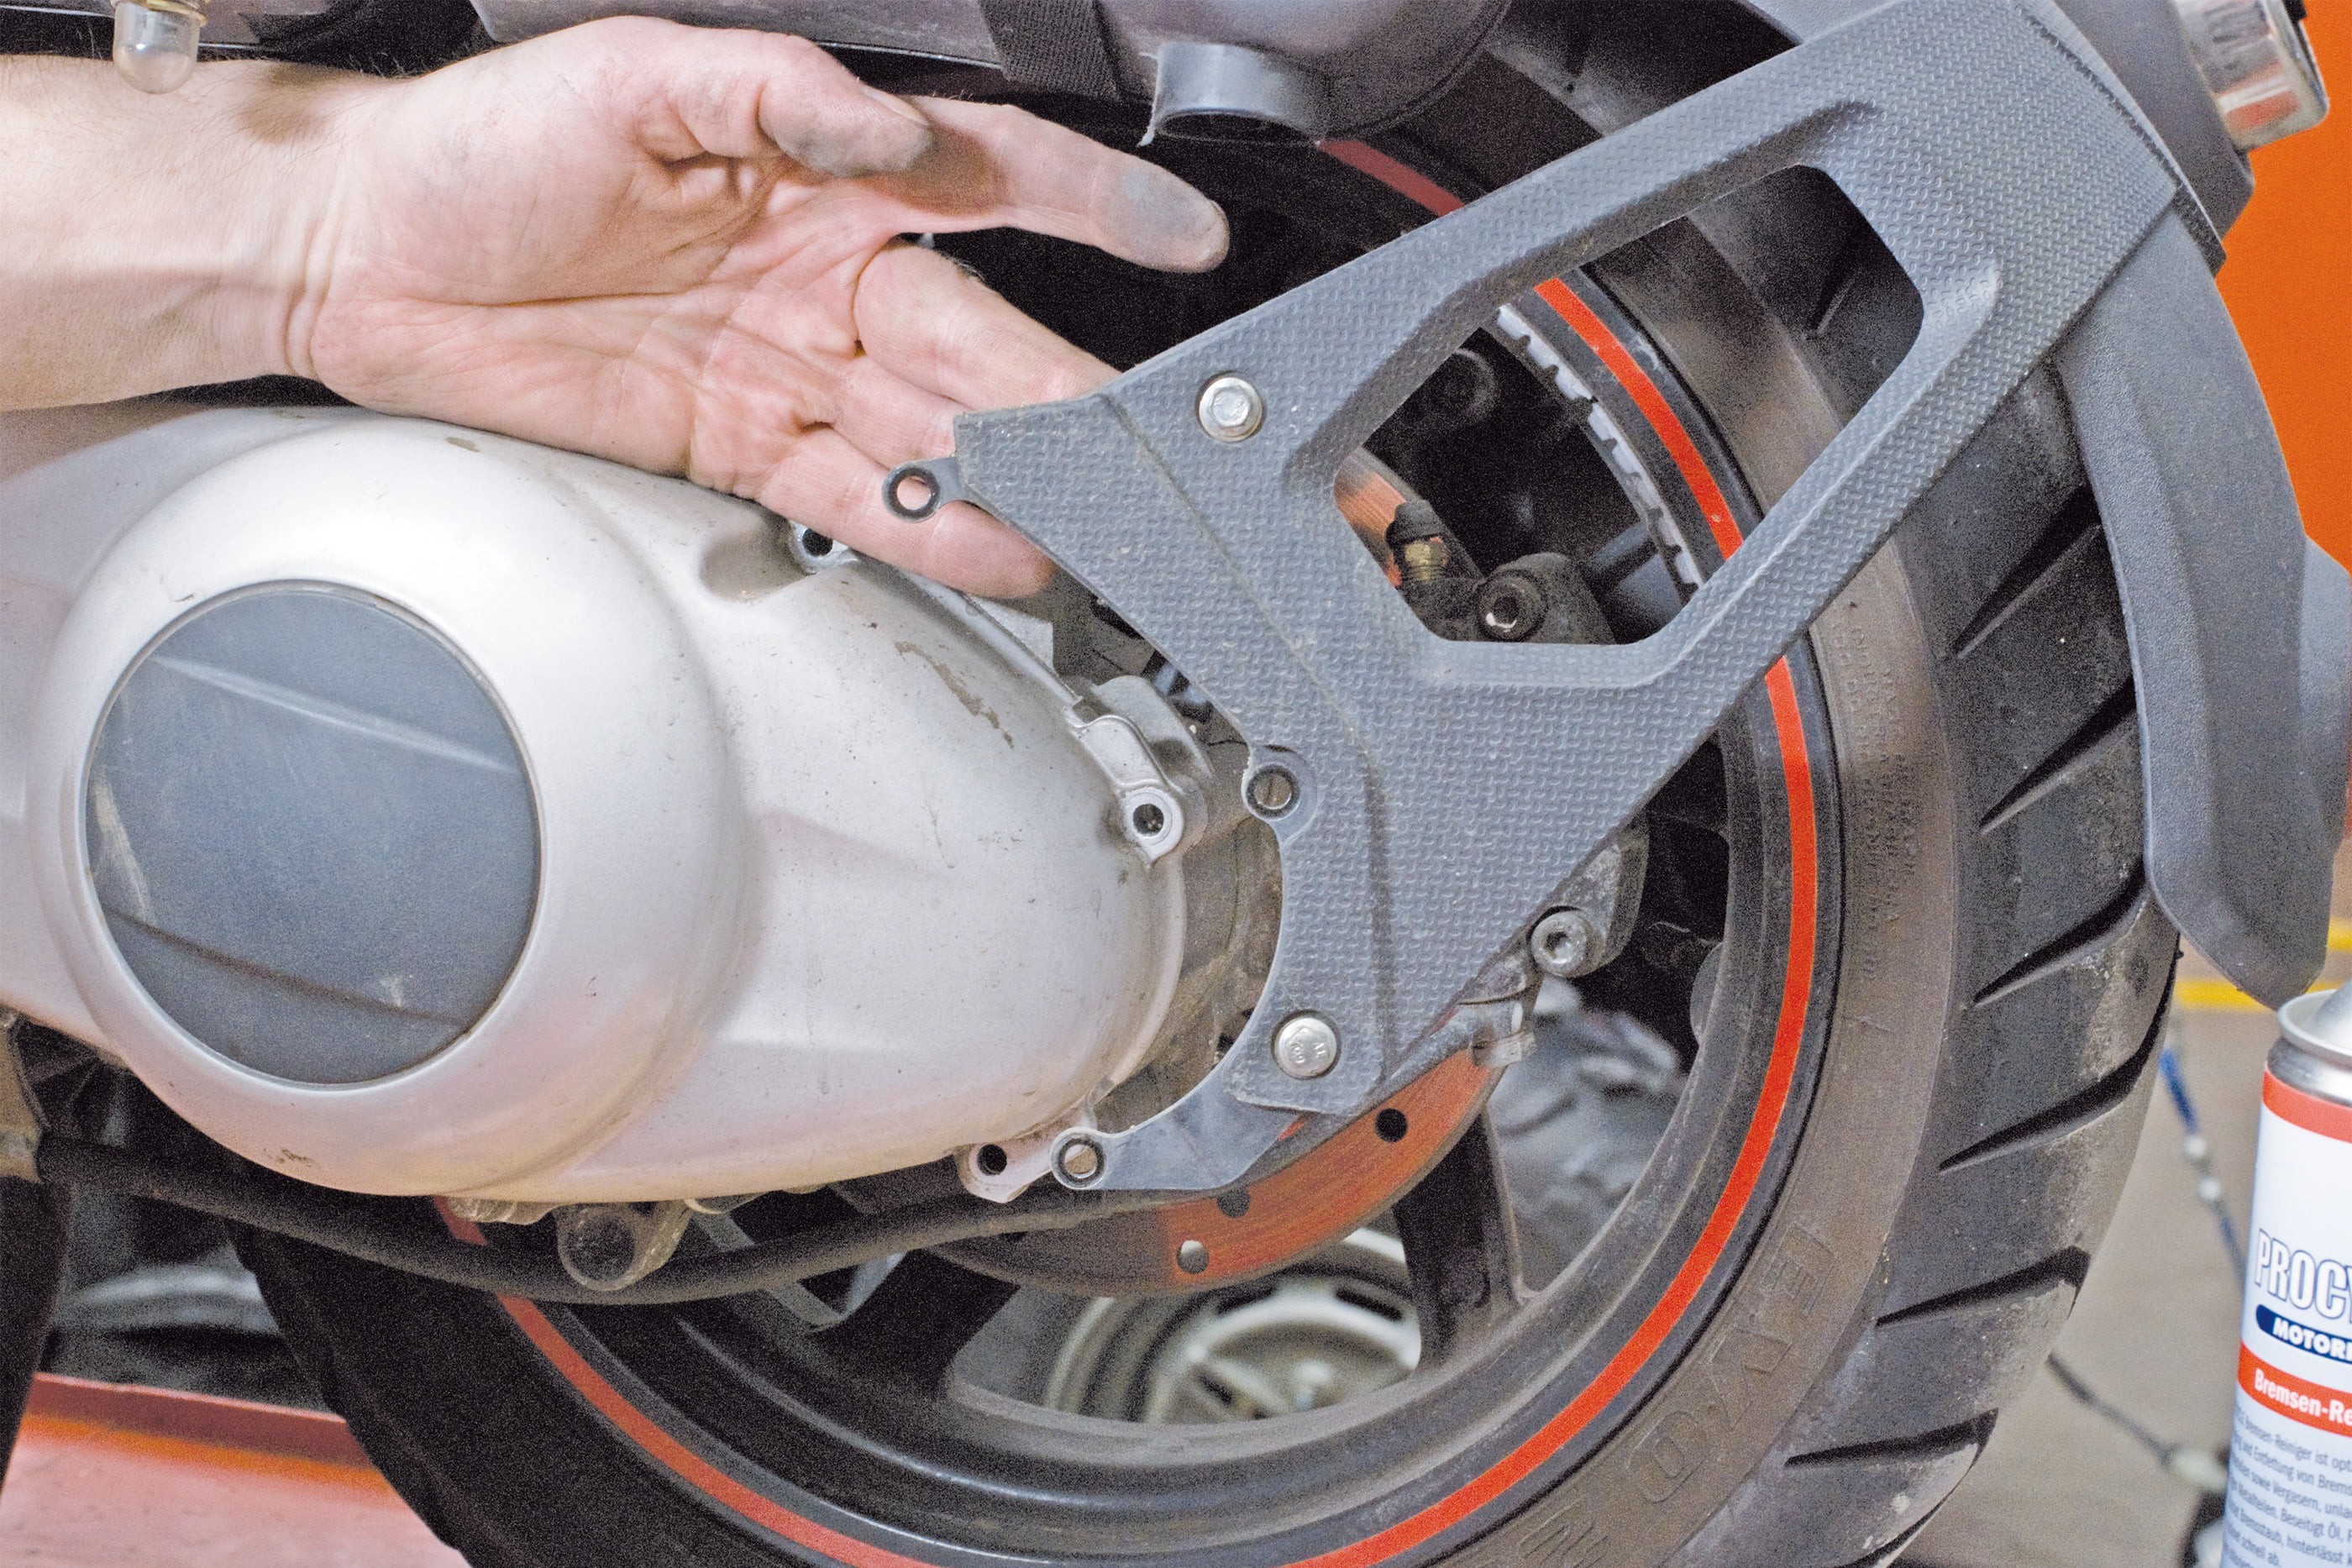
Step 2: Take off the spray guard
02 – Take off the spray guard
Any fairings which prevent you taking off the variator cover will, of course, need to be removed.
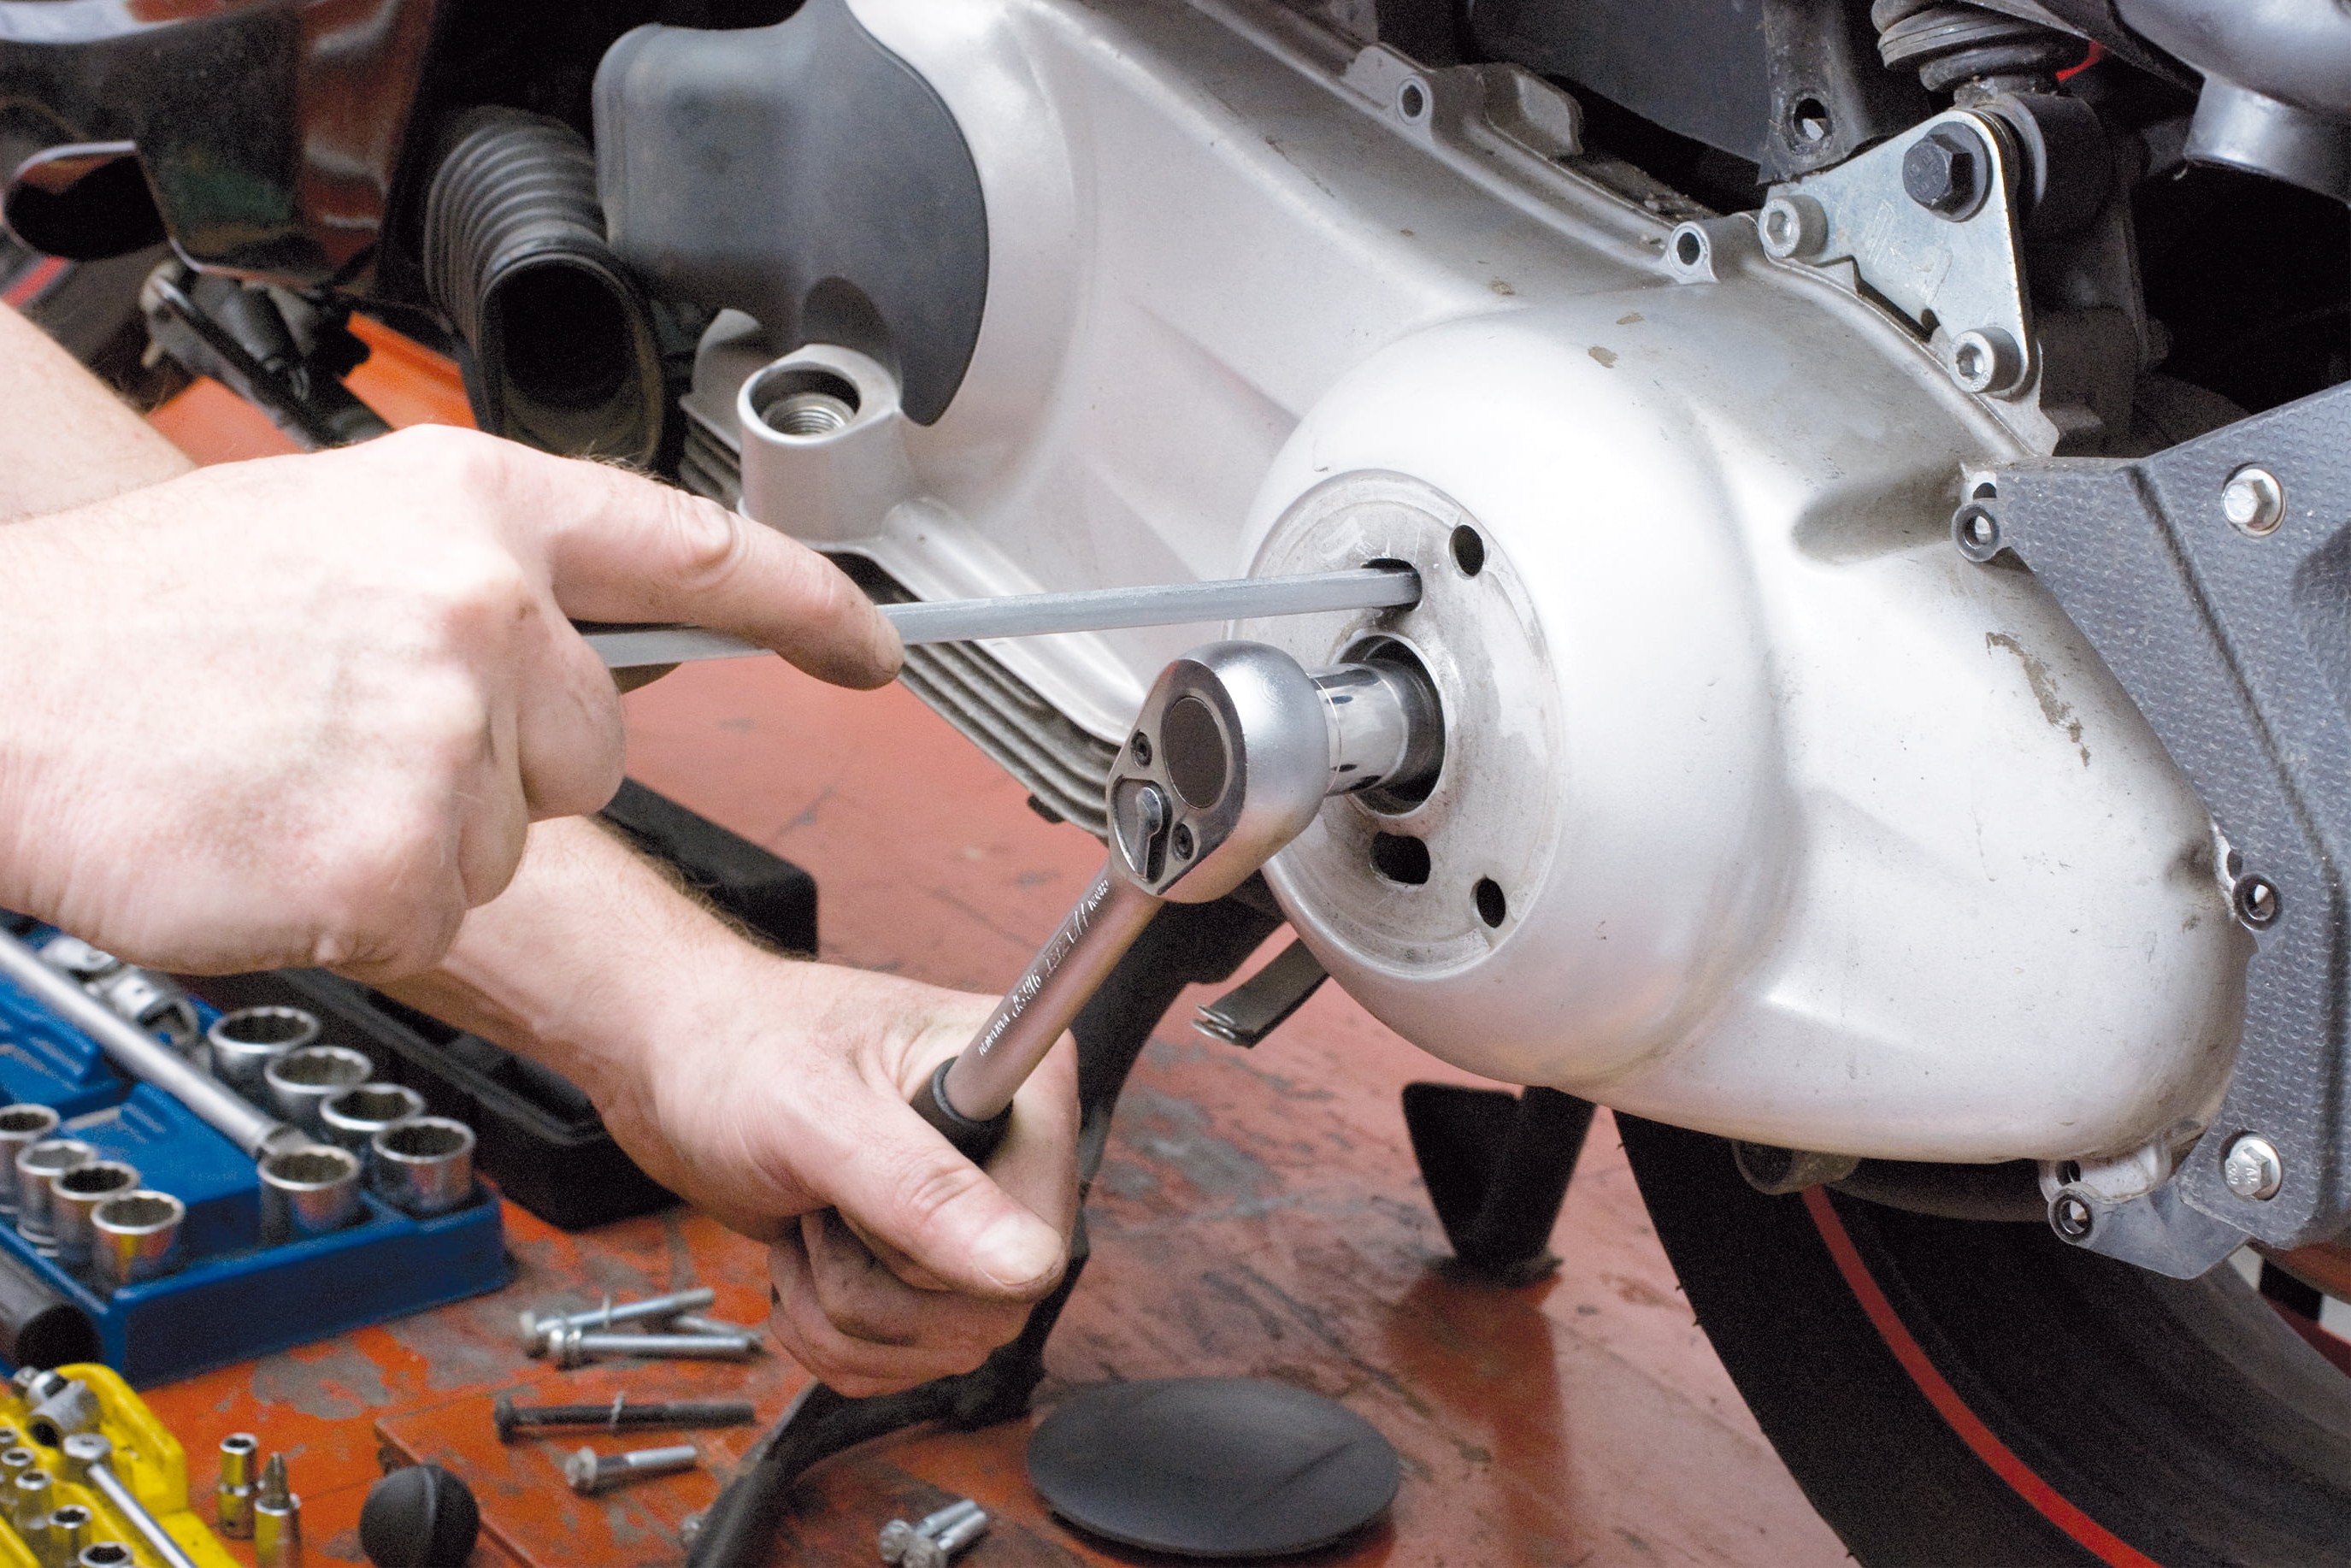
Step 3: Hold the clutch and undo the nut of the rear drive shaft
03 – Undo the nut of the rear drive shaft
In some cases, the rear drive shaft is also mounted in the cover and fixed with a nut, which will first need to be undone. On the larger variator cover, you will also find a separate smaller cover that needs to be removed. To remove the nut, you will need to hold the variator with a special tool to stop it turning.
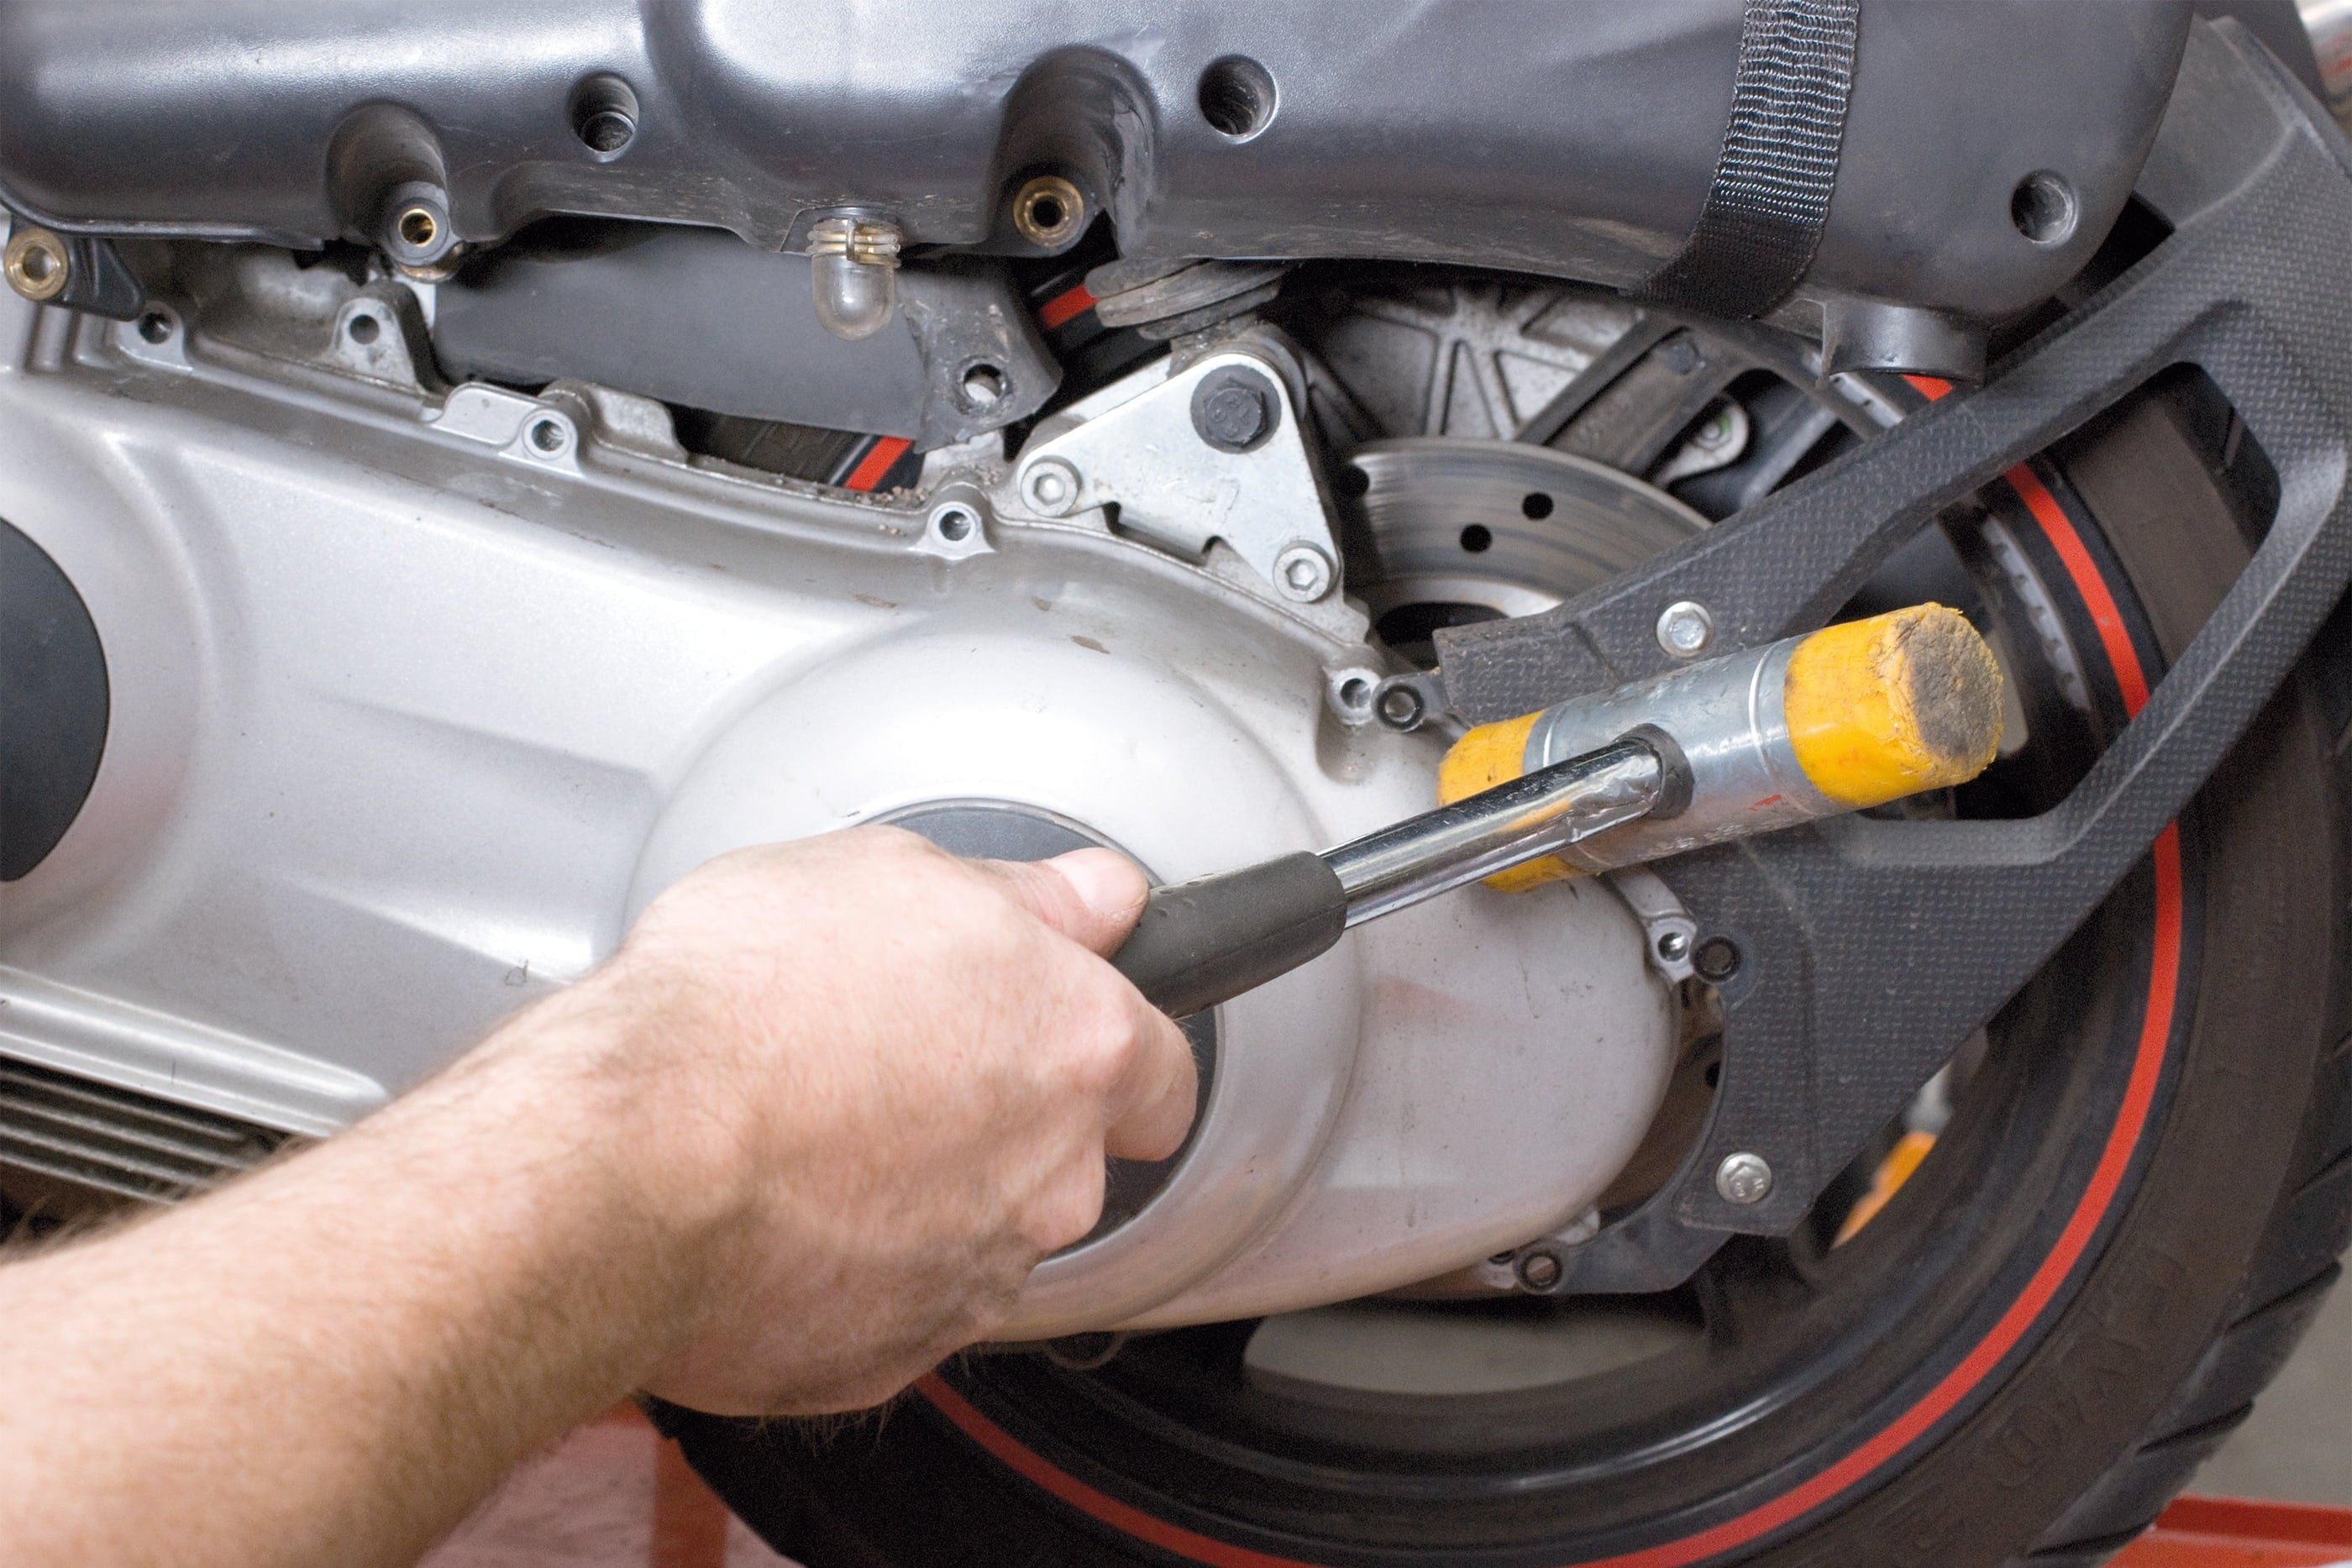
Step 4, Fig. 1: Loosen the variomatics cover
04 – Loosen the variomatics cover
Once you're sure that there are no other components preventing removal of the variator cover, undo the retaining screws in diagonally opposite sequence working from the outside inwards. Note the positions of the individual screws if they are of different lengths (write it down!) and make sure you don't lose any of the washers.
A couple of taps with a rubber mallet may help
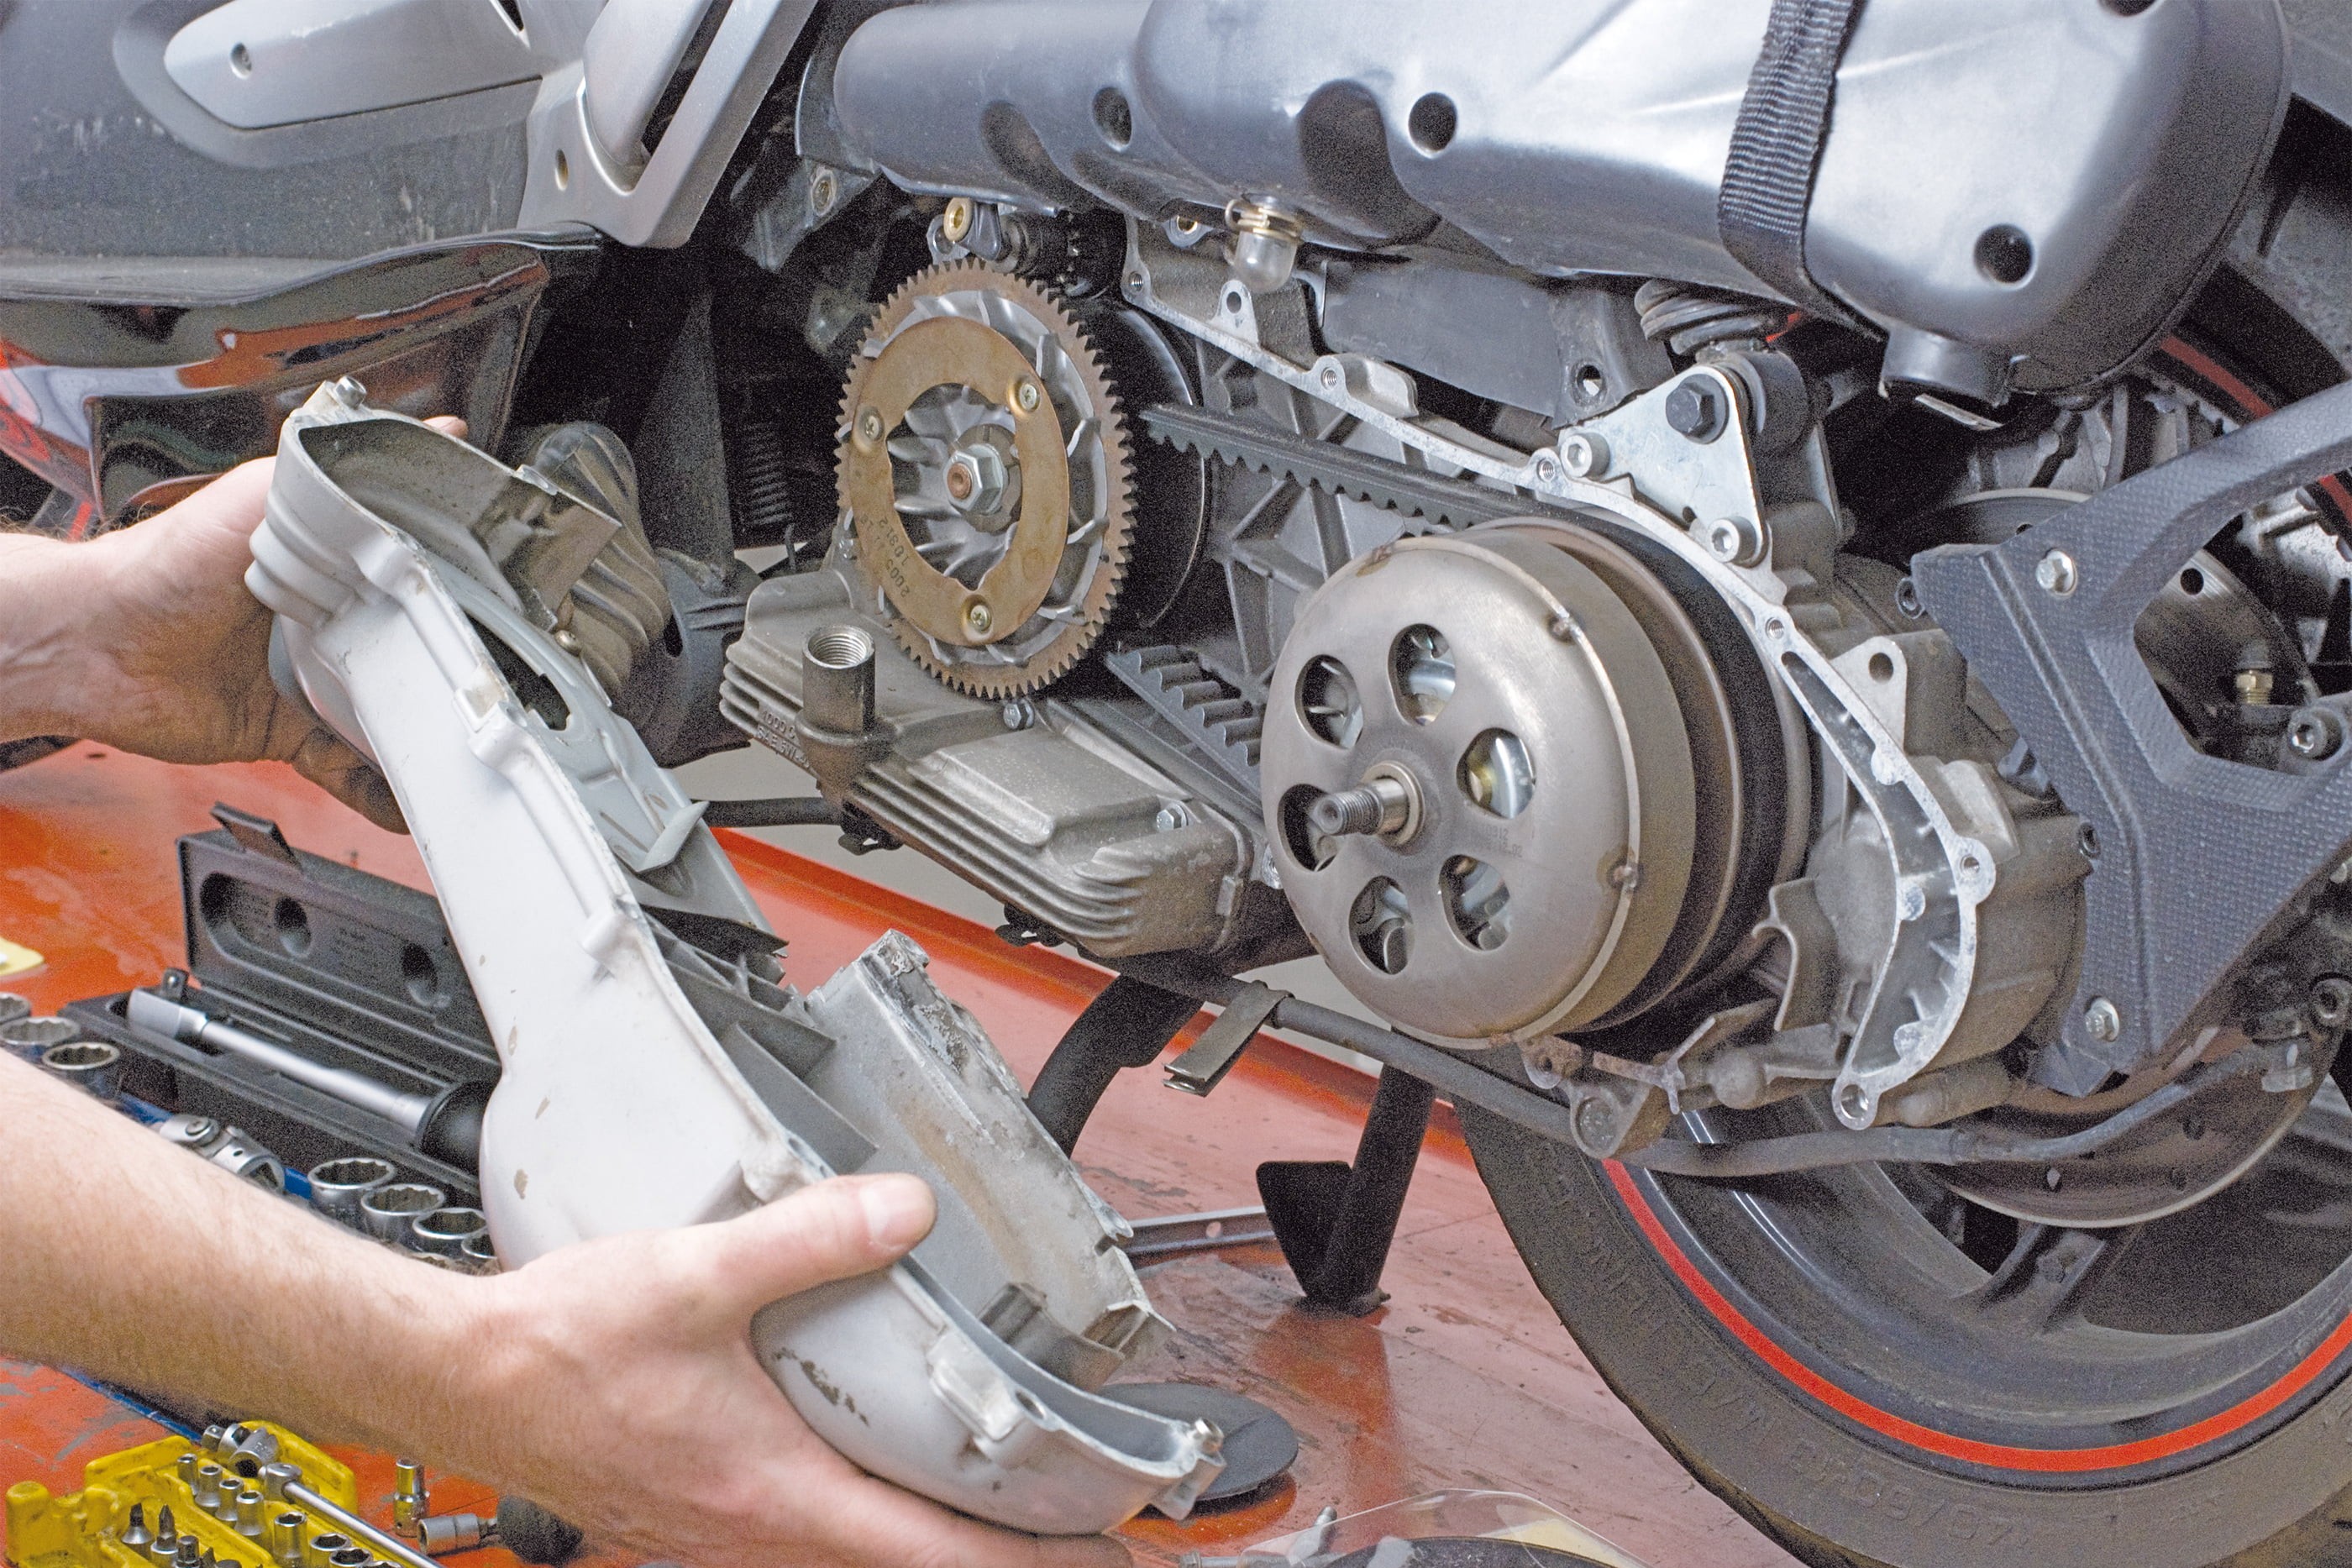
Step 4, Fig. 2: You can now remove the variator cover
You should now be able to take the cover off. If not, check to see where the sticking point is. You may have forgotten a screw – whatever you do, don't use force. Only if you are totally sure that you haven't overlooked any screws is it OK to resort to the rubber mallet to loosen a very tightly fitting variator cover.
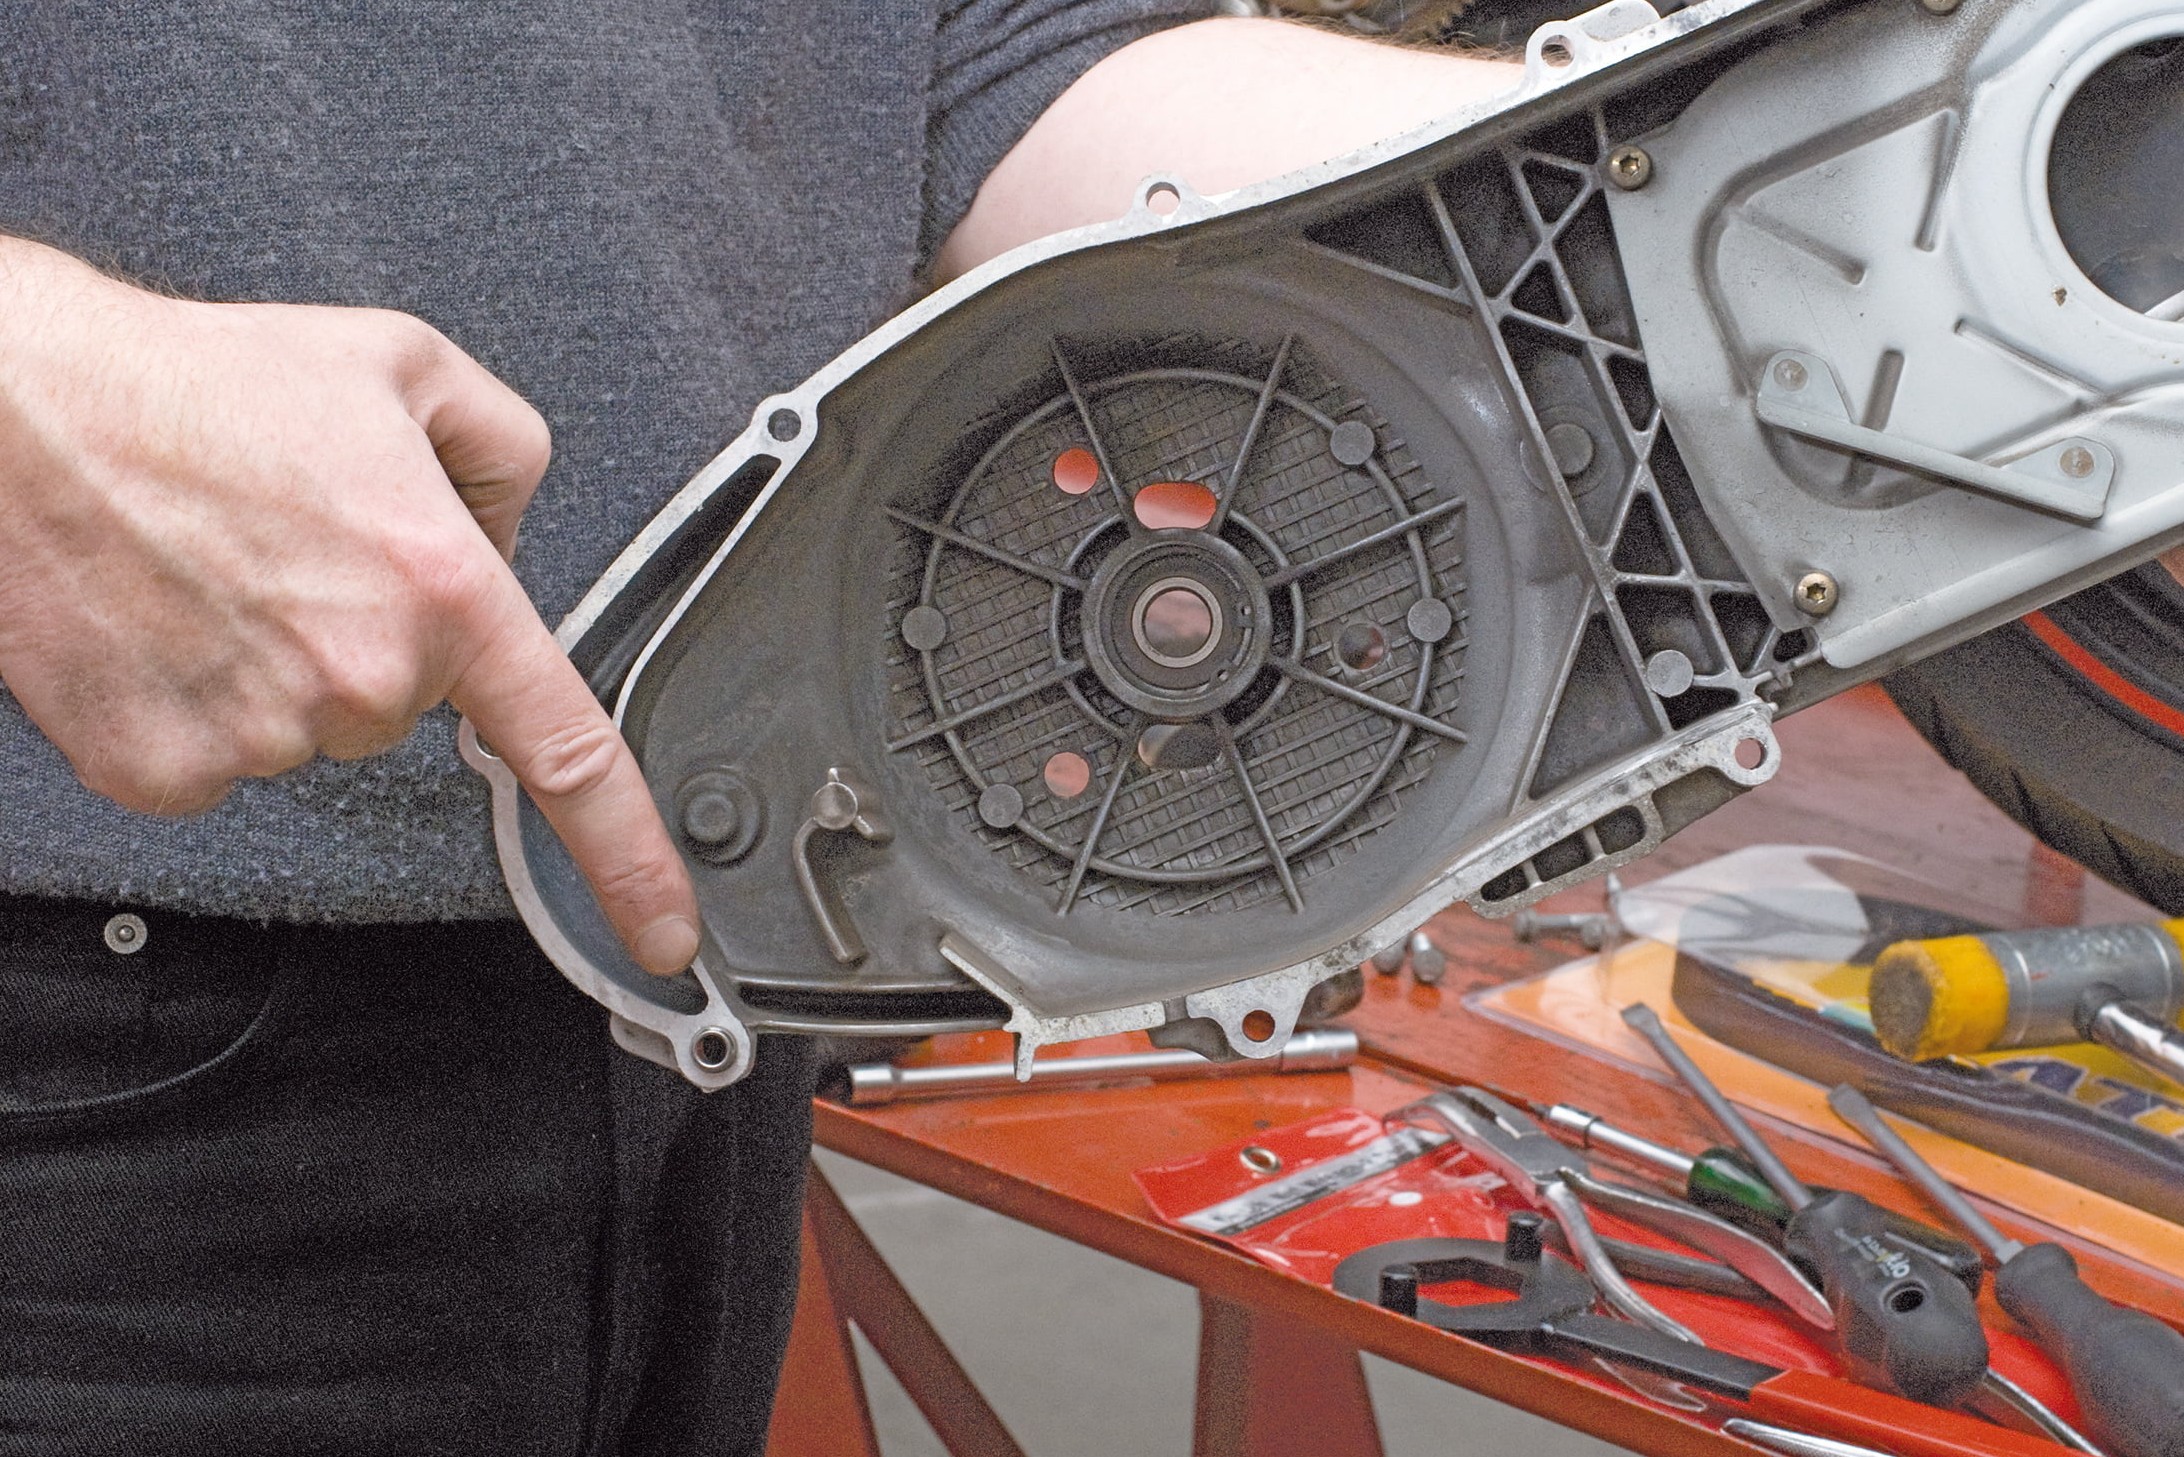
Step 4, Fig. 3: Do not lose the adapter sleeves of the cover
Once you have successfully removed the cover, make sure that any adapter sleeves remain in place and can't get lost.
If the rear drive shaft projects into the cover, you will generally find there is a loose bushing somewhere, which you also mustn't lose. Clean the inside of the cover thoroughly, removing all dust and dirt. If there is oil in the variator housing, it means you have a leaky engine gasket or drive gasket, which must definitely be replaced. You are now looking at the variator.
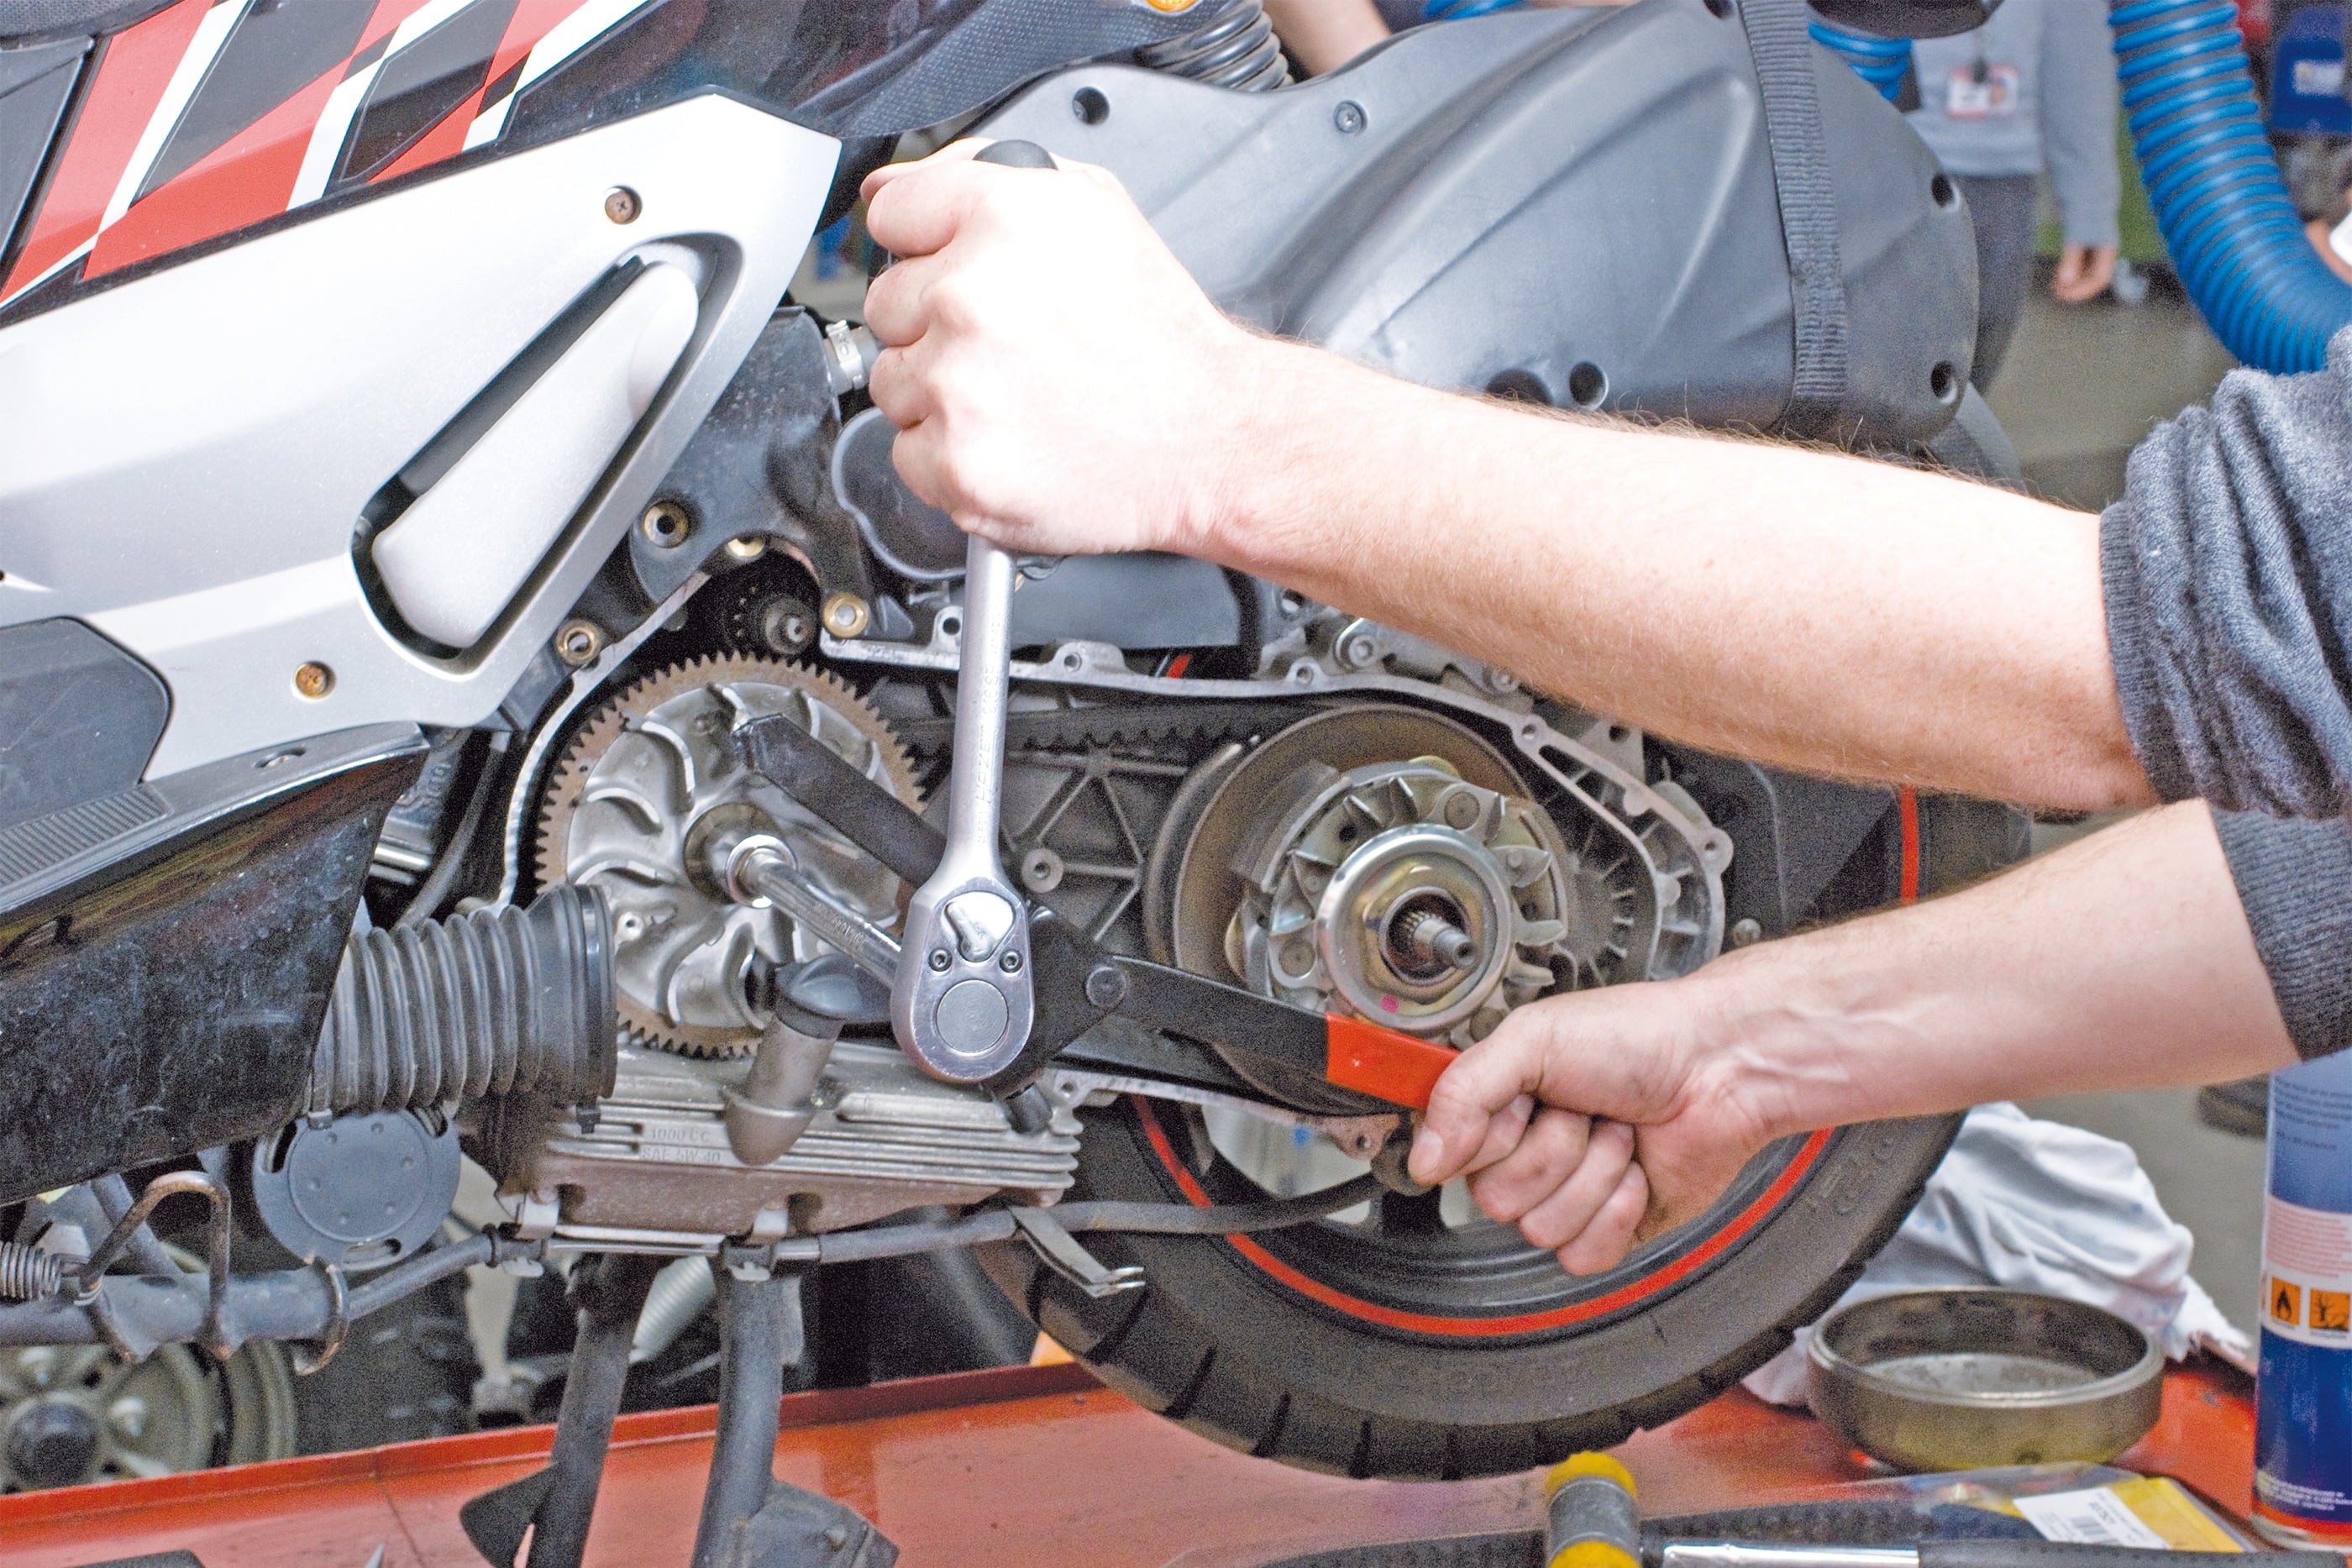
Step 5, Fig. 1: Block the variator and undo the central nut …
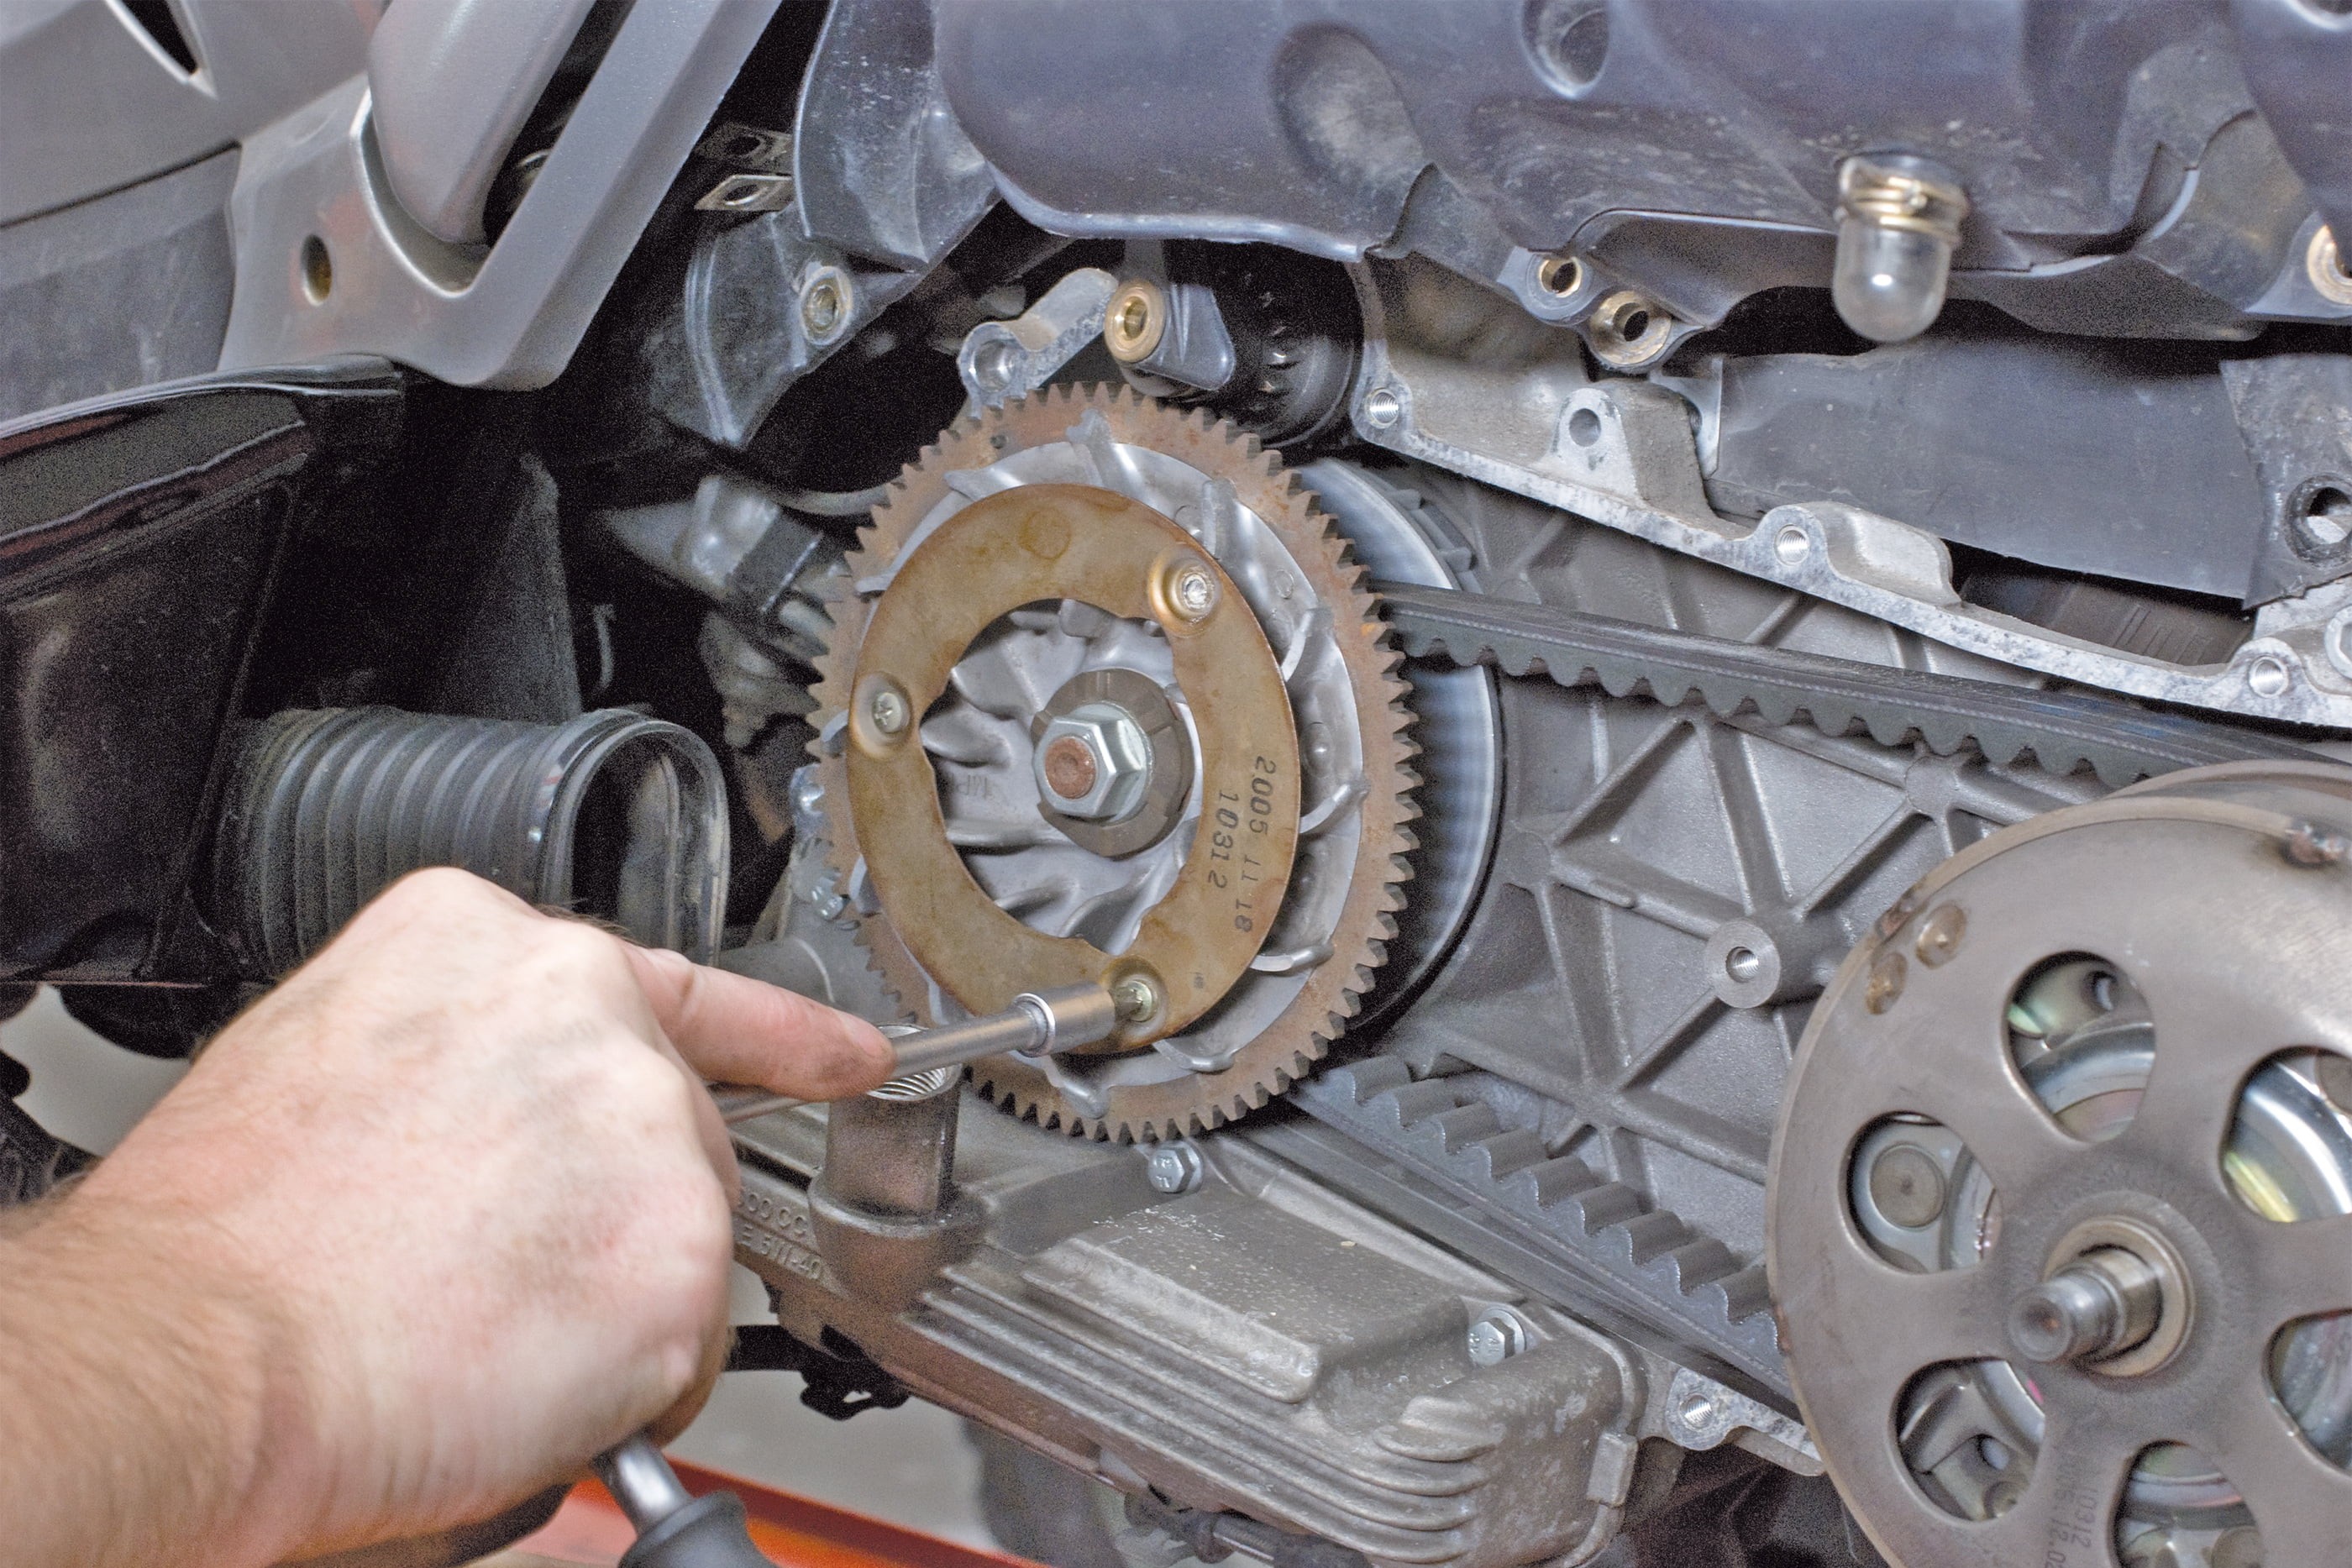
Step 5, Fig. 2: … remove the metal ring for easier access
Inspecting and maintaining the drive belt and variator rollers
05 – Remove the variomatics cover
To fit a new drive belt or new variator rollers, start by undoing the retaining nut of the front pulley halves on the crankshaft journal. While doing this you will need to hold the variator still with a special locking tool.
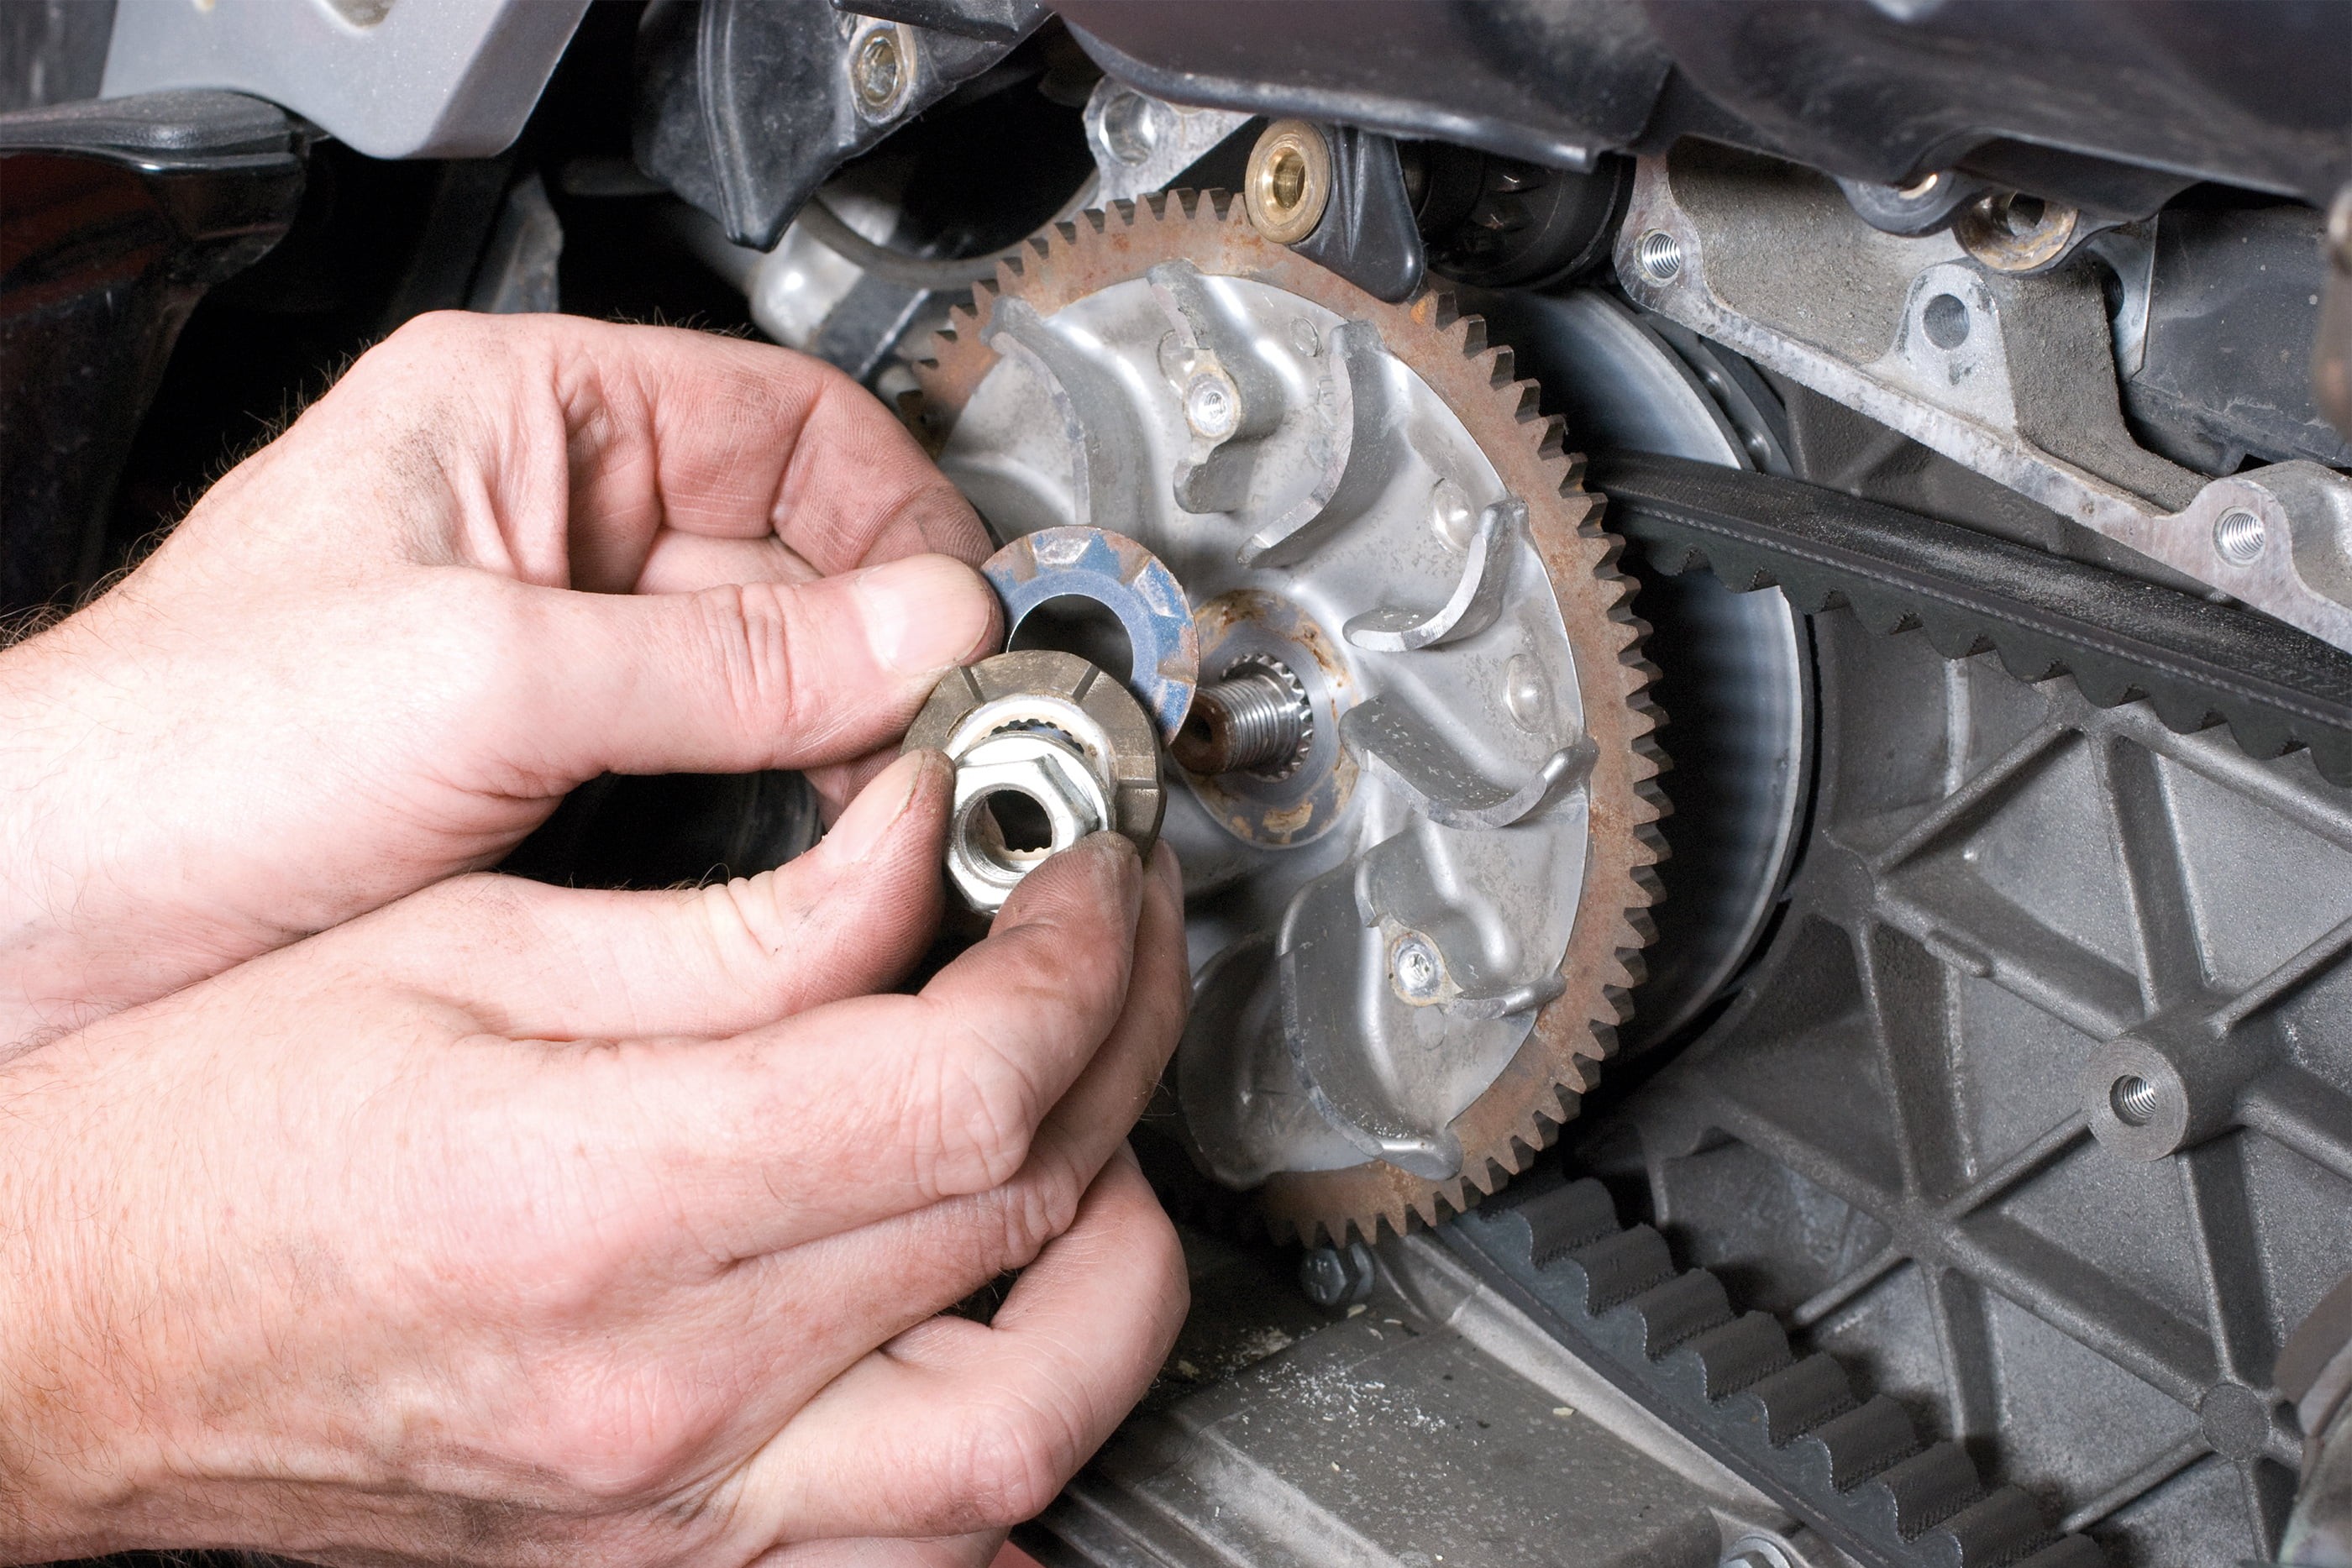
Step 6, Fig. 1: Remove the nut; note the position of the washers …
06 – Remove the front pulley
If the front pulley is toothed, you can buy a locking tool that fits your scooter. If there are holes or stury fins on the face of the pulley, you can grip these with a suitable holder.
Skilful DIY mechanics can make their own locking tool or holder out of flat steel. If you block the pulley by holding the cooling fins, be very careful to avoid damaging or breaking the fins.
Important: The nut is very tight, so it's essential to use a tool that fits well and grips the variator very securely to prevent any damage! You might want to get someone to help you by holding the tool firmly in place while you loosen the nut.
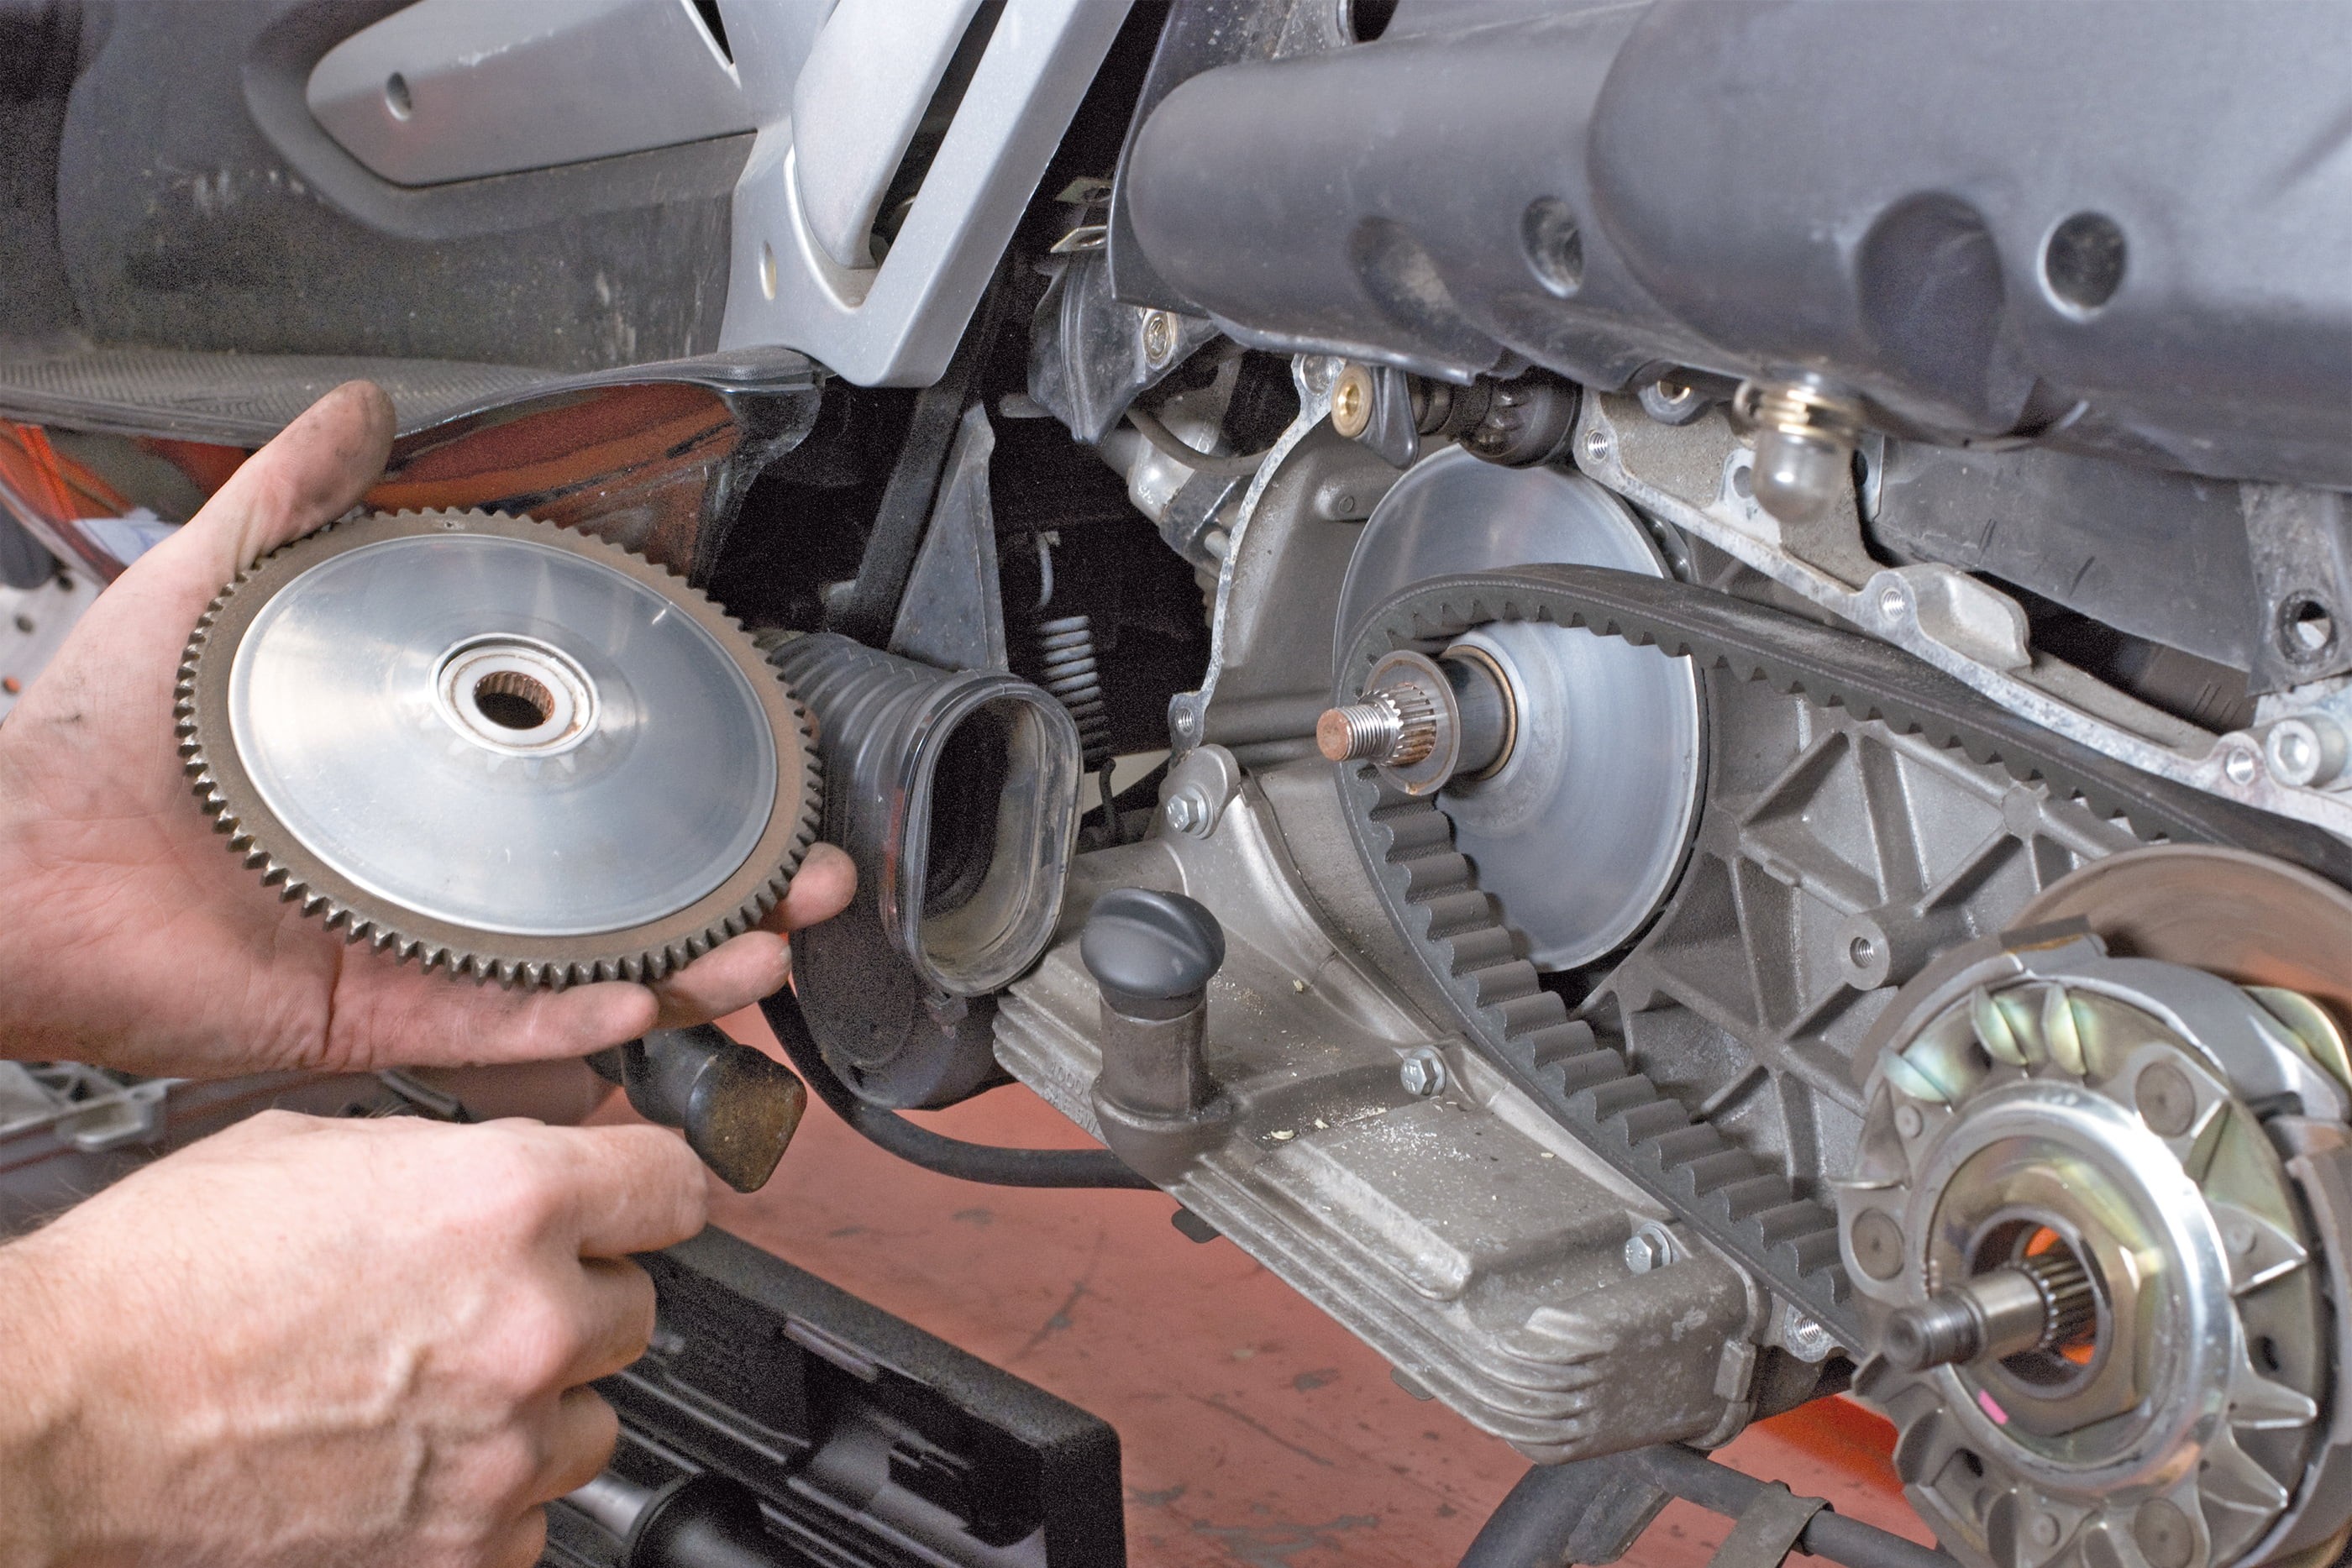
Step 6, Fig. 2: … and remove the front pulley.
Once you have loosened and removed the nut, you will be able to remove the front pulley. If there is a kick start drive wheel sitting on the shaft behind the nut, make a note of its position.
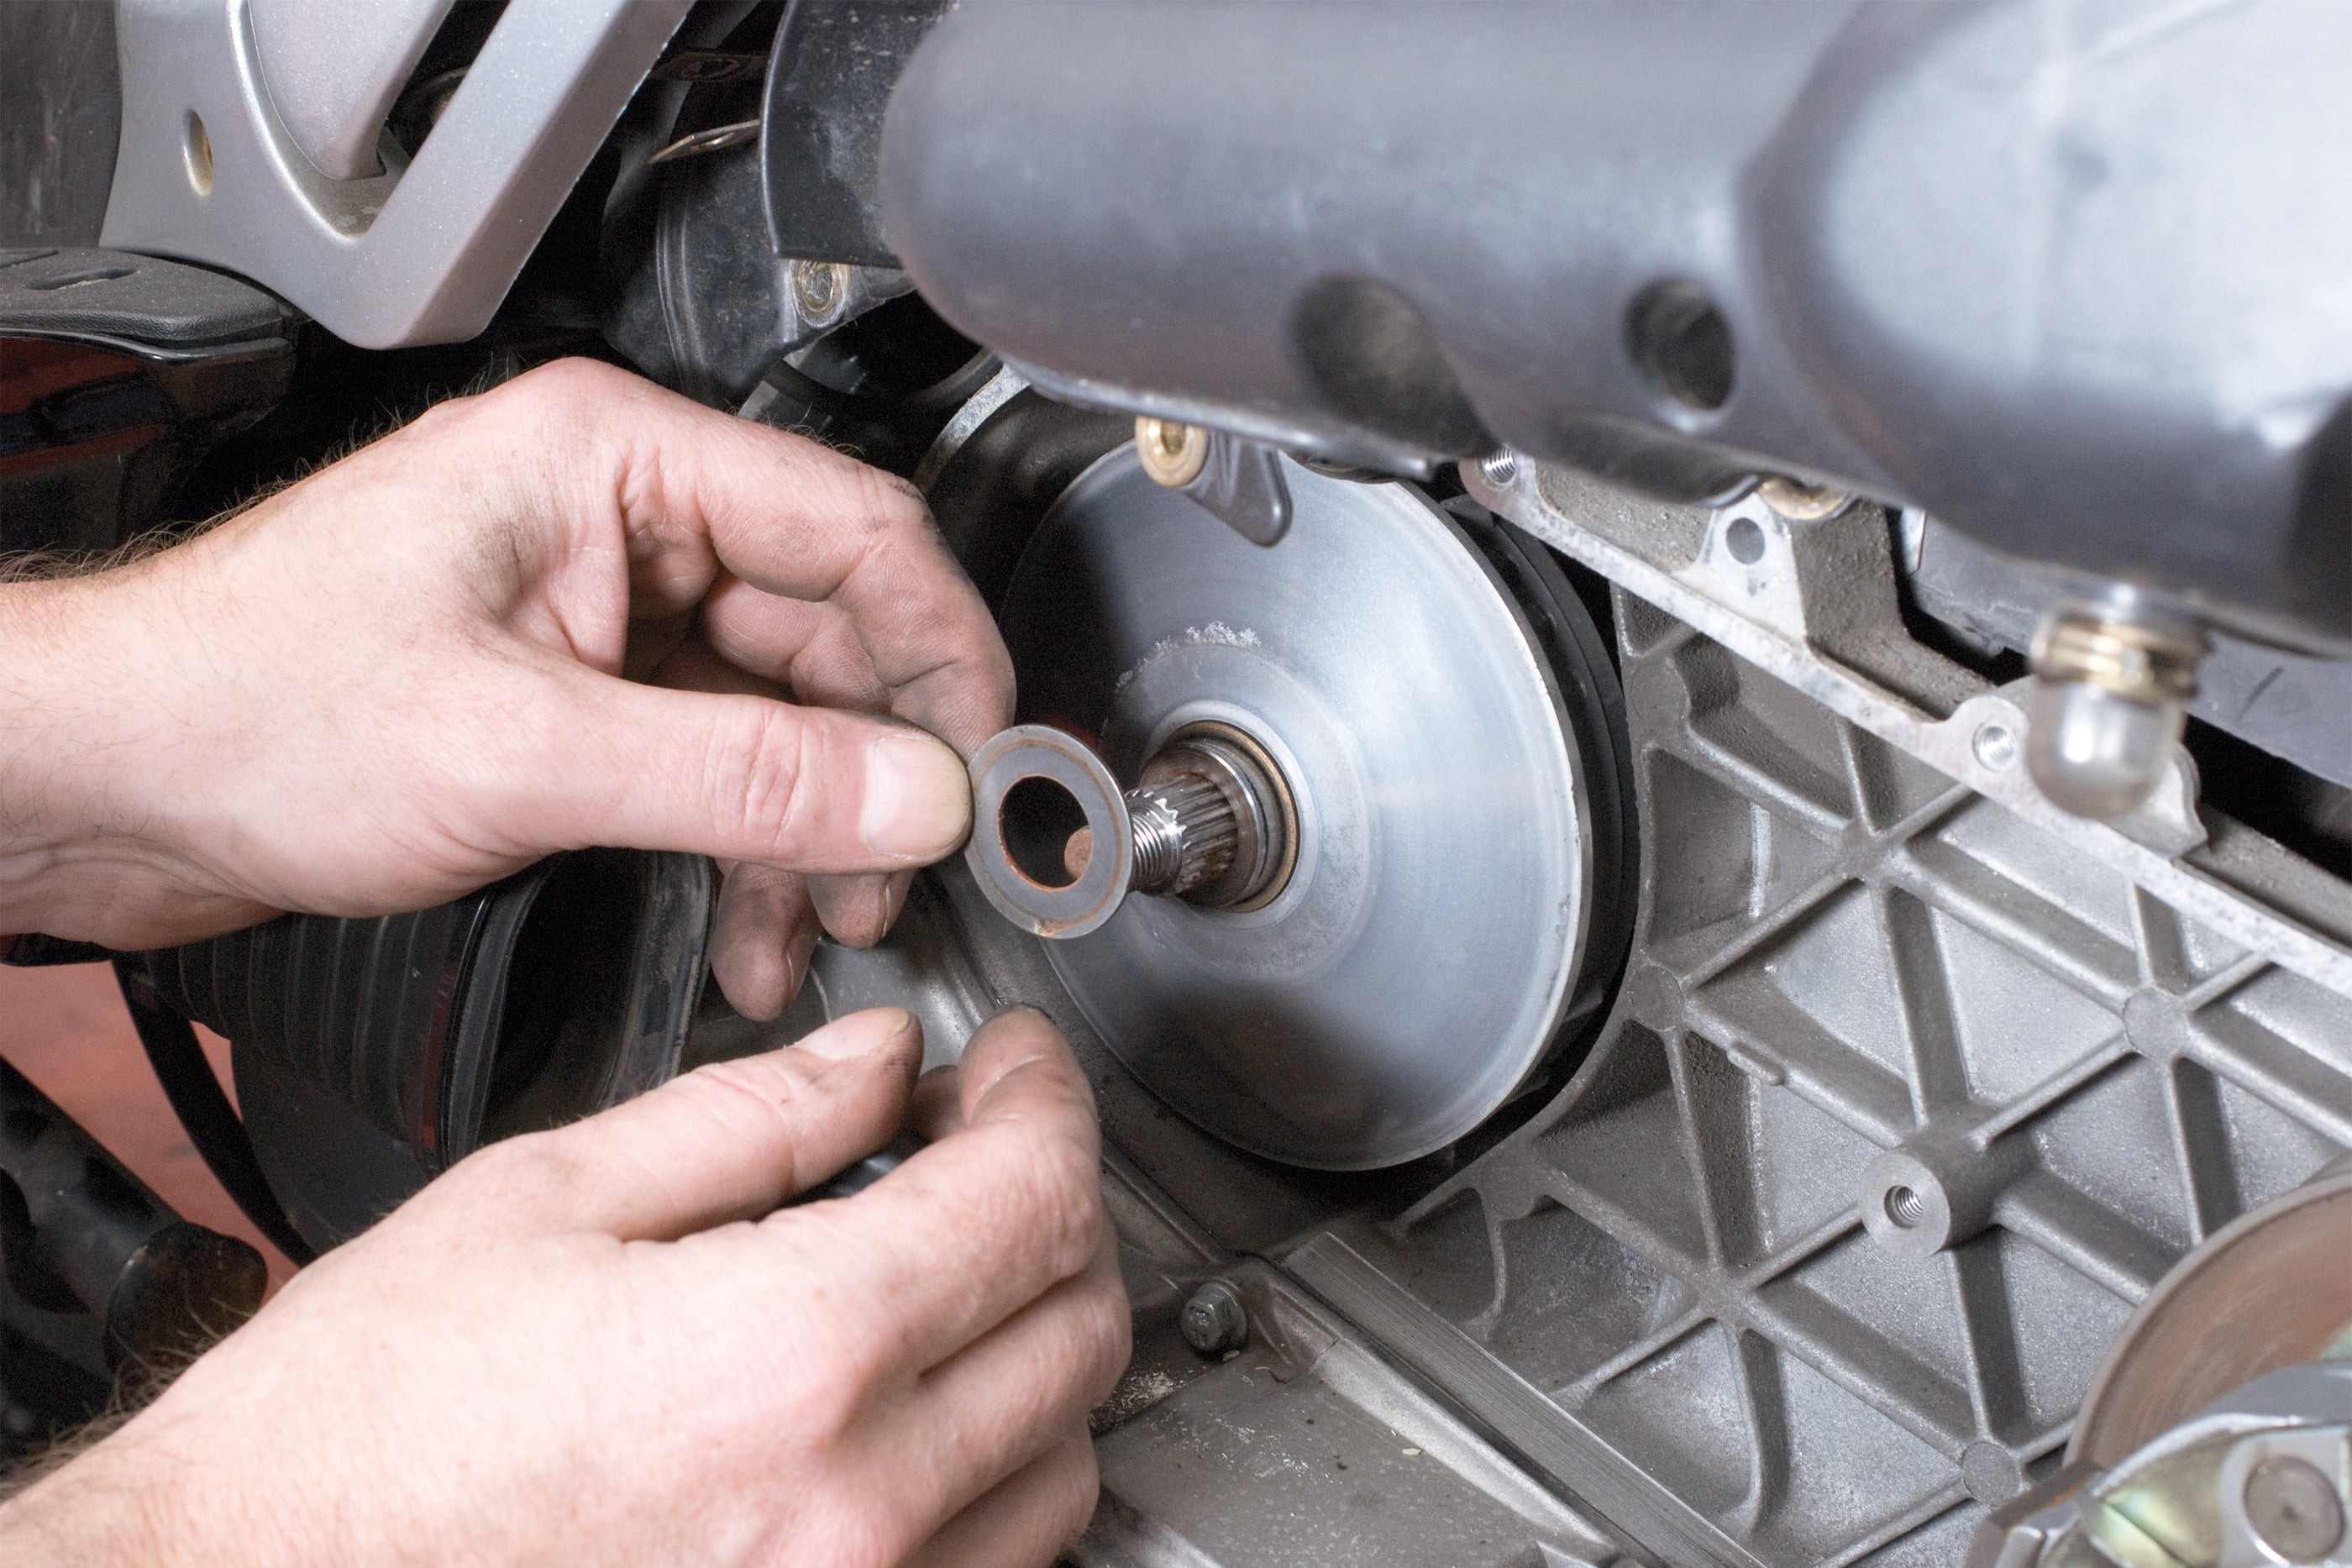
Step 7: Note the position of any spacers (take a photo first) ...
07 – The drive belt
You will now be able to access the drive belt. The belt must not be cracked, brittle, frayed or have any broken teeth. It must not be oily and must have a certain minimum width (check with your local dealership to find out what the wear limit is). A large quantity of rubber debris in the housing caused by abrasion may indicate that the belt is not running correctly in the variator (investigate the cause!) – or may just be due to the fact that maintenance is long overdue. Premature wear to the drive belt may be due to an incorrectly installed or worn pulley.
If the pulley halves are grooved, they must be replaced (see above). If they have turned blue due to heat, this means they have warped or were incorrectly installed. If the drive belt does not yet need replacing, wipe it clean with brake cleaner and mark the correct running direction on it before continuing.
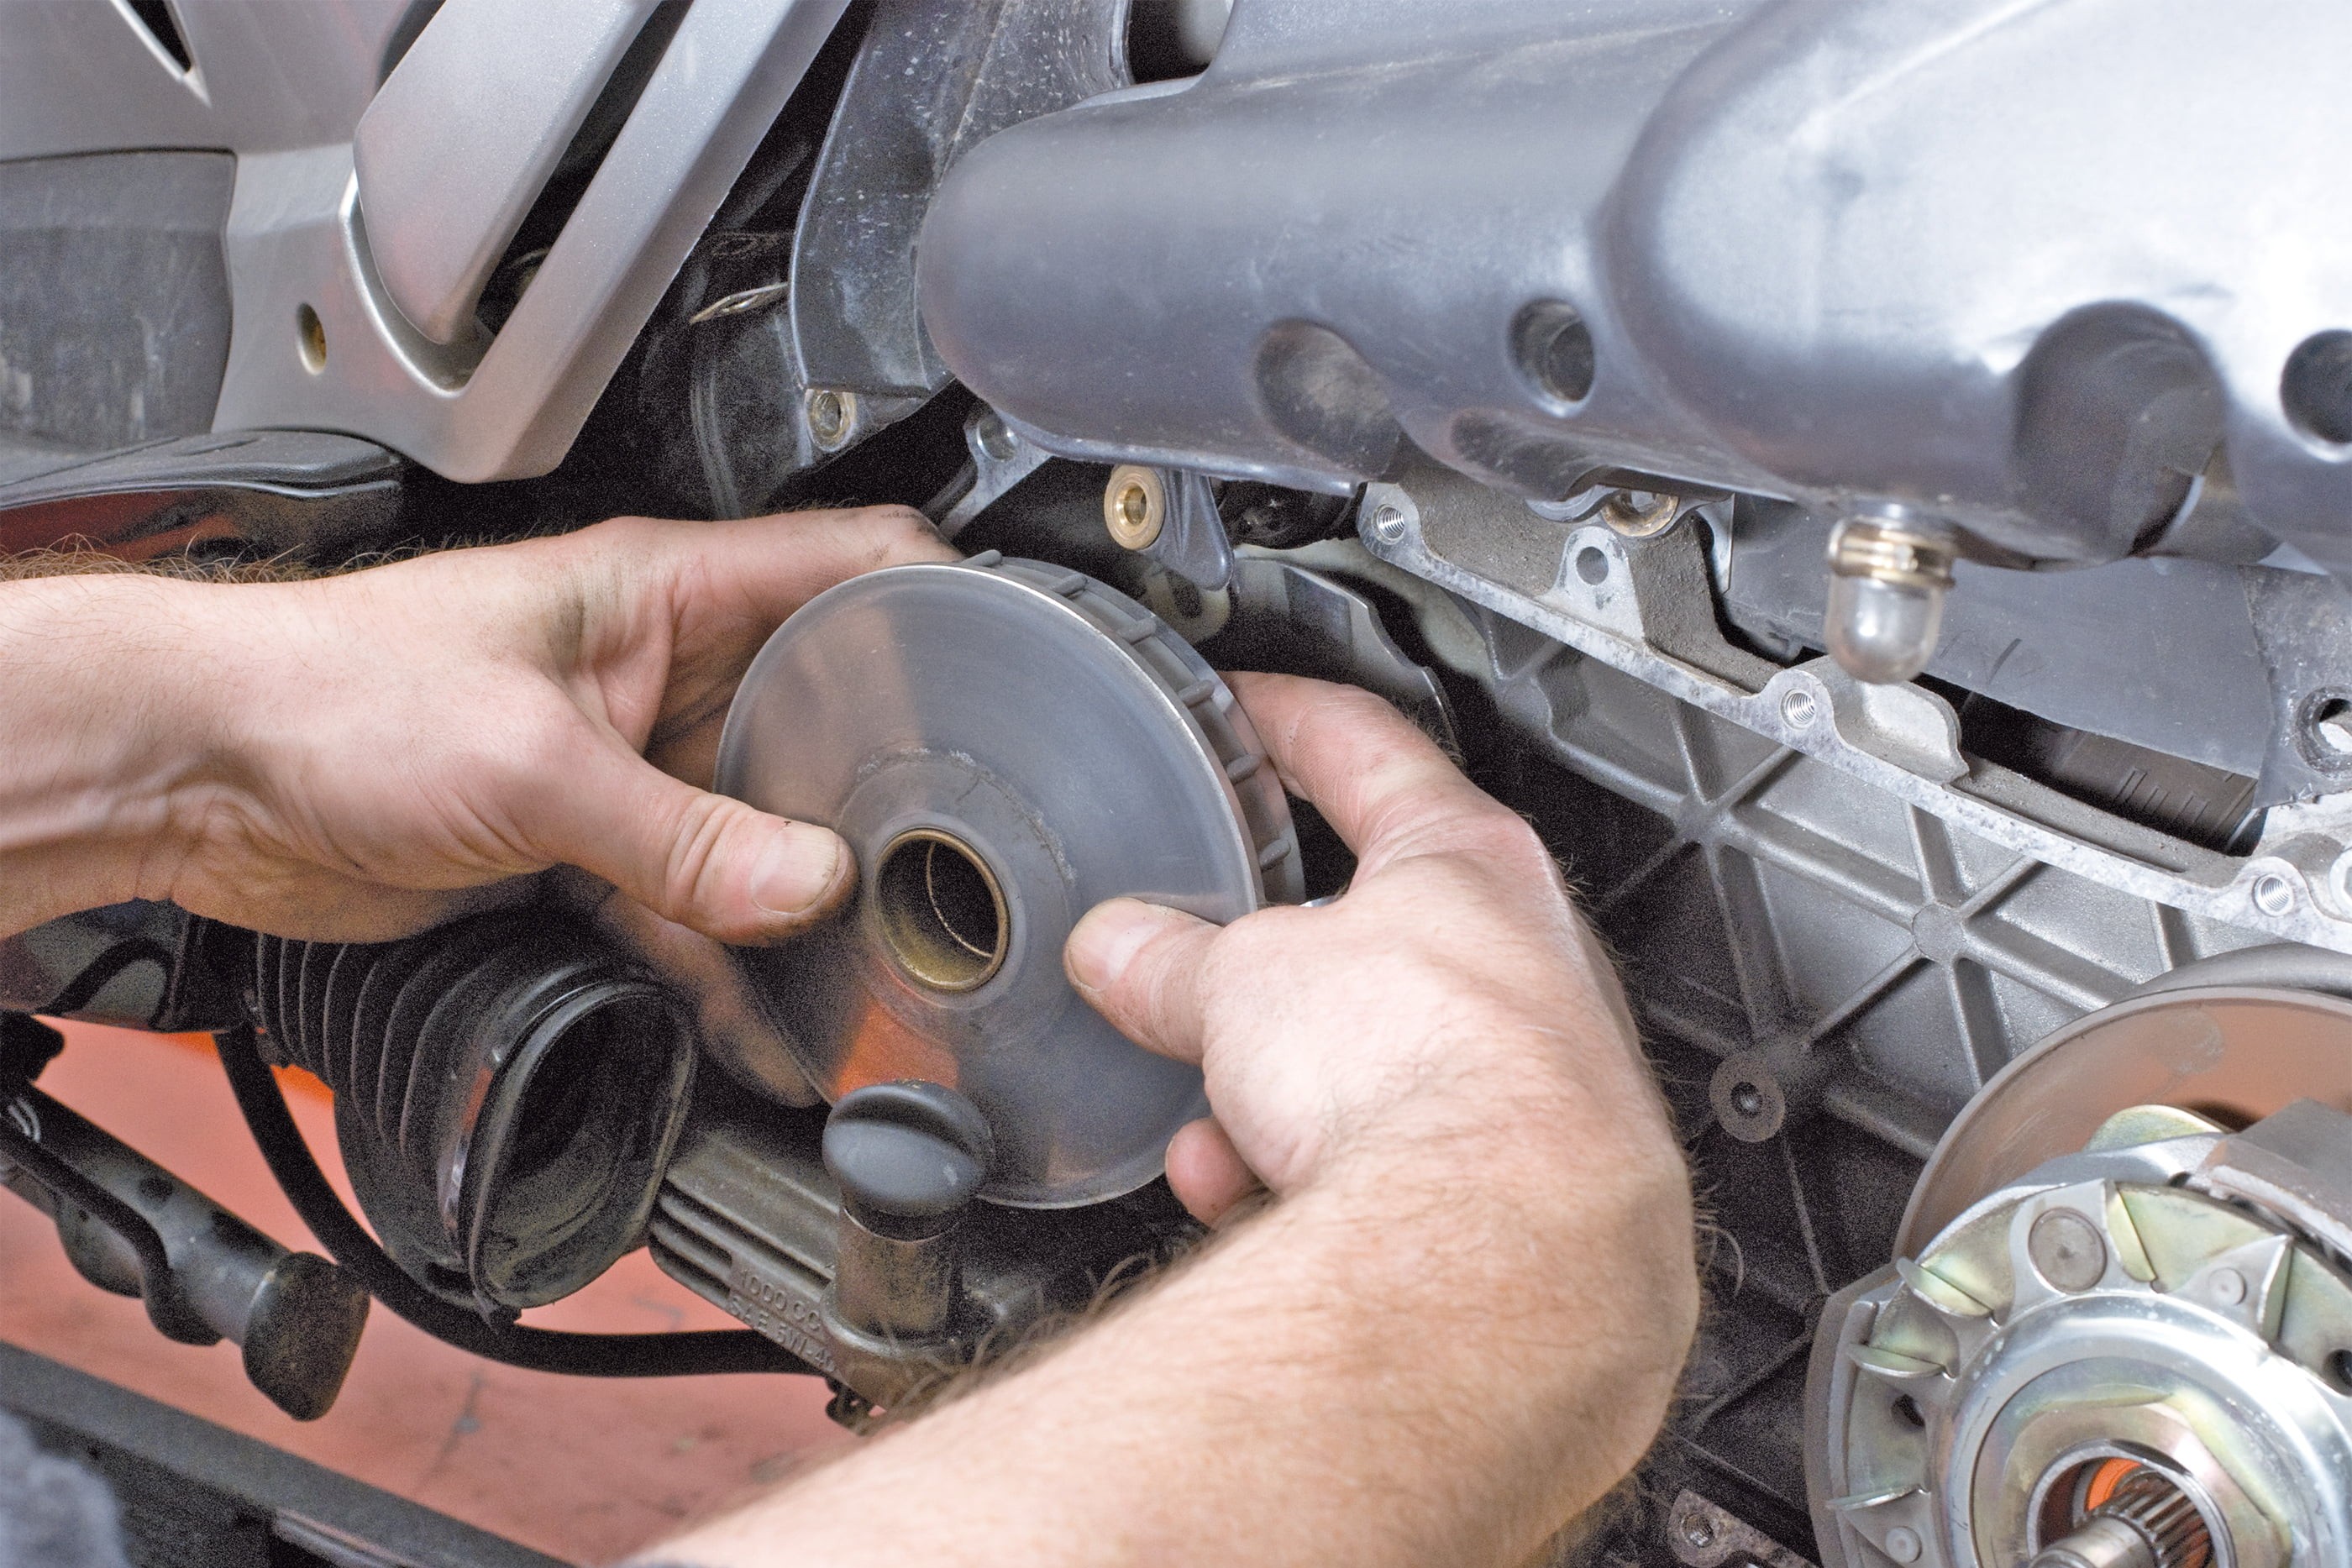
Step 8, Fig. 1: … and remove entire variator assembly from the shaft.
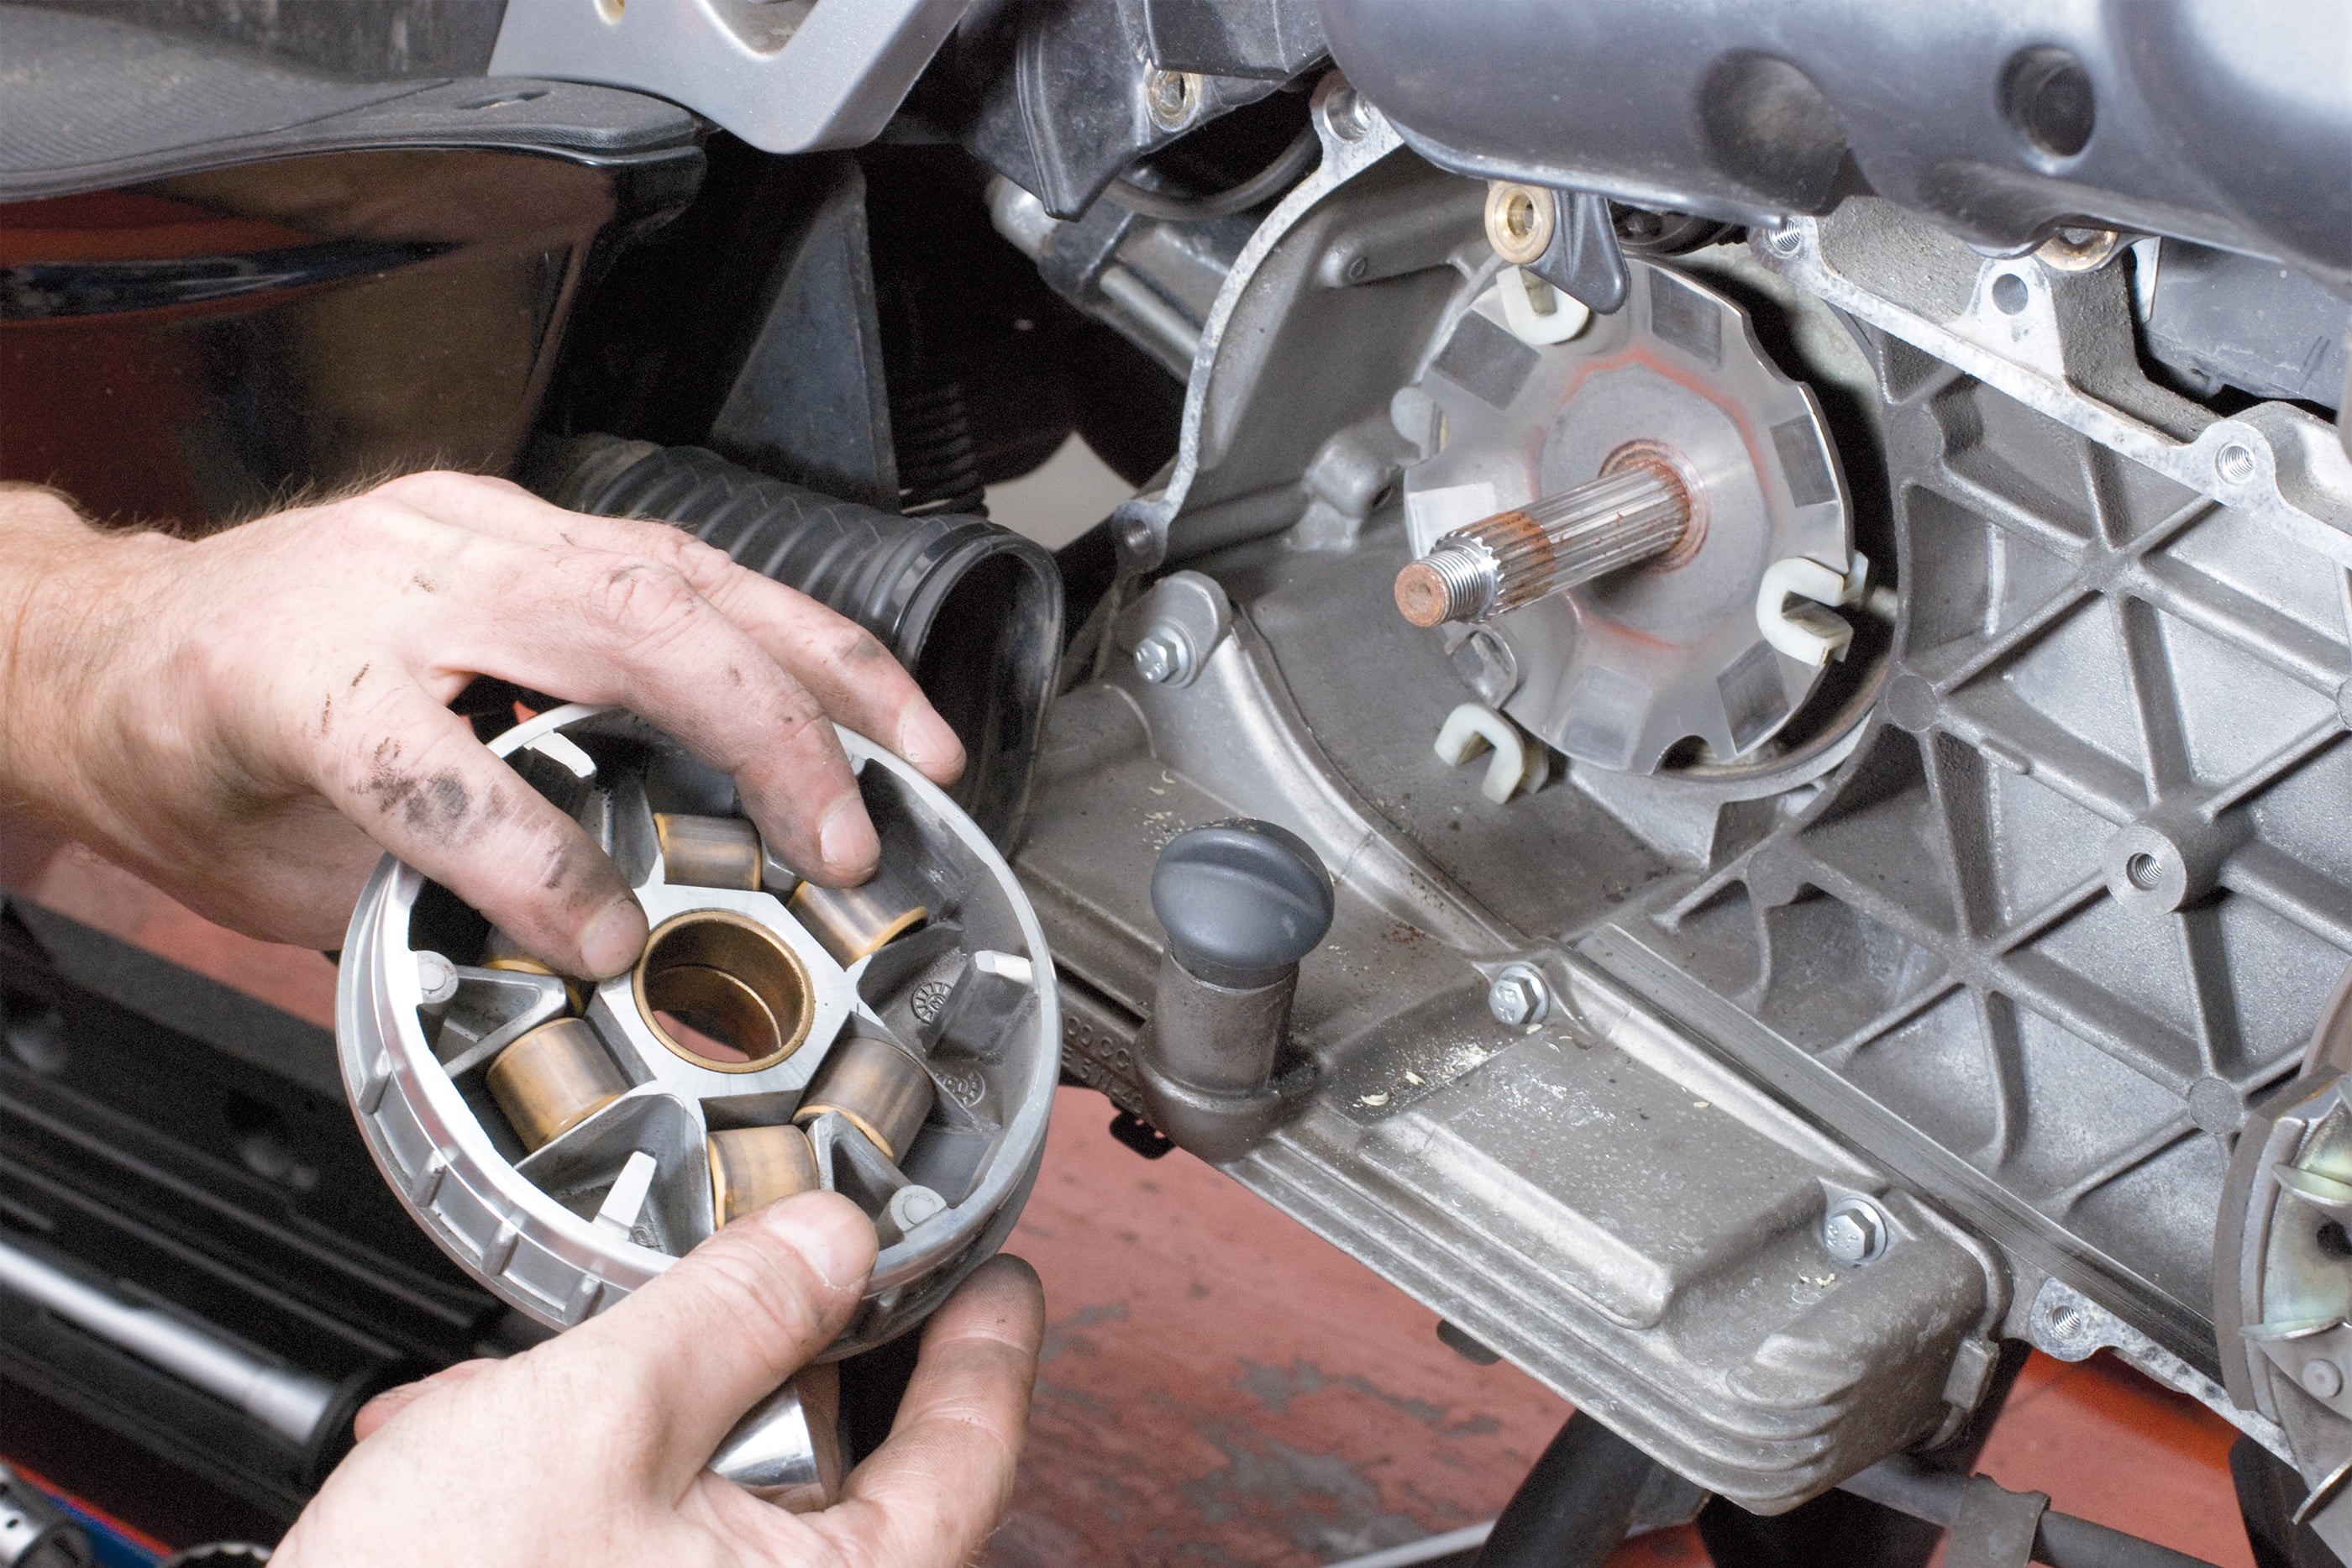
Step 8, Fig. 2: Interior of variator
08 – The variator rollers
To check the variator rollers, or to replace them, pull the front inner pulley half with the variator housing off the shaft as a unit.
The housing may be fixed to the pulley or loose – so hold the unit very firmly together as you remove it to make sure the components don't all fall apart, and to keep the variator weights in place.
Now dismantle the housing of the variator rollers – make an exact note of the position of the individual parts. Clean them with brake cleaner.
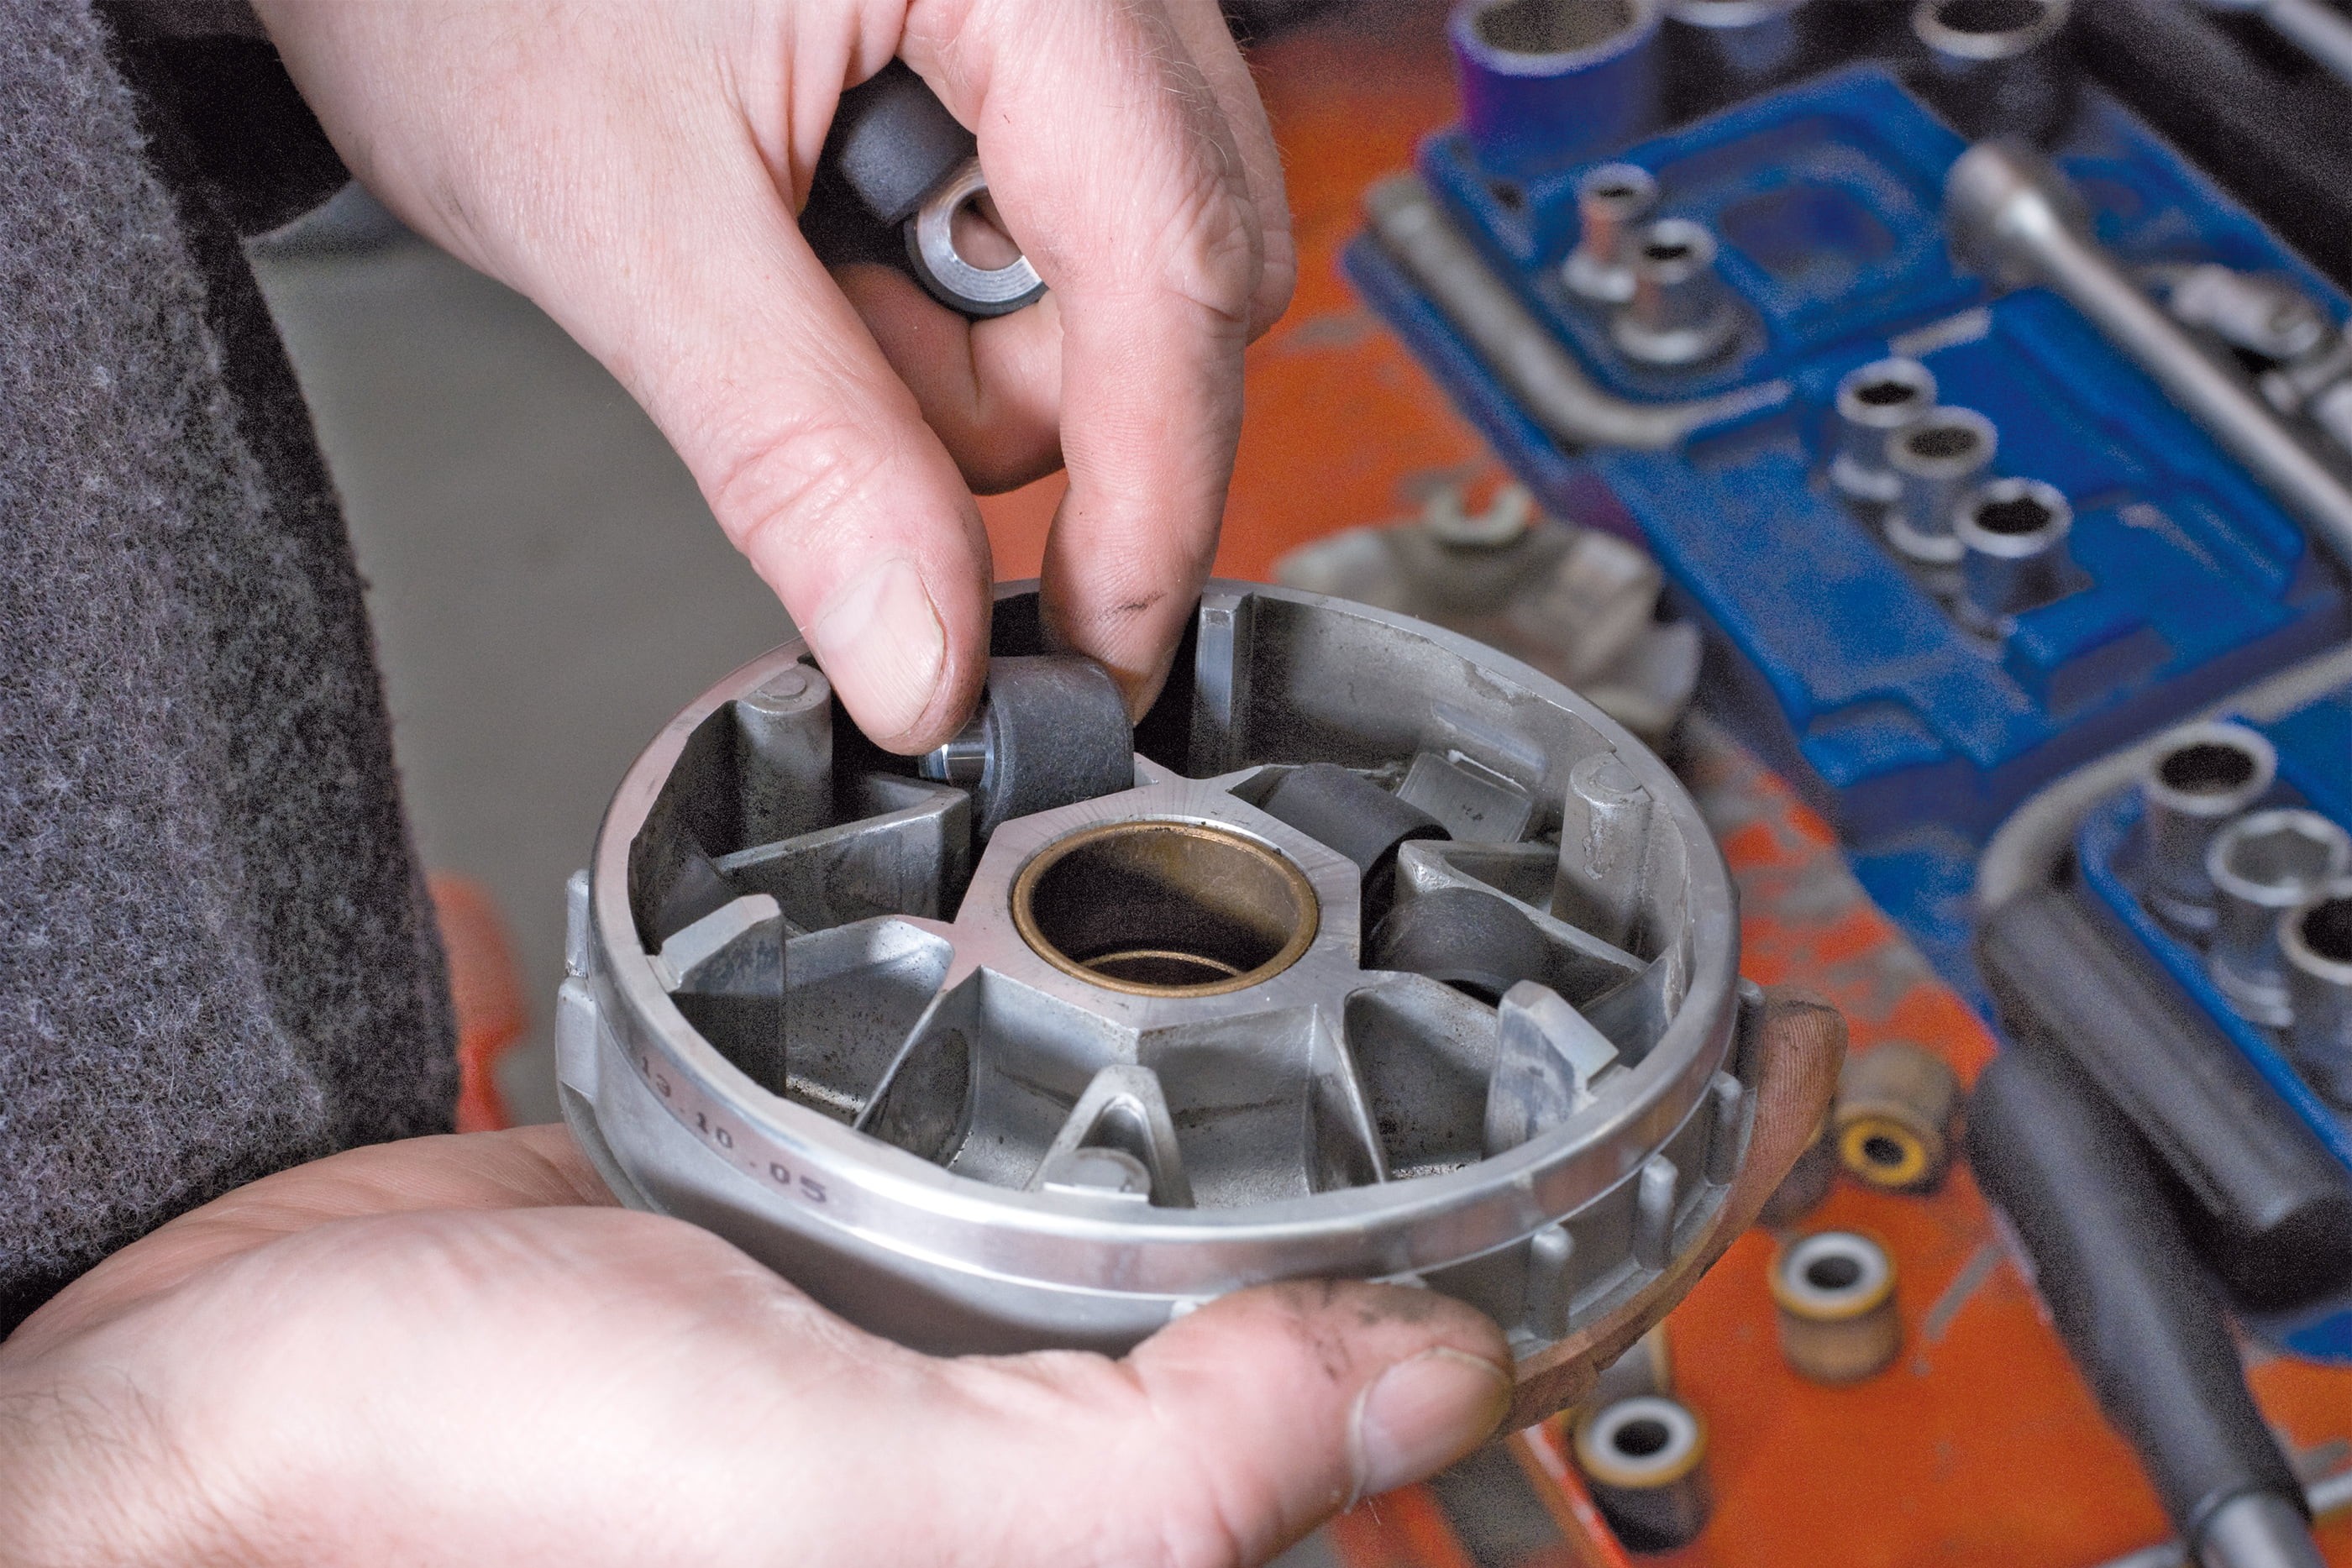
Step 8, Fig. 3: Replace old, worn variator rollers
Check the variator rollers for wear and tear – if they are worn, display flat spots or angular wear, or are irregular in diameter, replace them as a set.
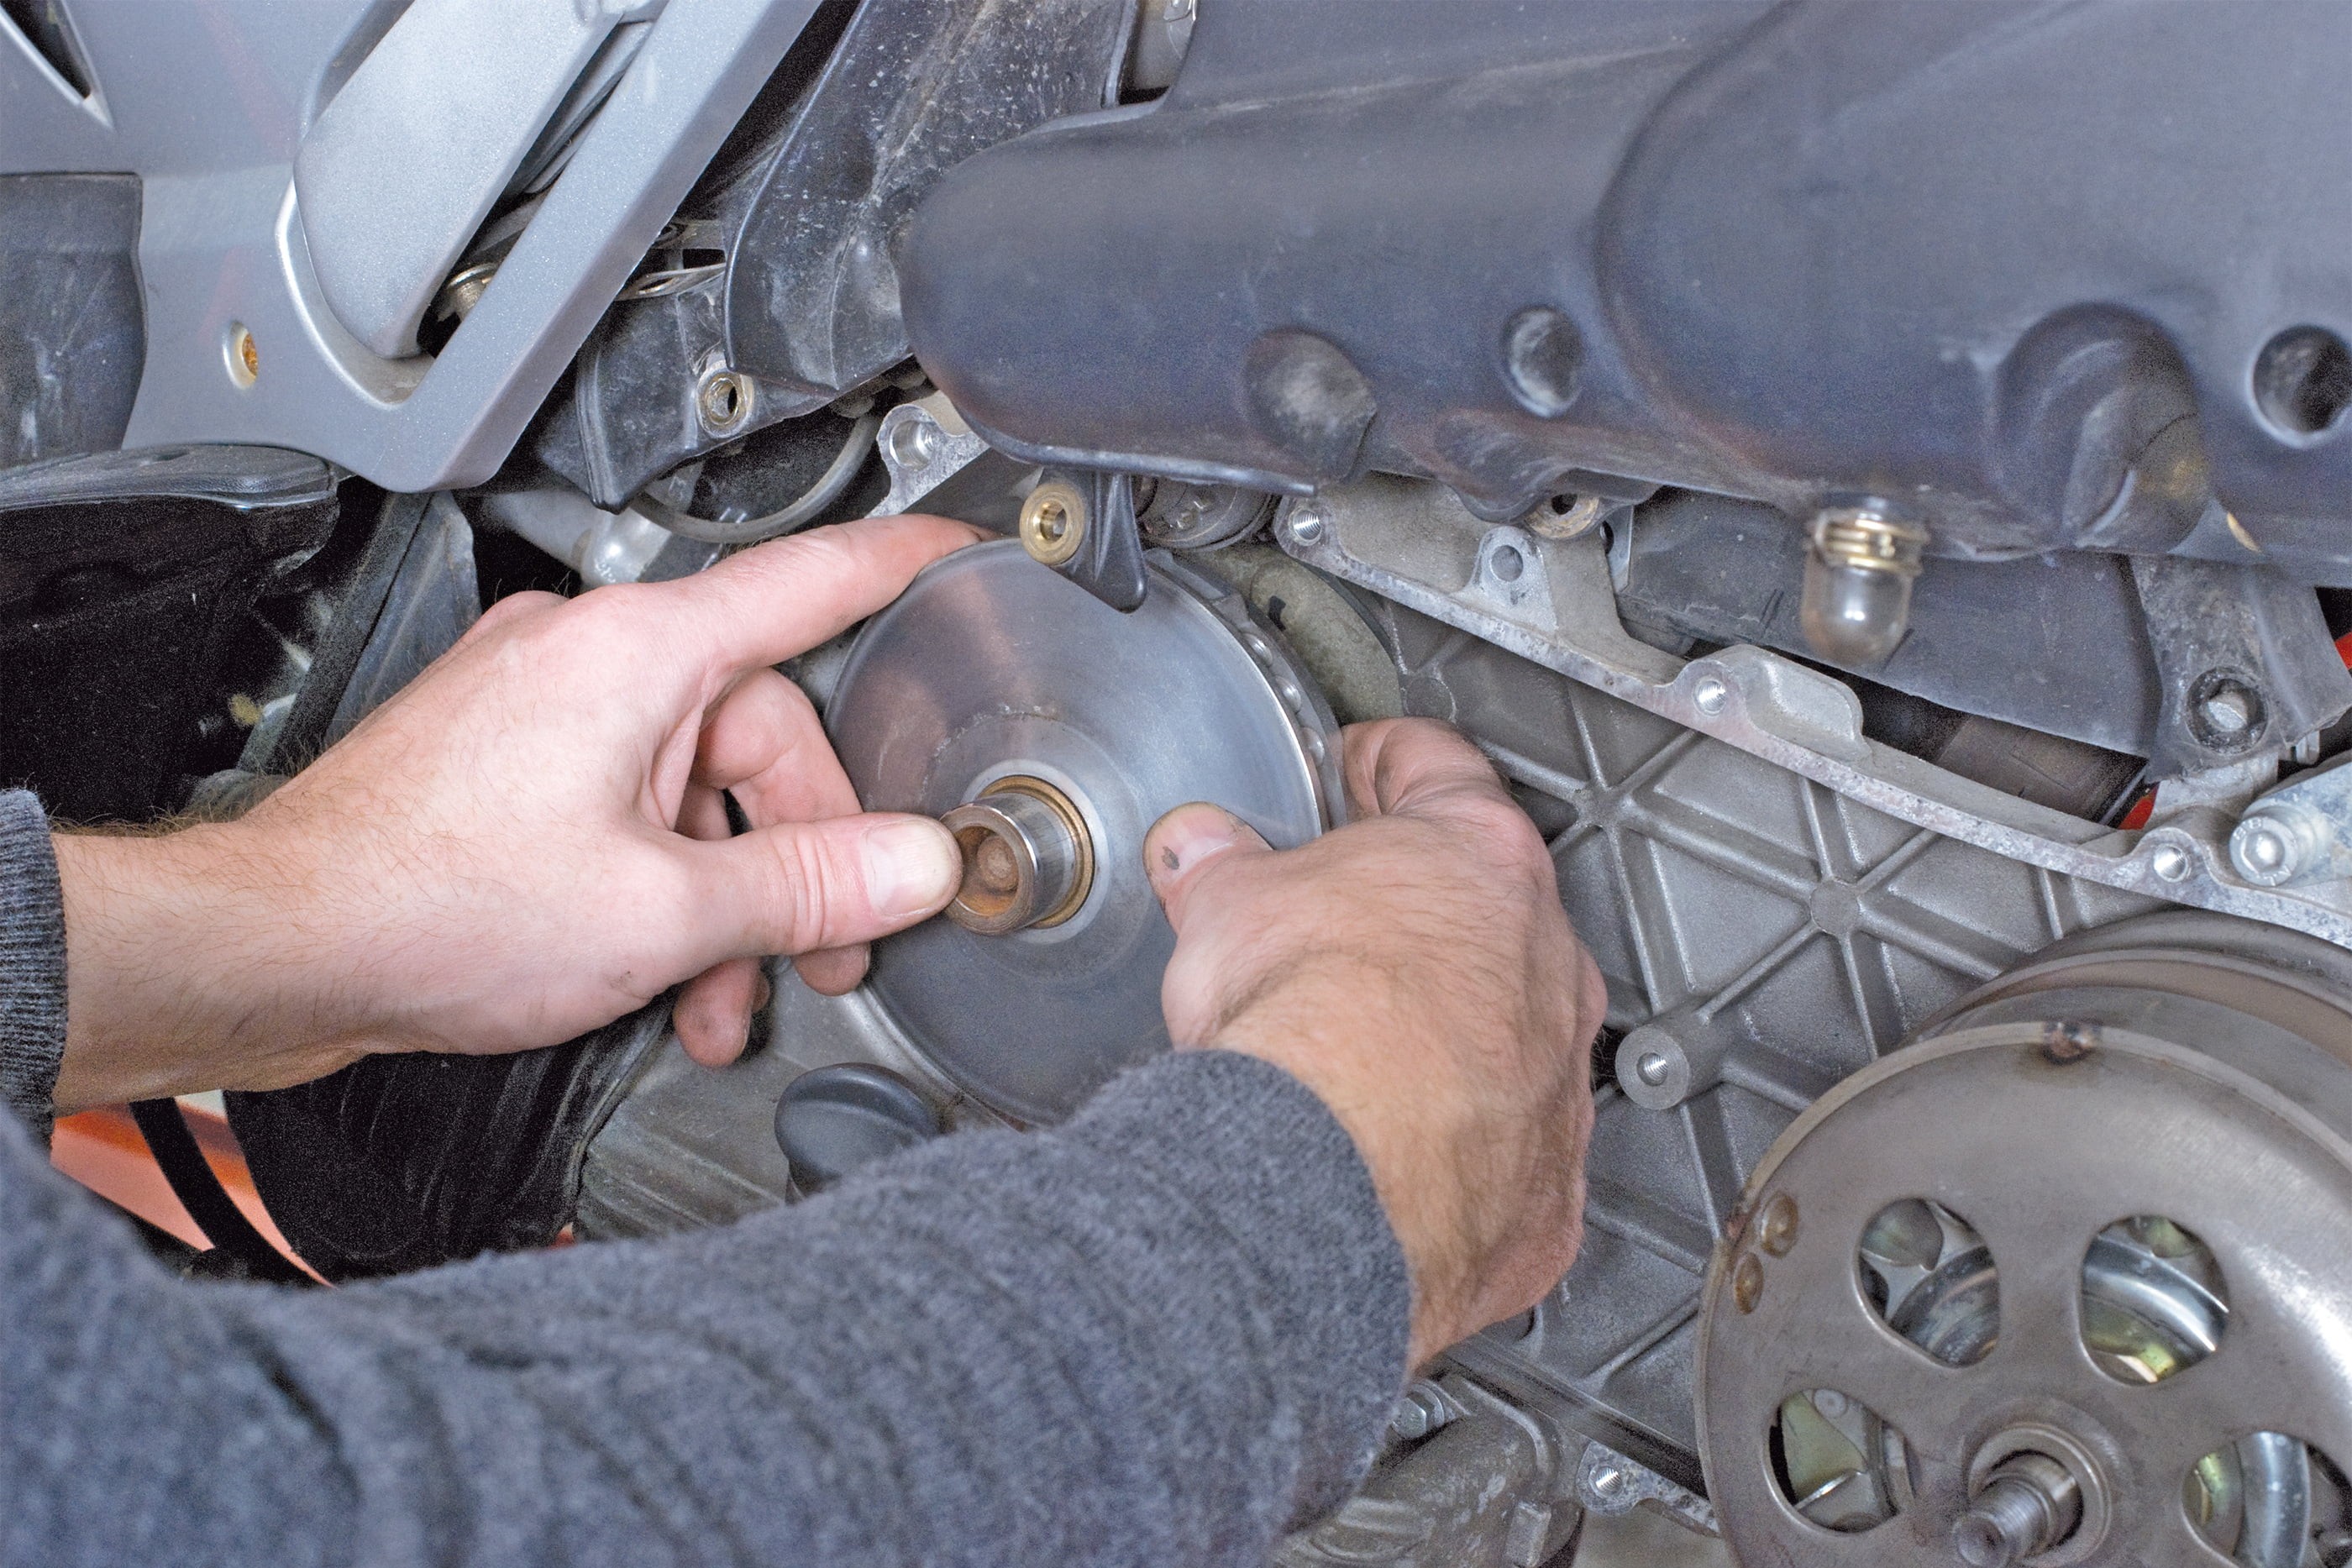
Step 9: Put variator assembly onto the shaft.
09 – Put variator assembly onto the shaft.
When assembling the variator housing, the variator rollers and tracks have to be either lightly greased or installed dry (ask at your local dealership).
If the variator housing is fitted with an O-ring, this will need to be replaced with a new one. When fitting the unit on the shaft, take care to ensure that the variator rollers stay in position in the housing, otherwise you will have to remove it again and reposition the rollers.
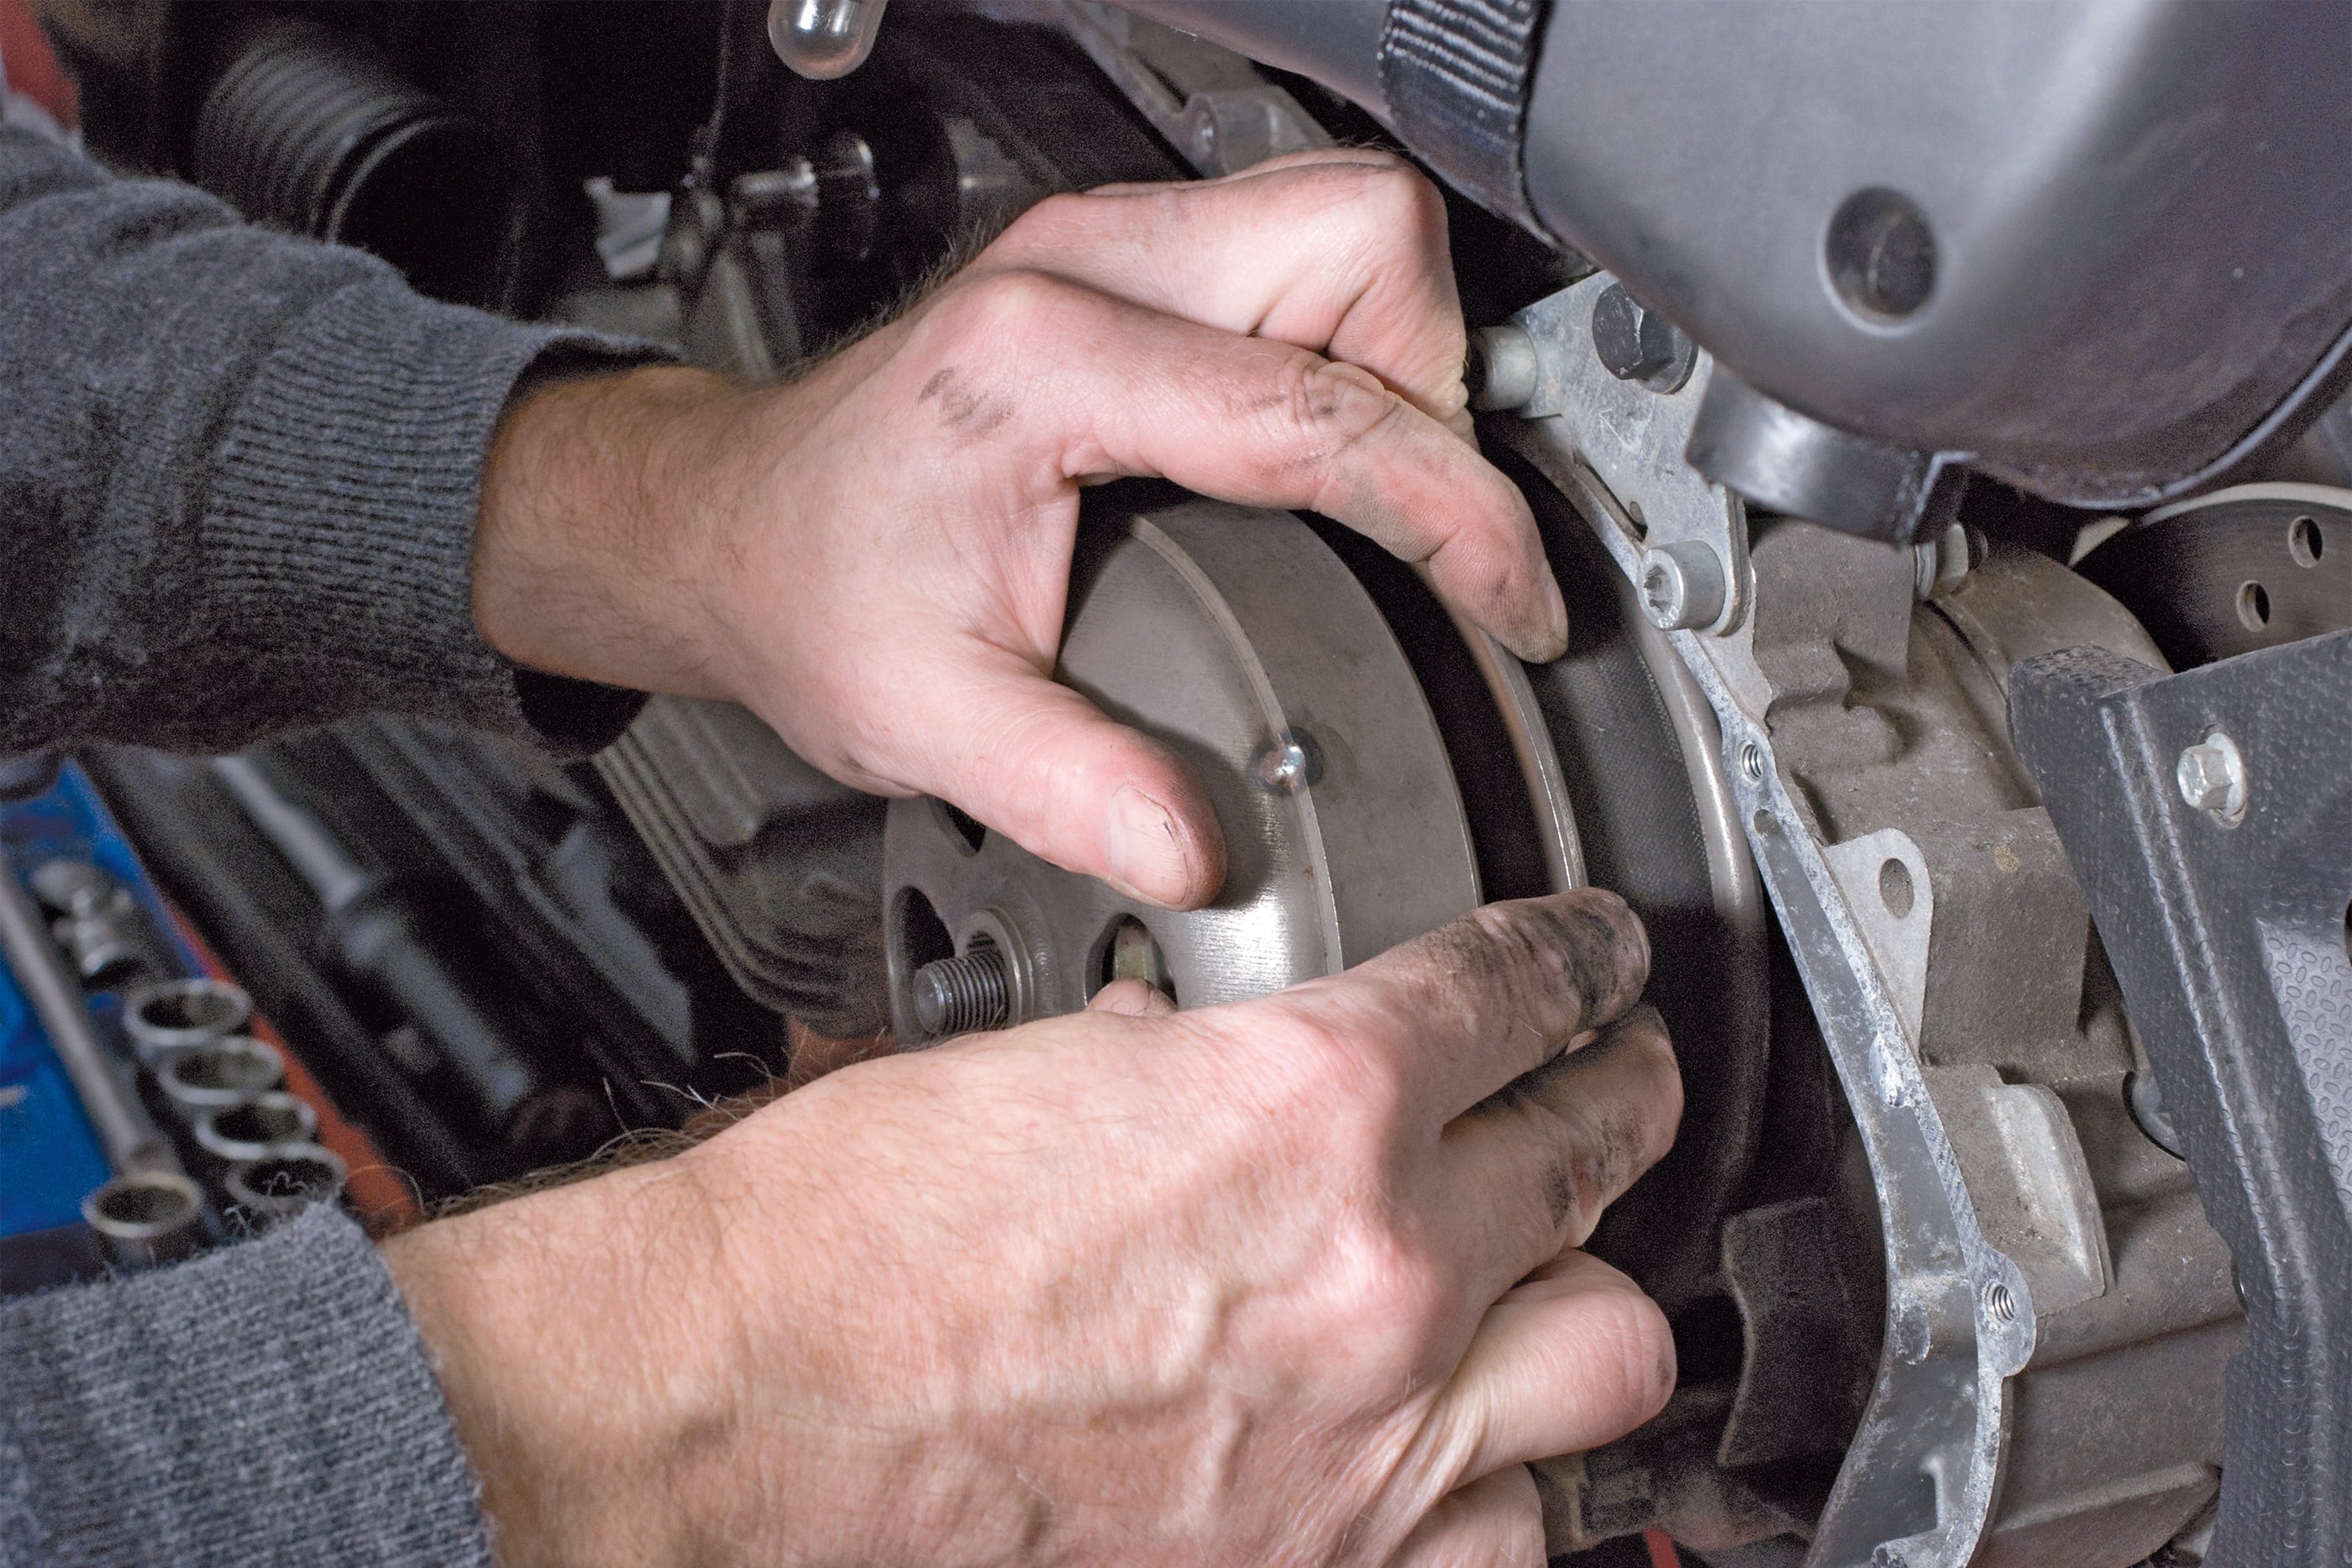
Step 10: Press pulleys halves apart and let the belt slide between them
10 – Press pulleys halves apart
Press the rear pulley halves apart, so that the belt can slide deep between the two halves and has more space at the front.
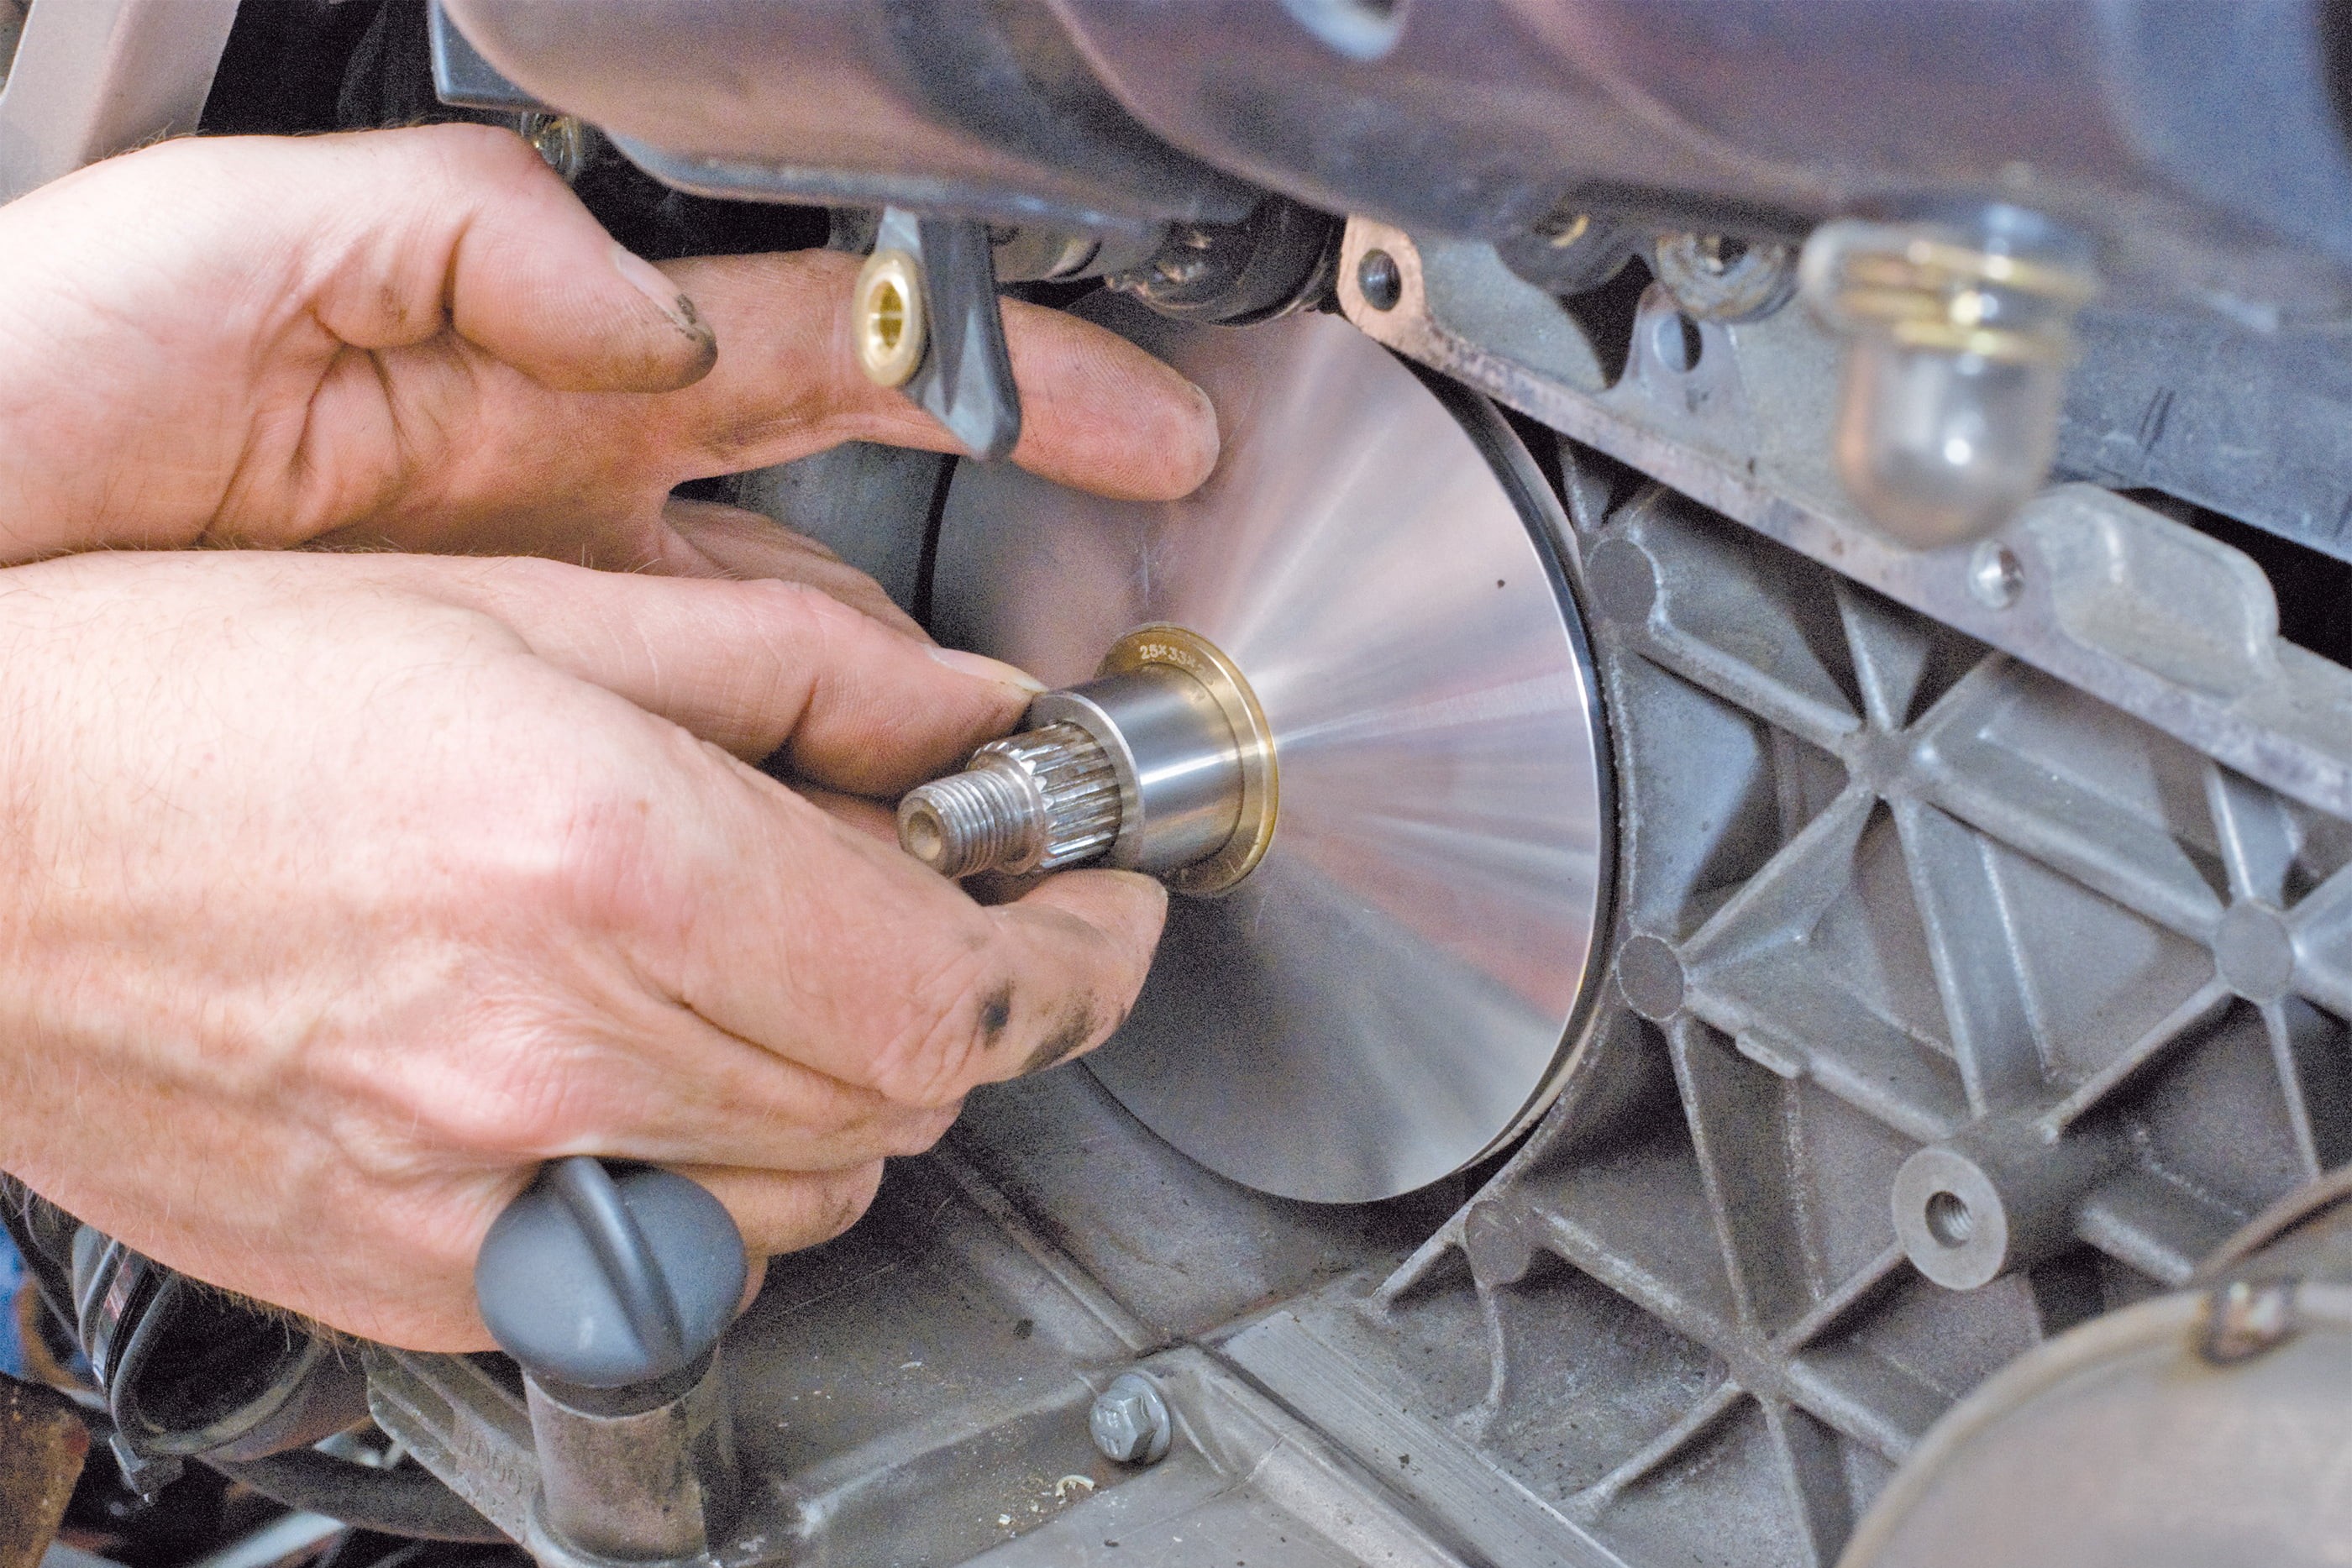
Step 11: Fit the bushing and any spacers
11 – Mount spacer washer
Now install the front outer pulley half of the variator with all its components – lightly grease the shaft before fitting the bushing. Make sure the drive belt is positioned evenly between the pulley halves and do not jam it.
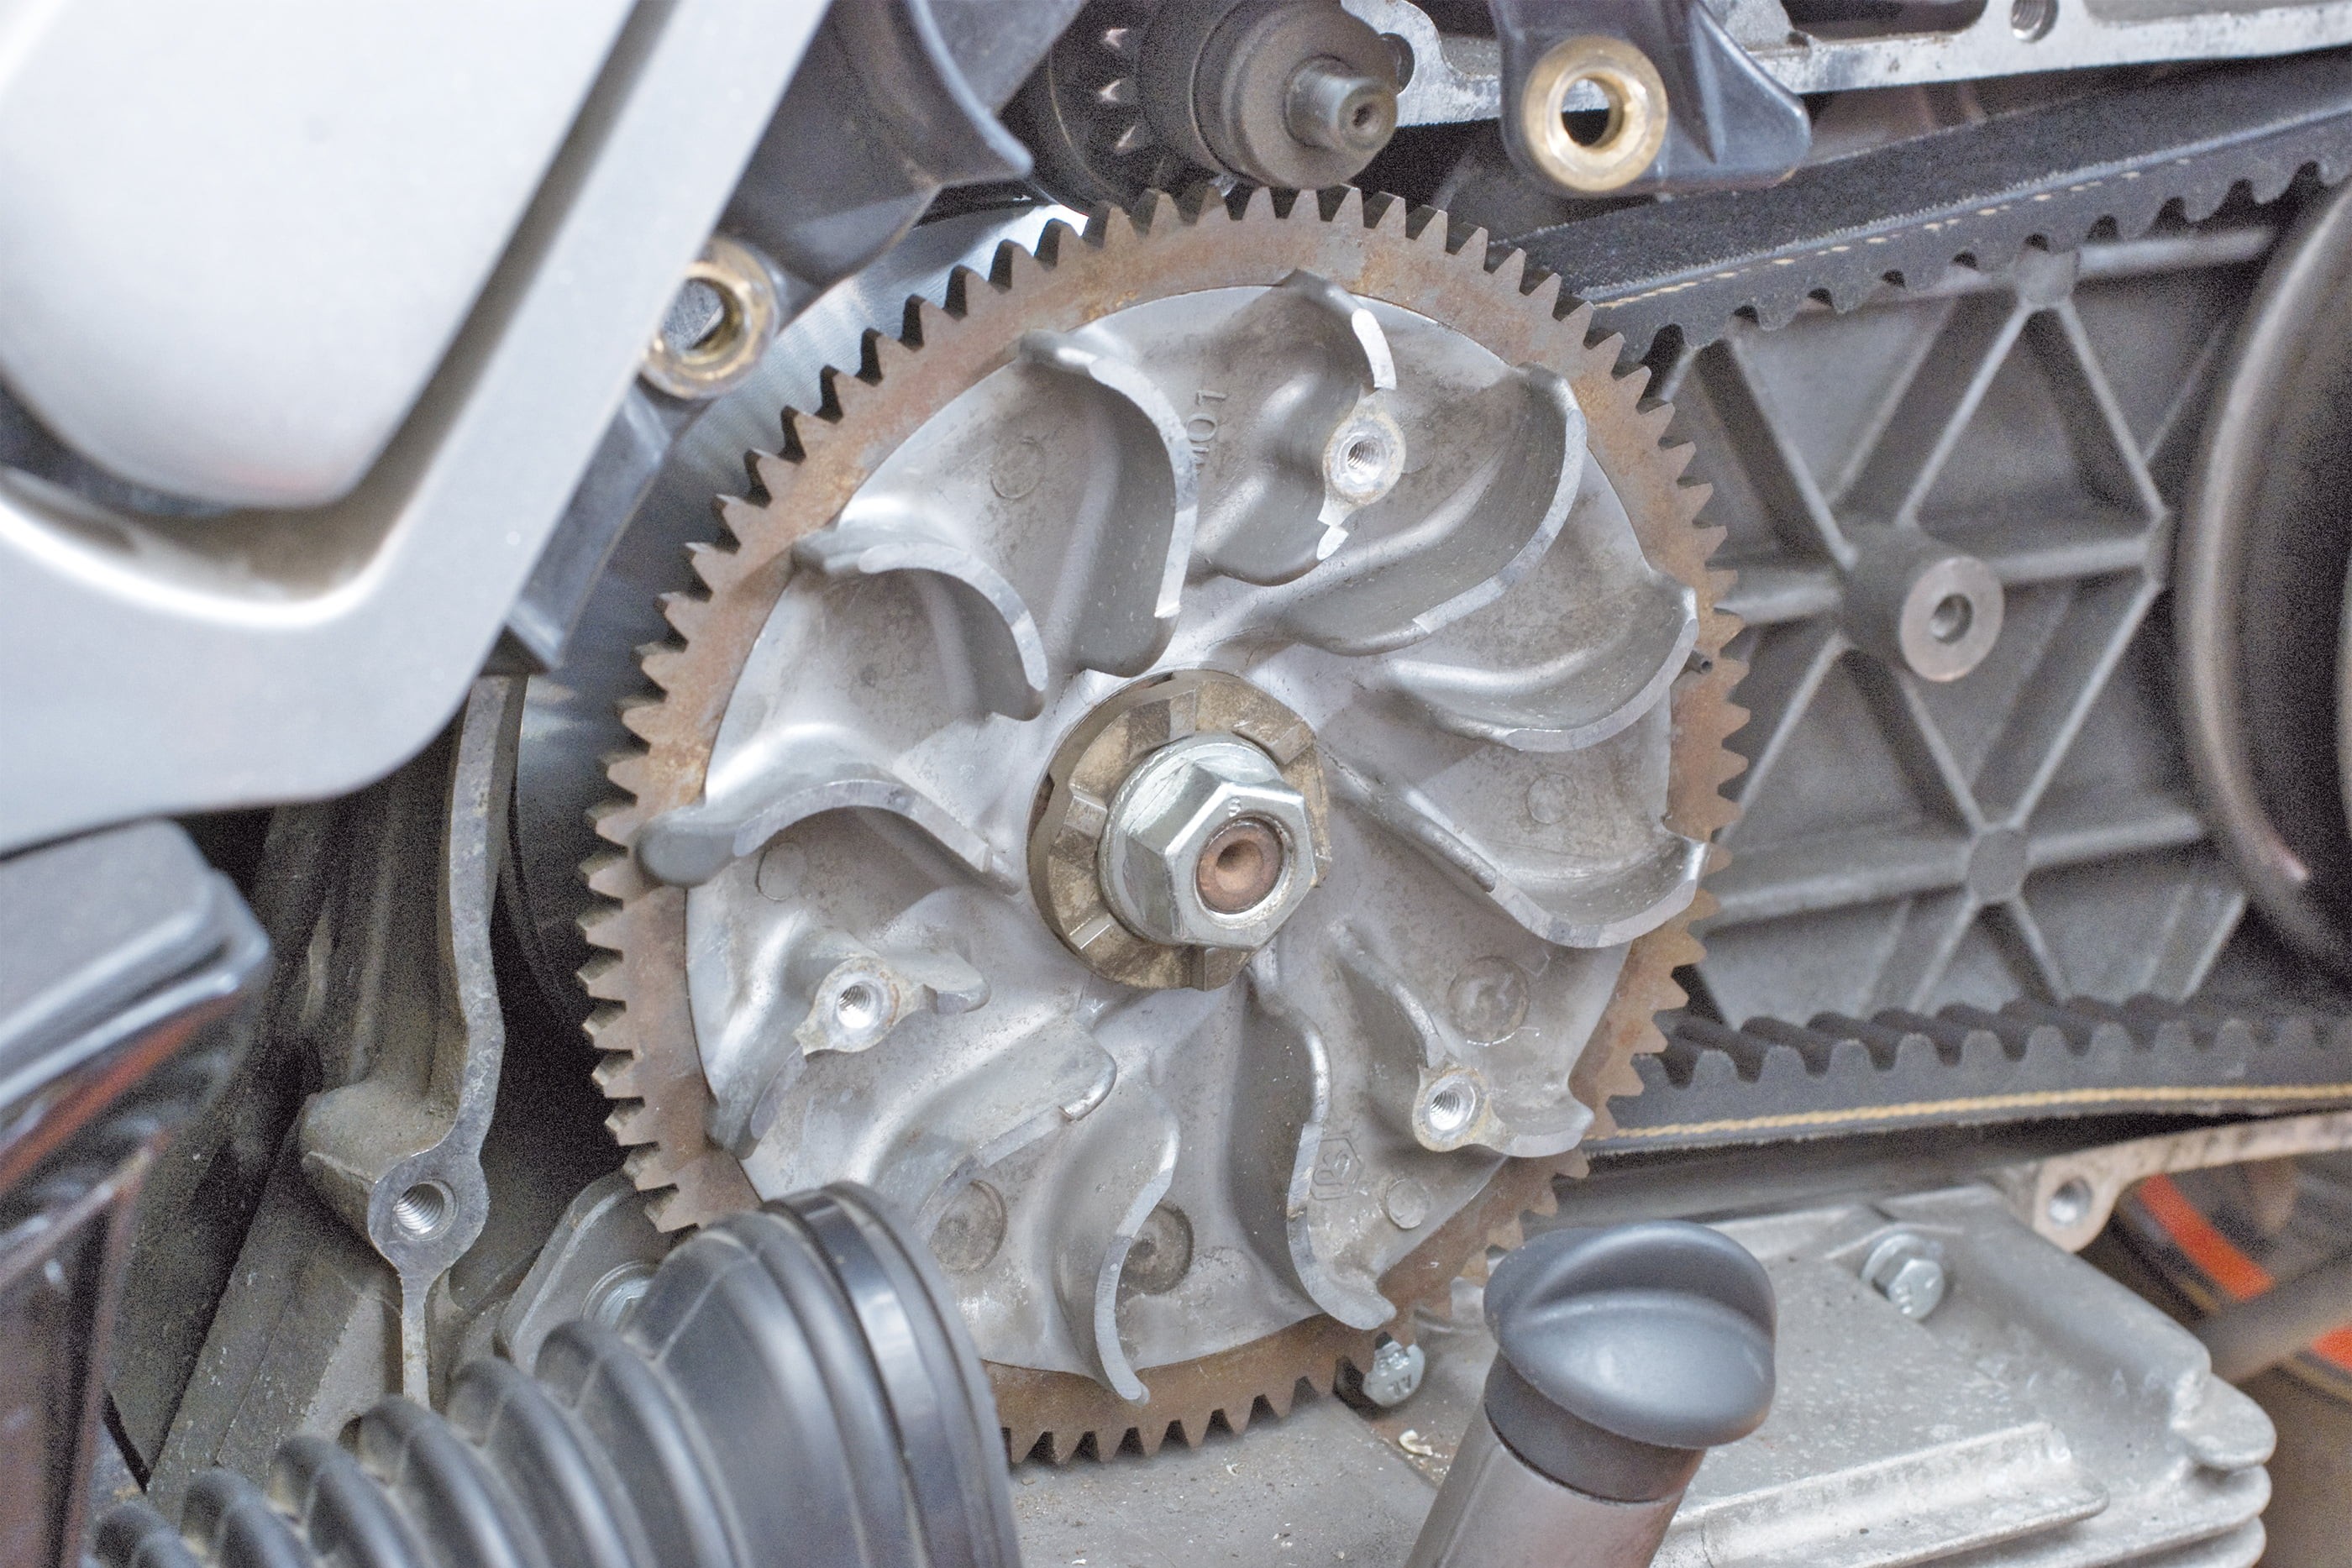
Step 12, Fig. 1: Put on all washers and the central nut …
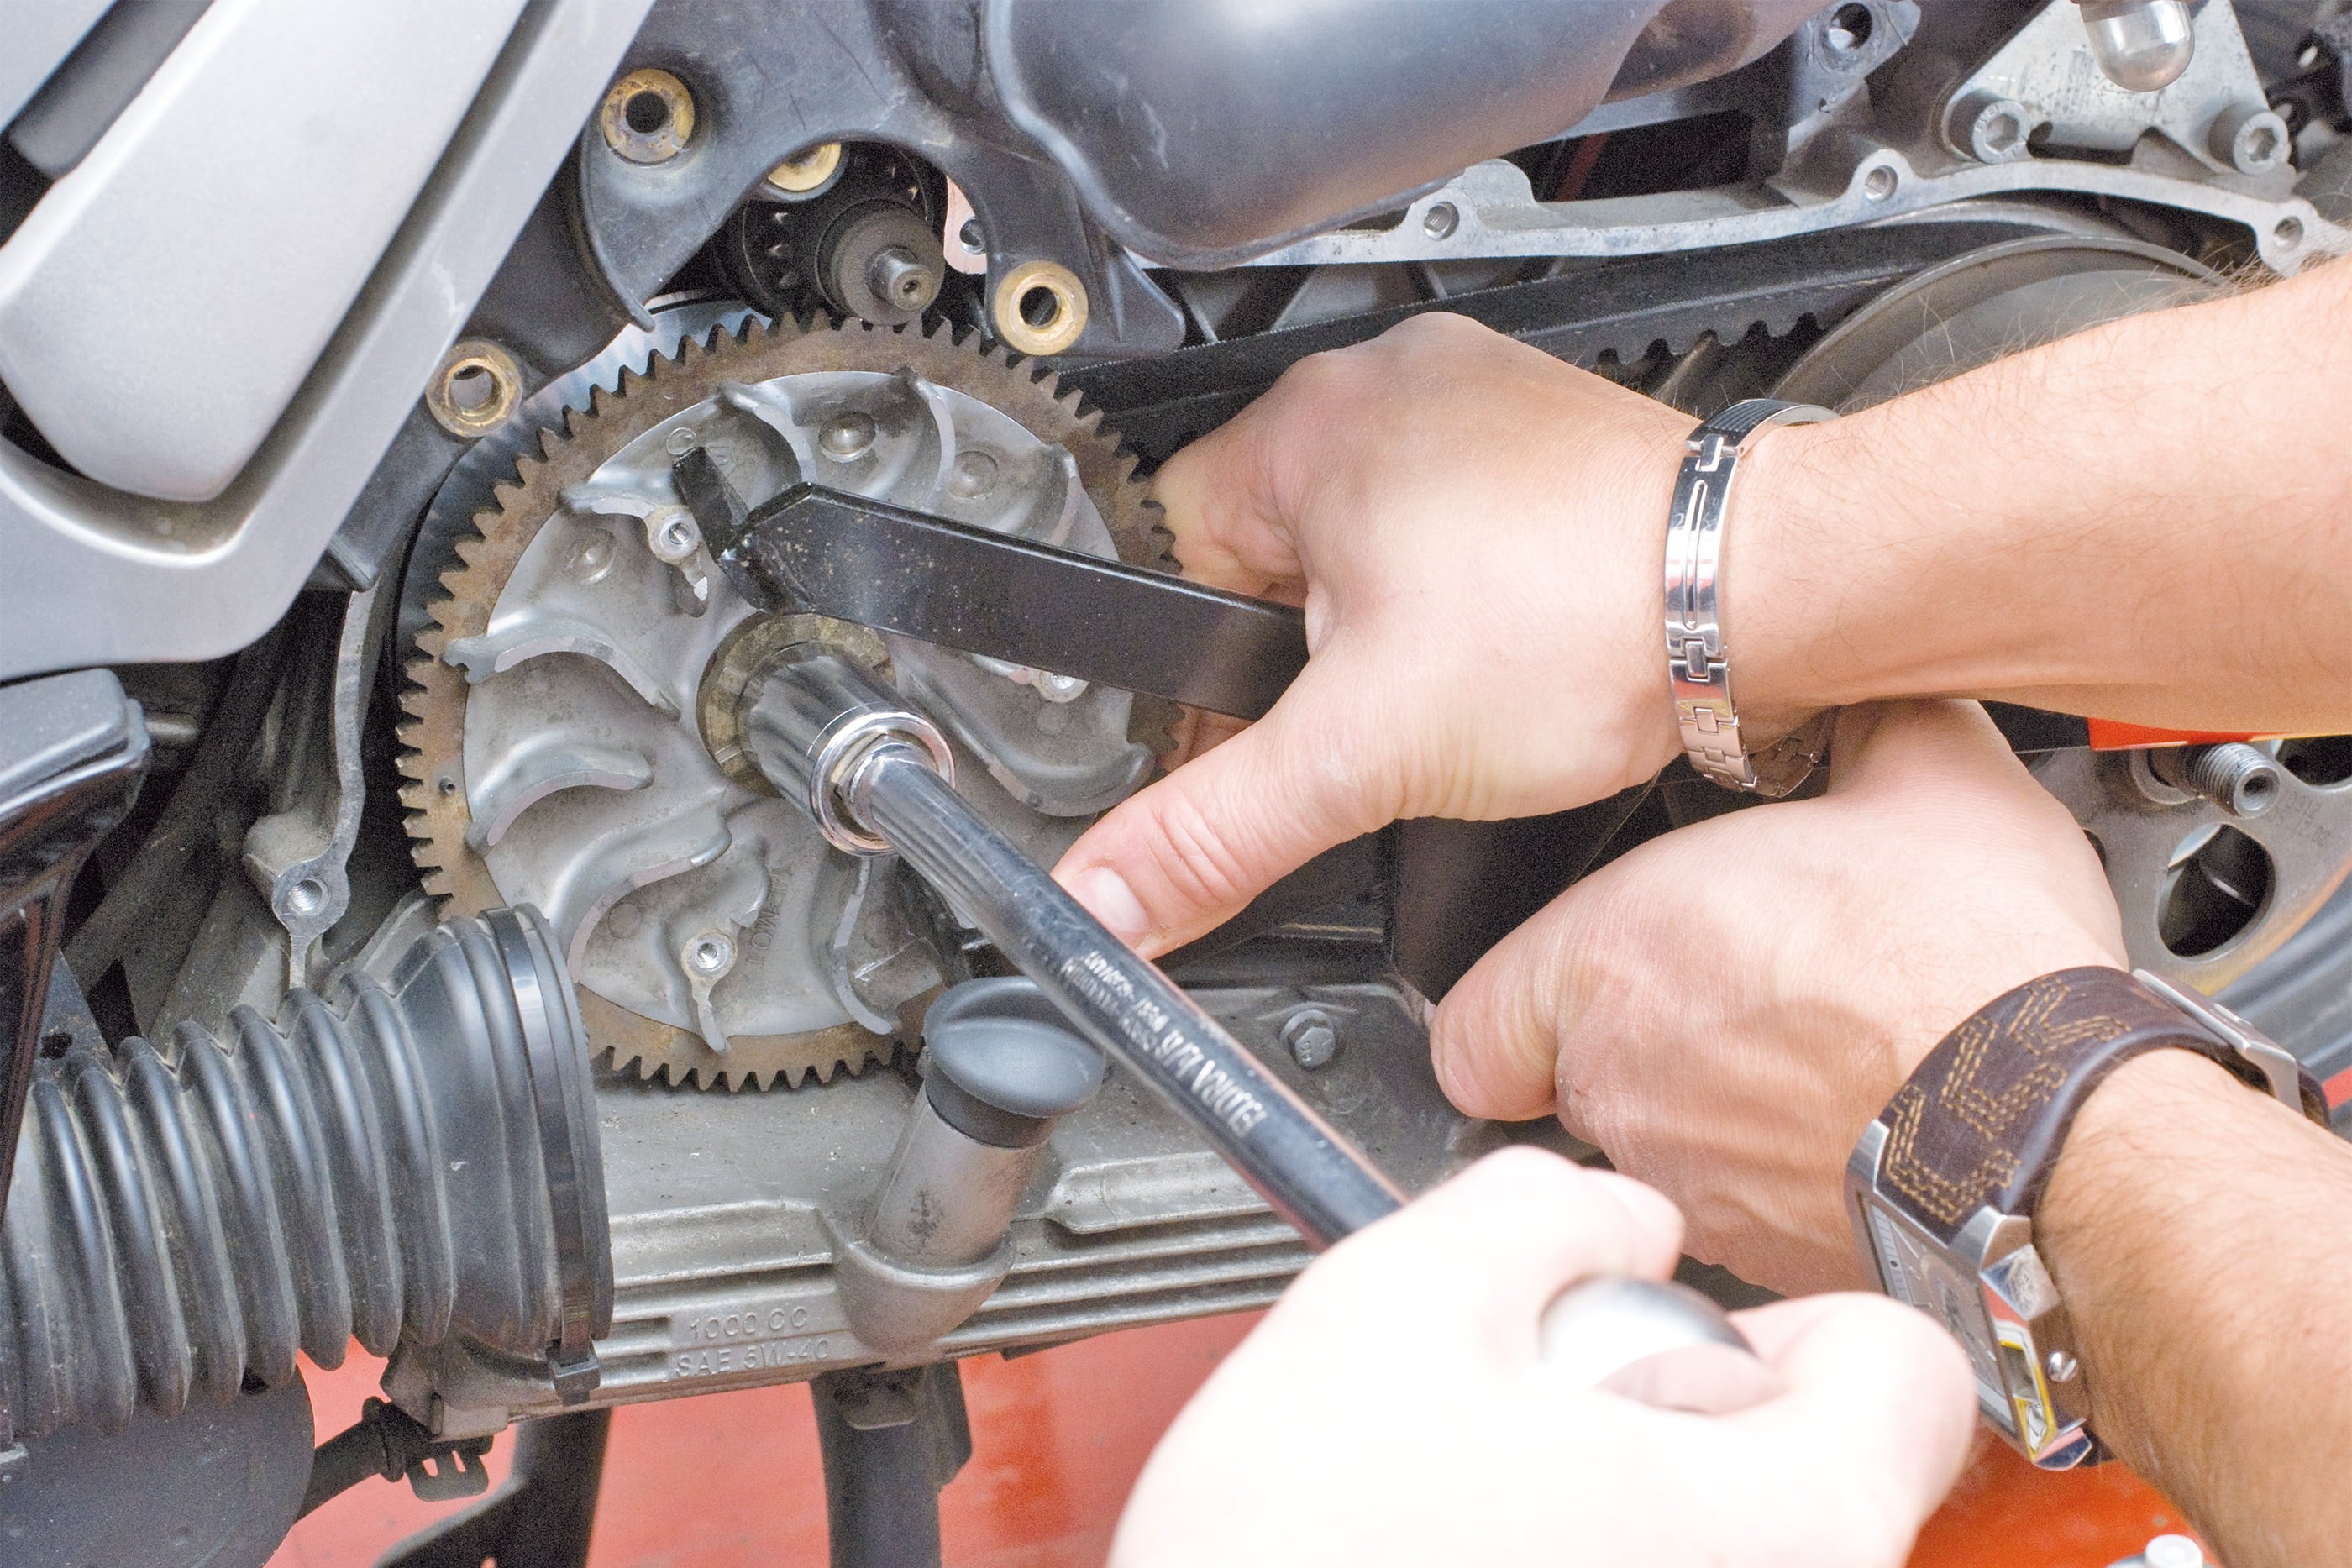
Step 12, Fig. 2: … and tighten nut. This may be a two-man job
12 – Put on all washers and the central nut
Before putting on the nut, double-check that all components are in their original position, and apply a little threadlock adhesive to the nut.
Use the locking tool again and a torque wrench to tighten and torque the nut in accordance with manufacturer specifications. If it makes it easier, get someone to hold the locking tool for you again while you work! Check again that the pulleys of the variator are running straight in relation to the sealing surface of the housing when you rotate the variator.
If they are wobbling, check that you have mounted everything correctly! Tauten the drive belt by pulling it slightly out from between the rear pulley halves.
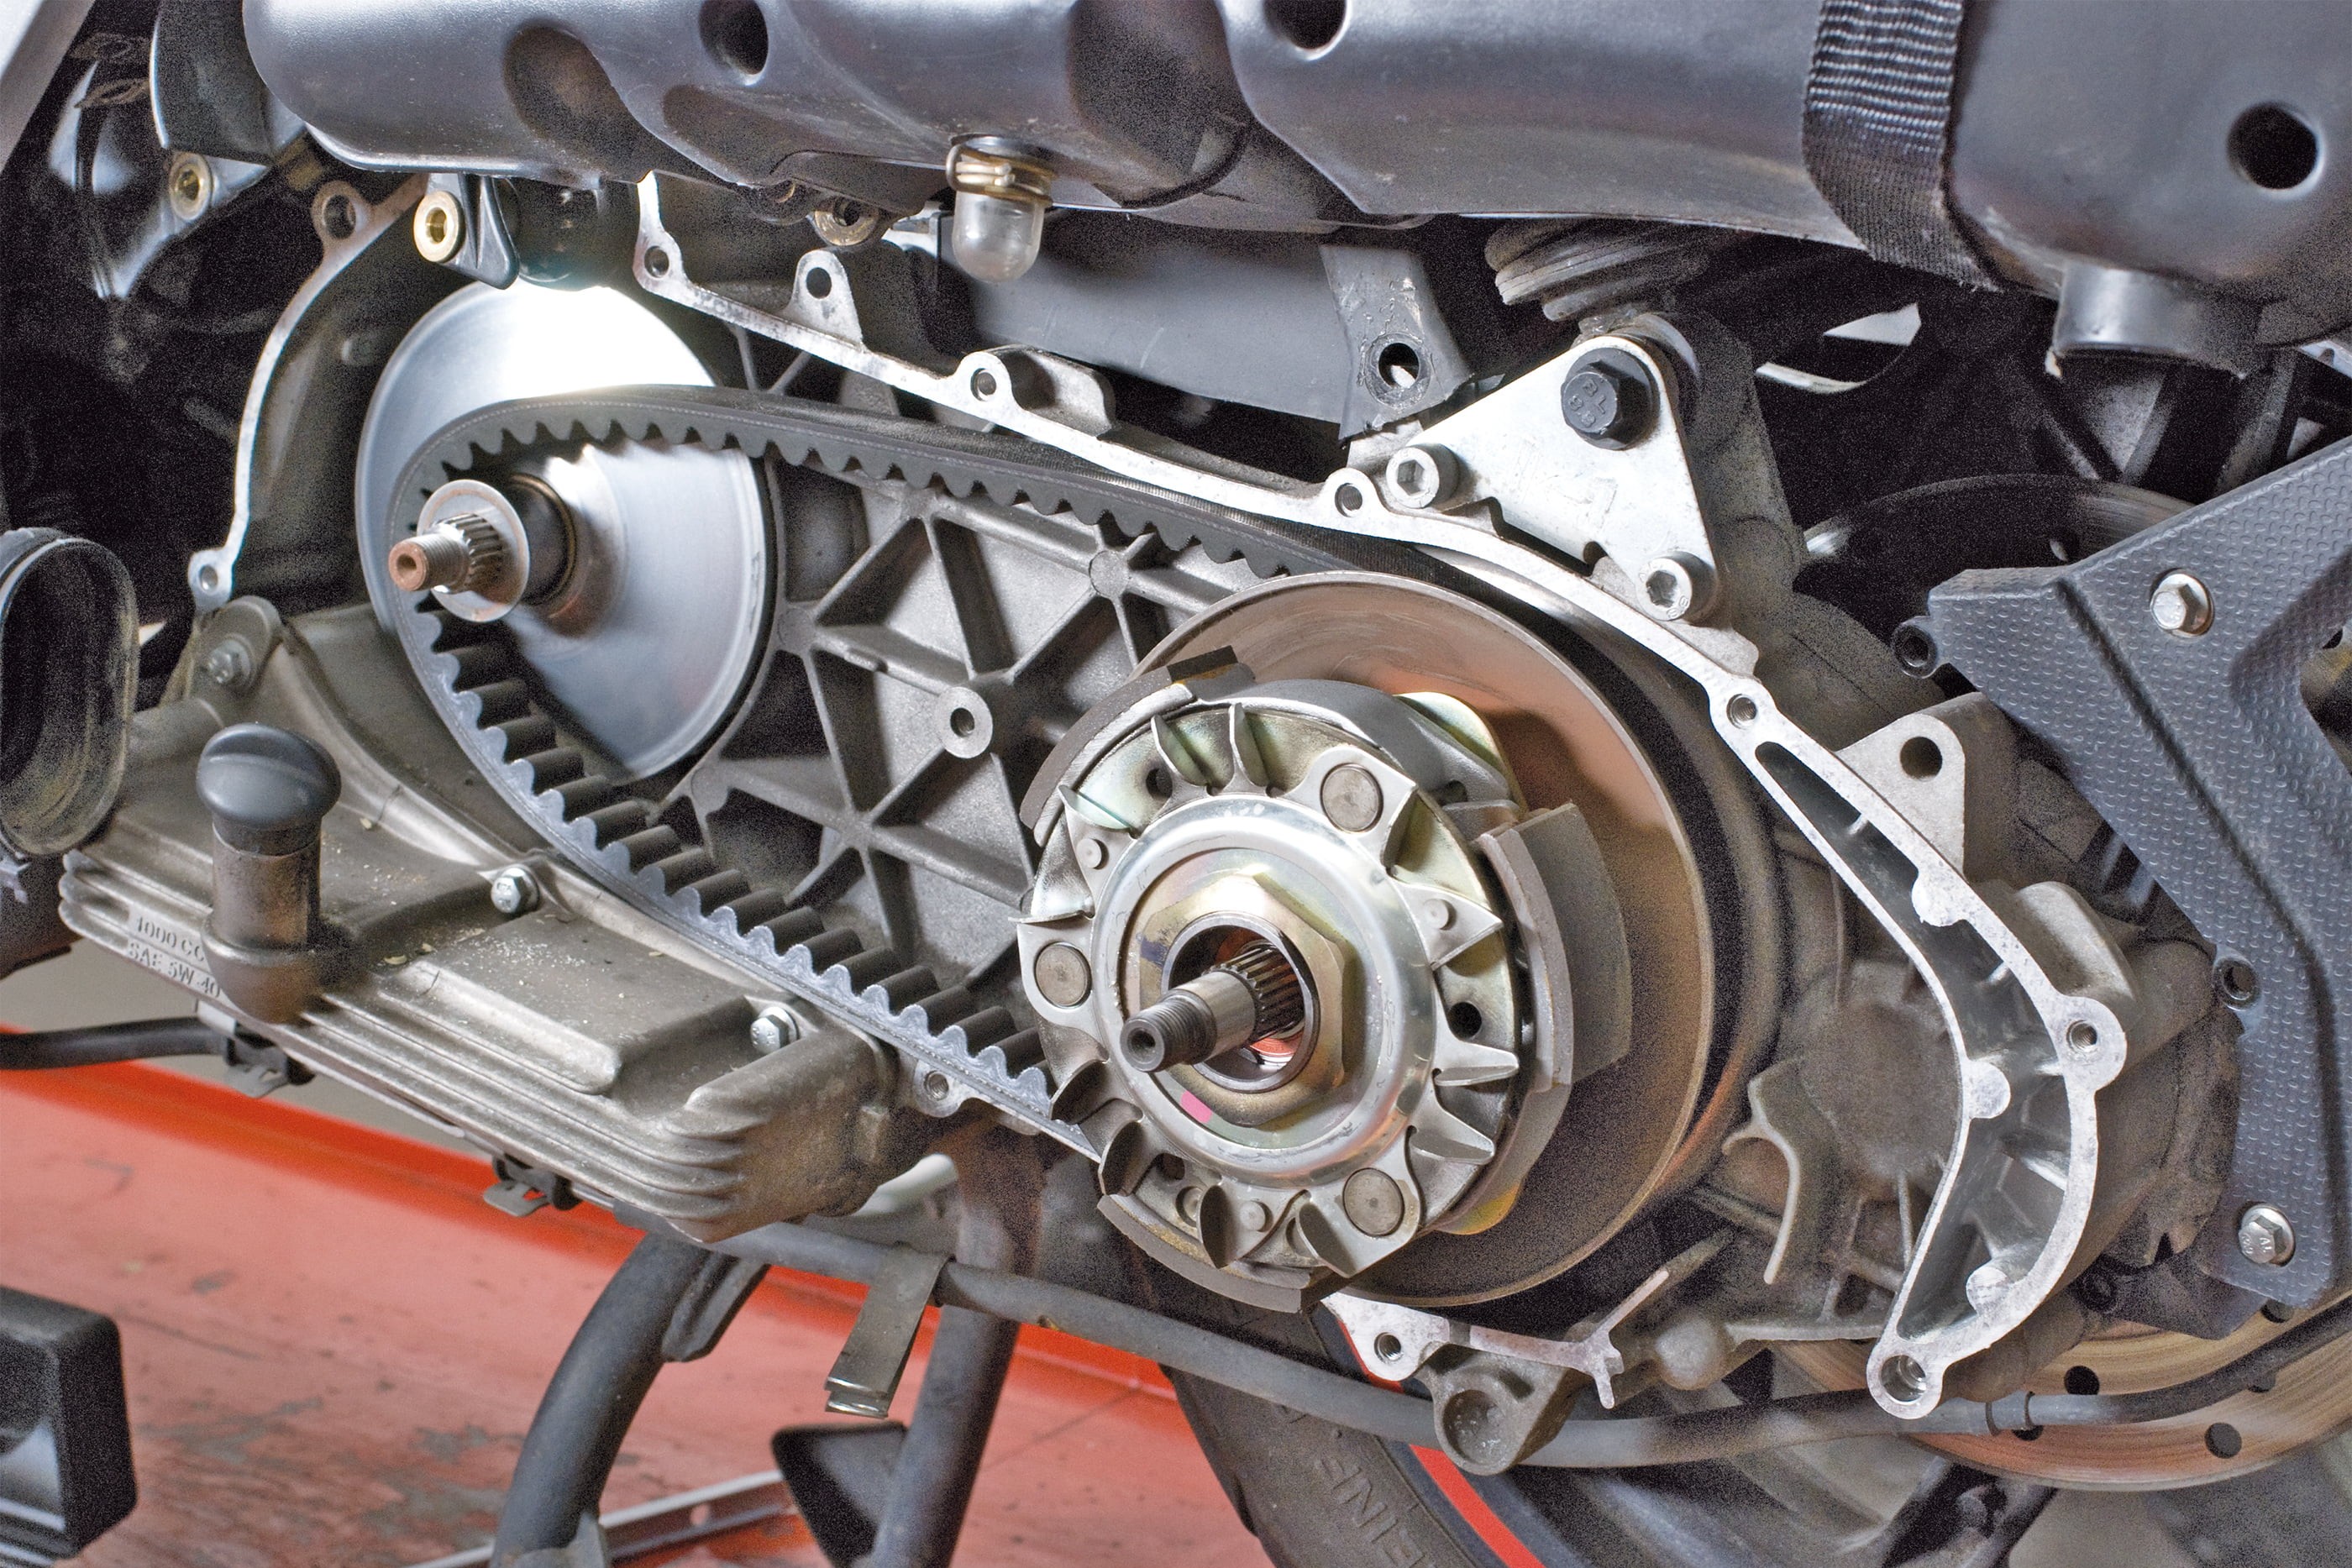
Step 13, Fig. 1: Check clutch linings (these look fine)
Inspecting and maintaining the clutch – now let's get started
13 – Removing the clutch
Remove the clutch bell housing from the shaft so that you can check its inner running surface and the linings of the centrifugal weights. Check with your local dealership about wear limits – linings that are less than 2 mm thick or have worn unevenly need to be replaced immediately.
You can check the clutch without having to remove the drive belt.
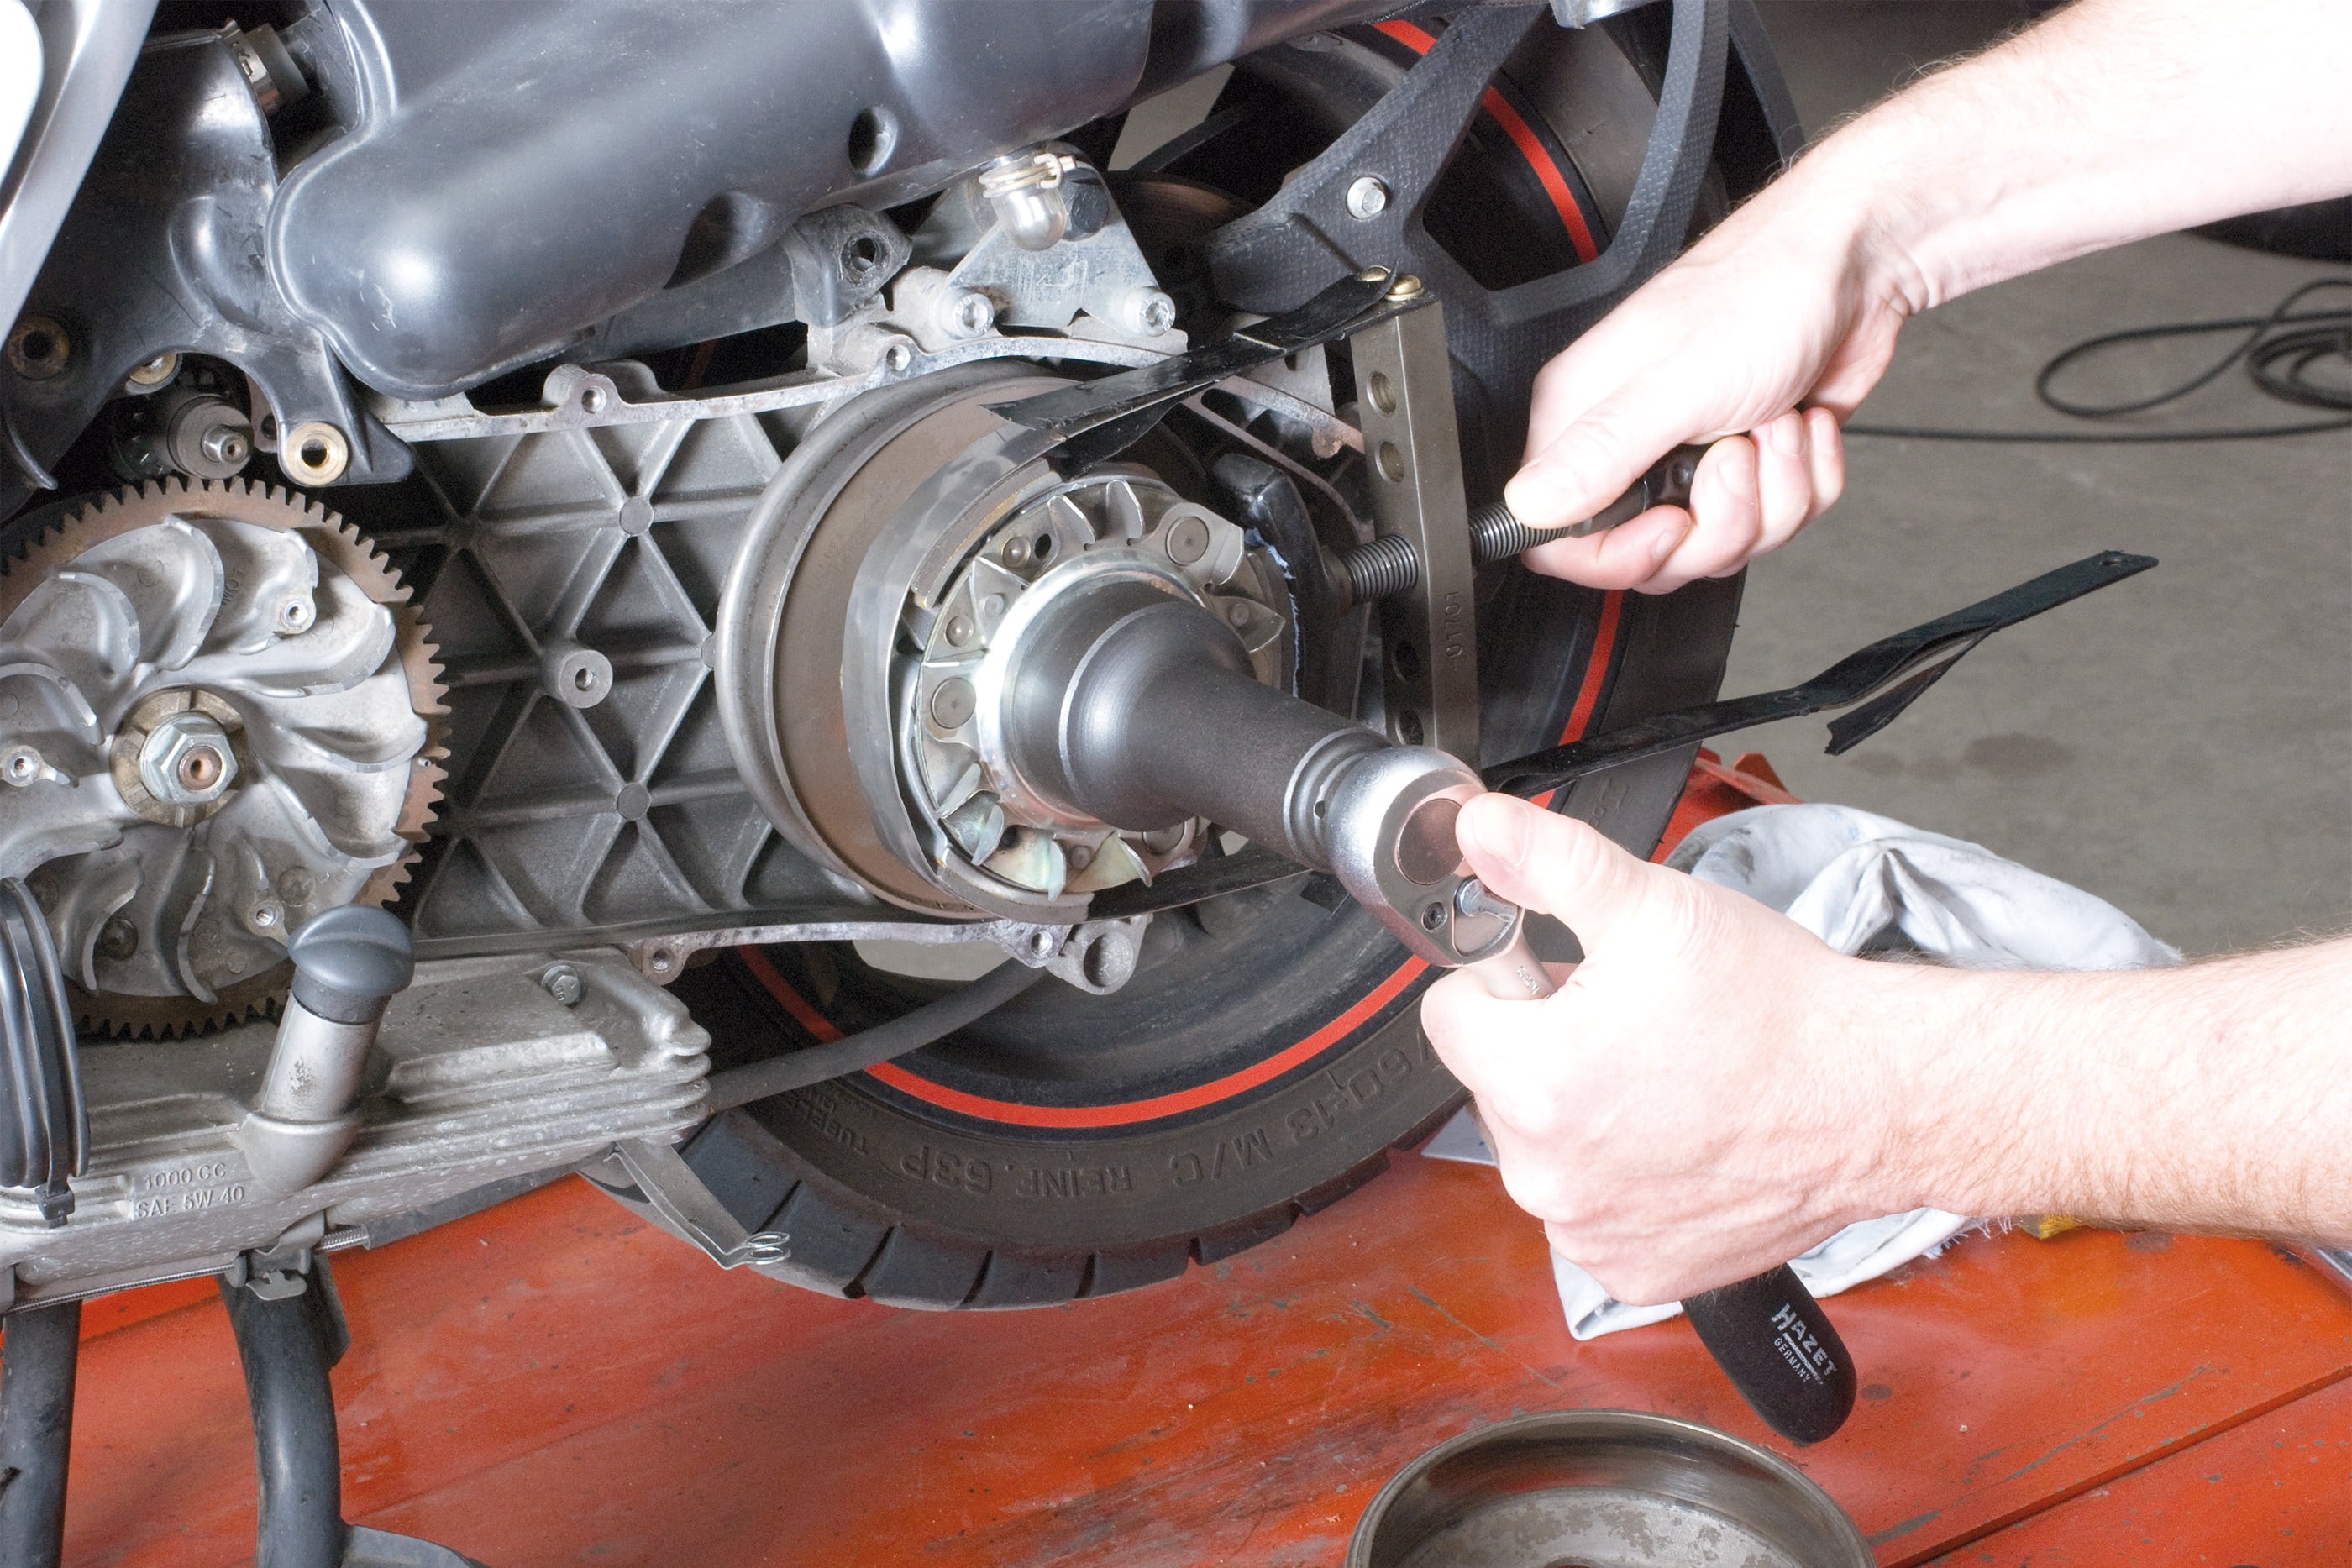
Step 13, Fig. 2: Undo the central nut, e.g. with a strap wrench/universal oil filter wrench
If you are changing the clutch linings and springs, it is better to pull the entire rear pulley unit, complete with clutch, off the shaft, as it has to be screwed on and this is made more difficult by a spring inside. To do this, first remove the drive belt. To undo the central nut on the shaft, hold the clutch bell housing firmly with a special tool that grips in the openings of the bell housing, or hold the exterior of the bell with a strap wrench. Once again, it may be helpful to get someone to hold the gripping tool in place while you undo the lock nut.
If the nut is located on the outside, you can undo it before removing the variator cover – in which case, you will already have carried out this step, as in our example. When you have unscrewed the nut, remove the clutch bell housing and, as mentioned in the previous section, check for signs of wear and tear (grooves). If the clutch linings are worn or the springs of the centrifugal weights have become stretched, you will need to pull the pulley unit, complete with clutch, off the shaft, as described in the previous section. This unit is held together by a large central nut.
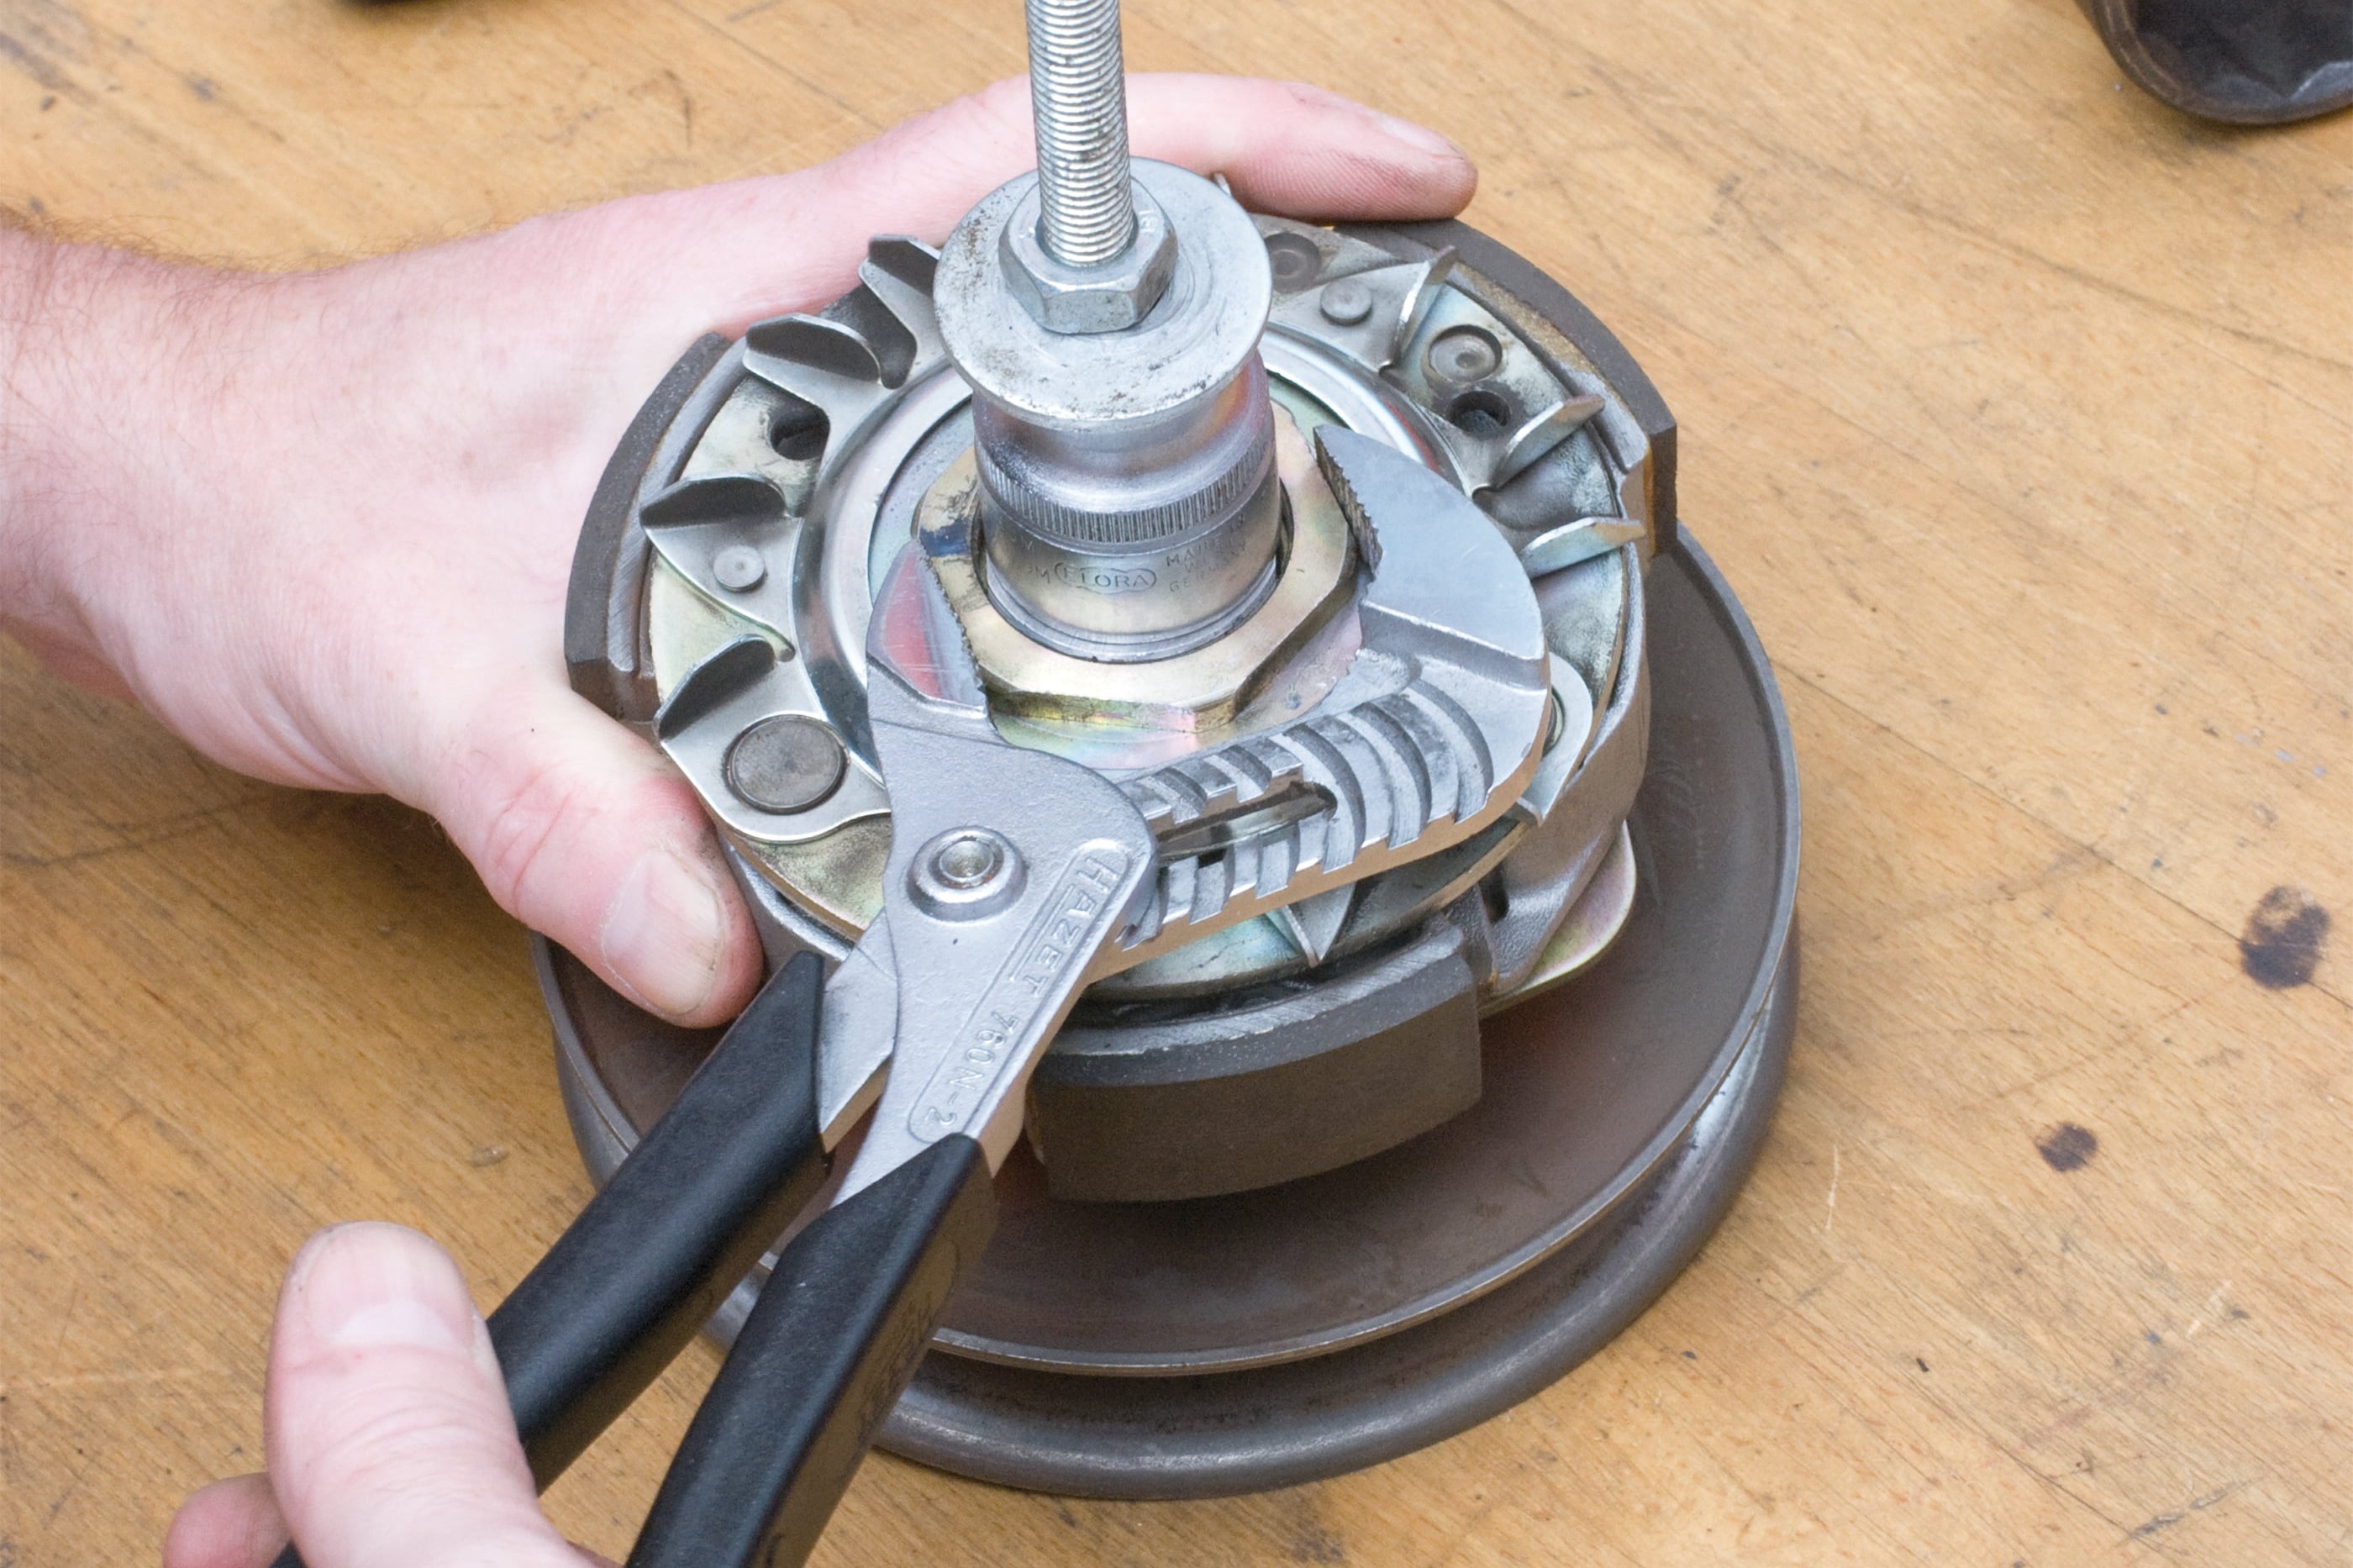
To loosen this nut, grip the clutch with a suitable tool, such as a metal strap wrench, and use a special wrench of the correct size to loosen the nut – water pump pliers are not suitable!
TIP! You can create a spindle with a threaded rod
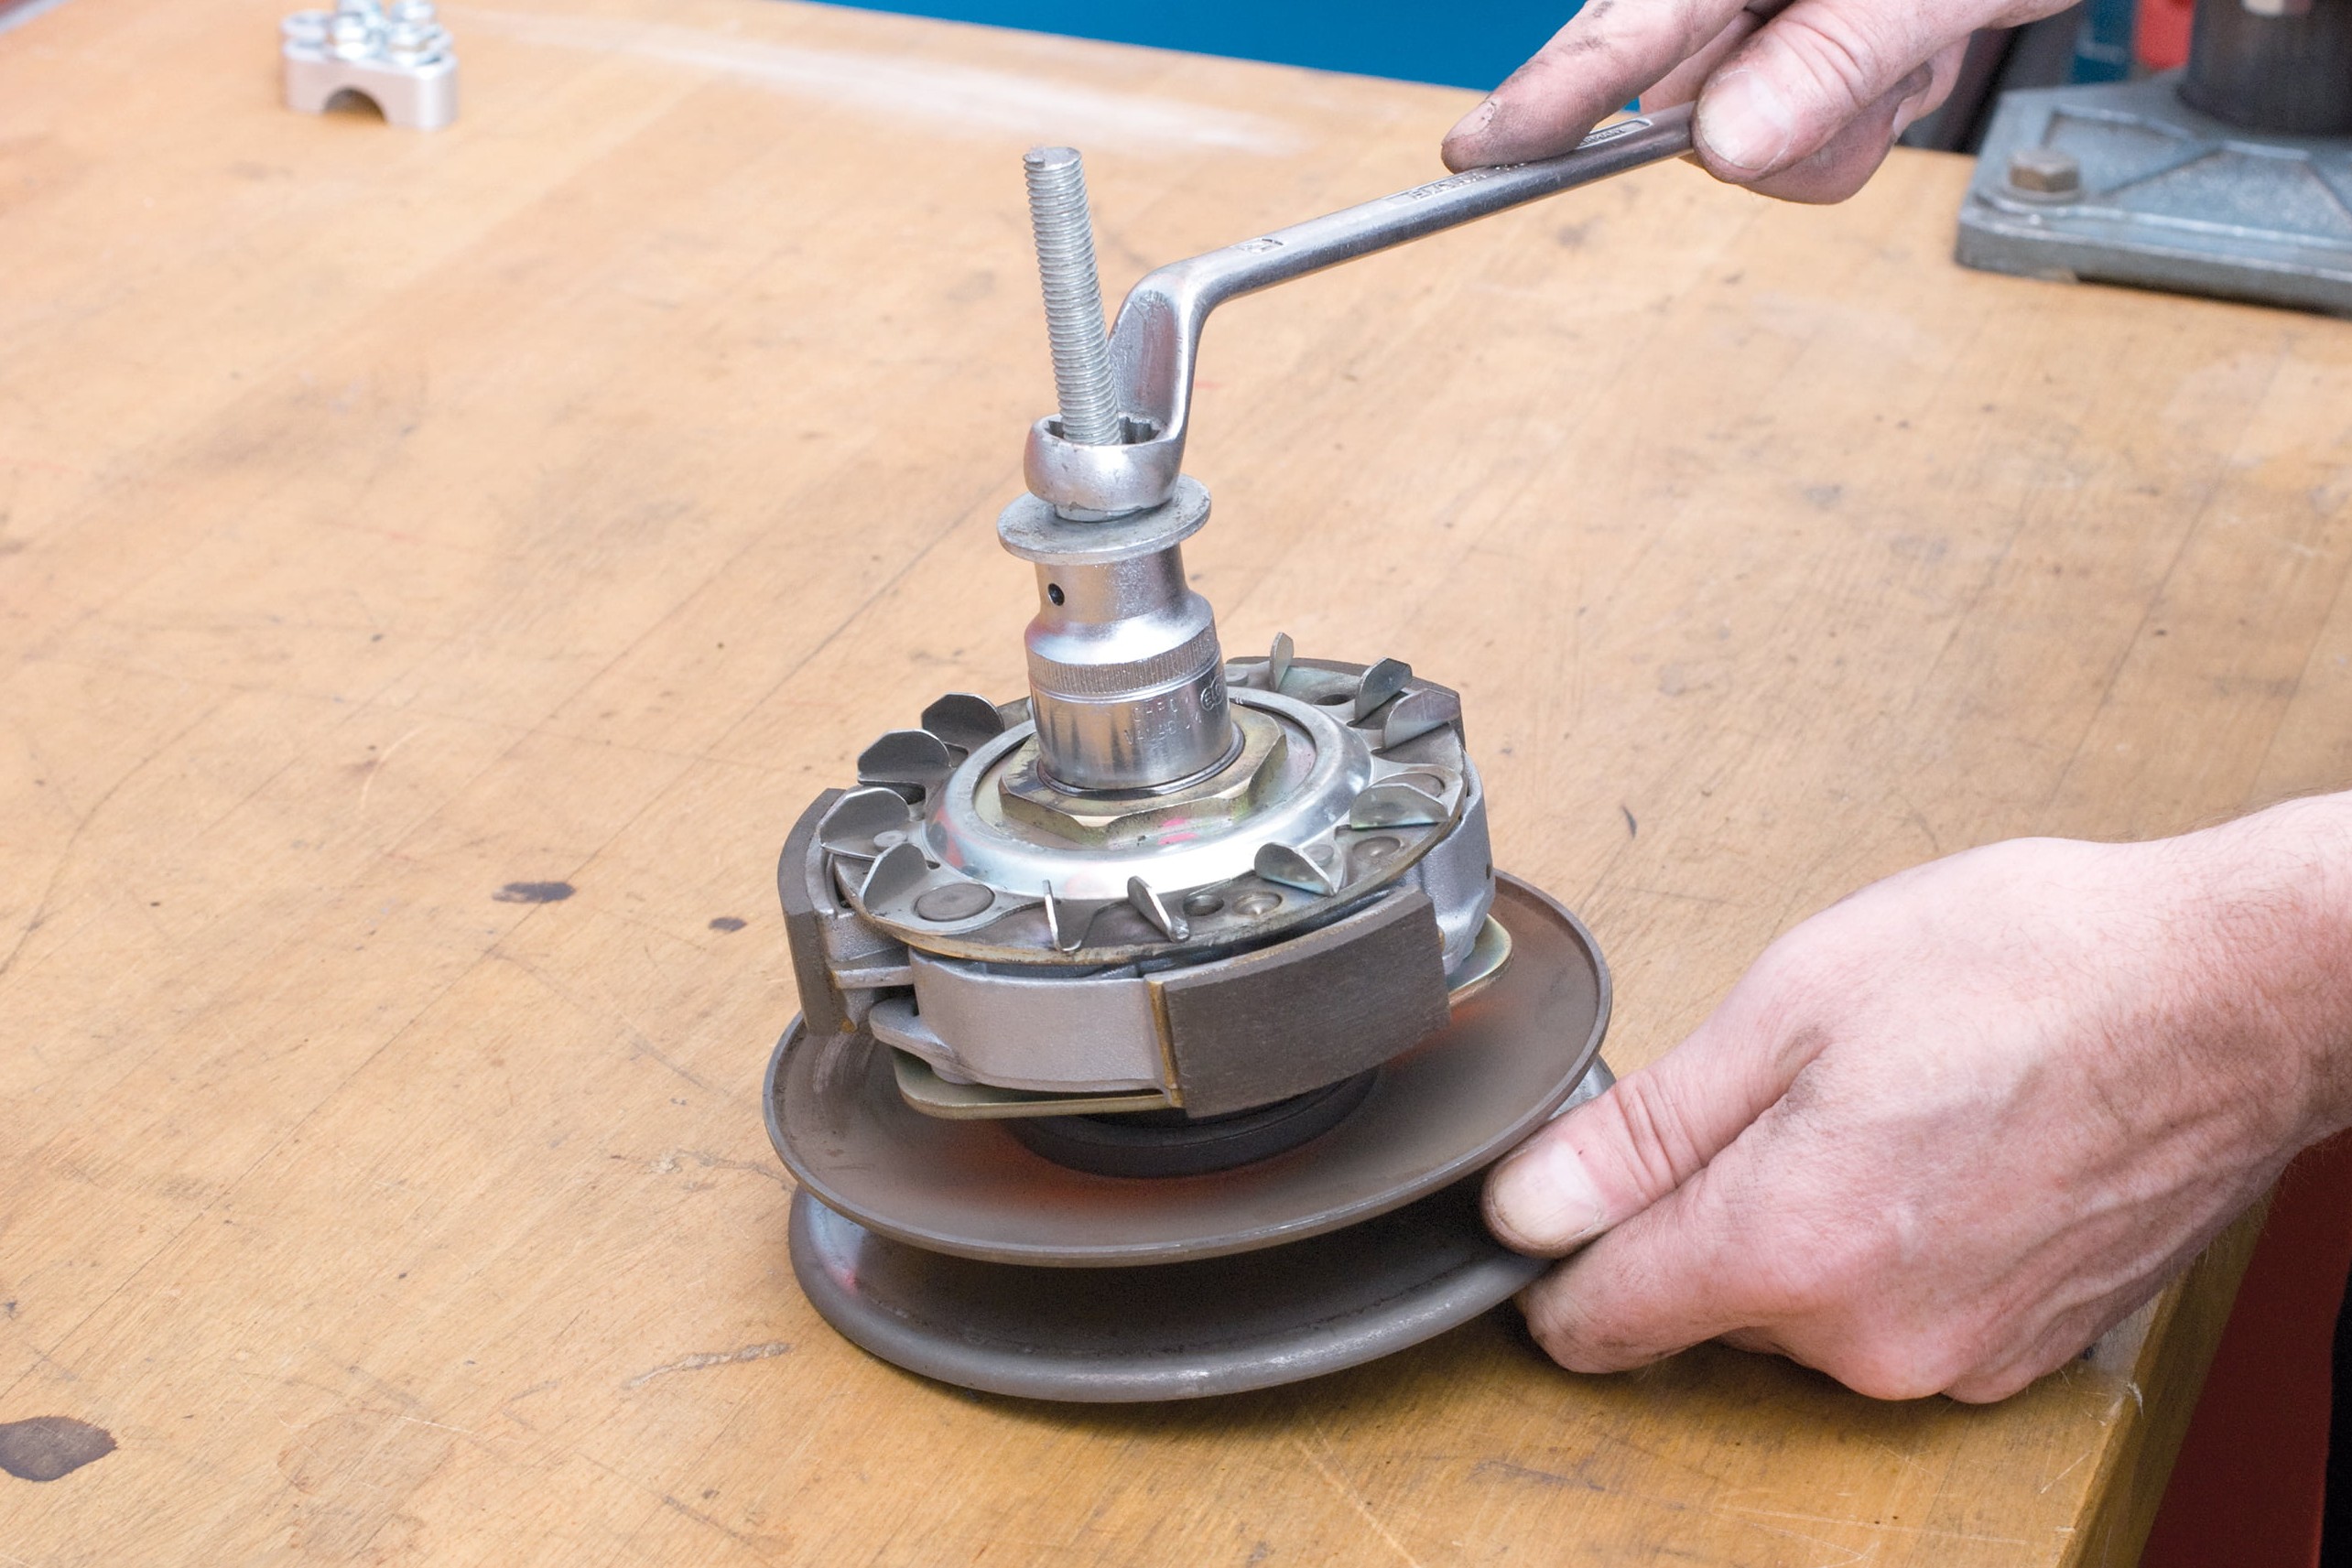
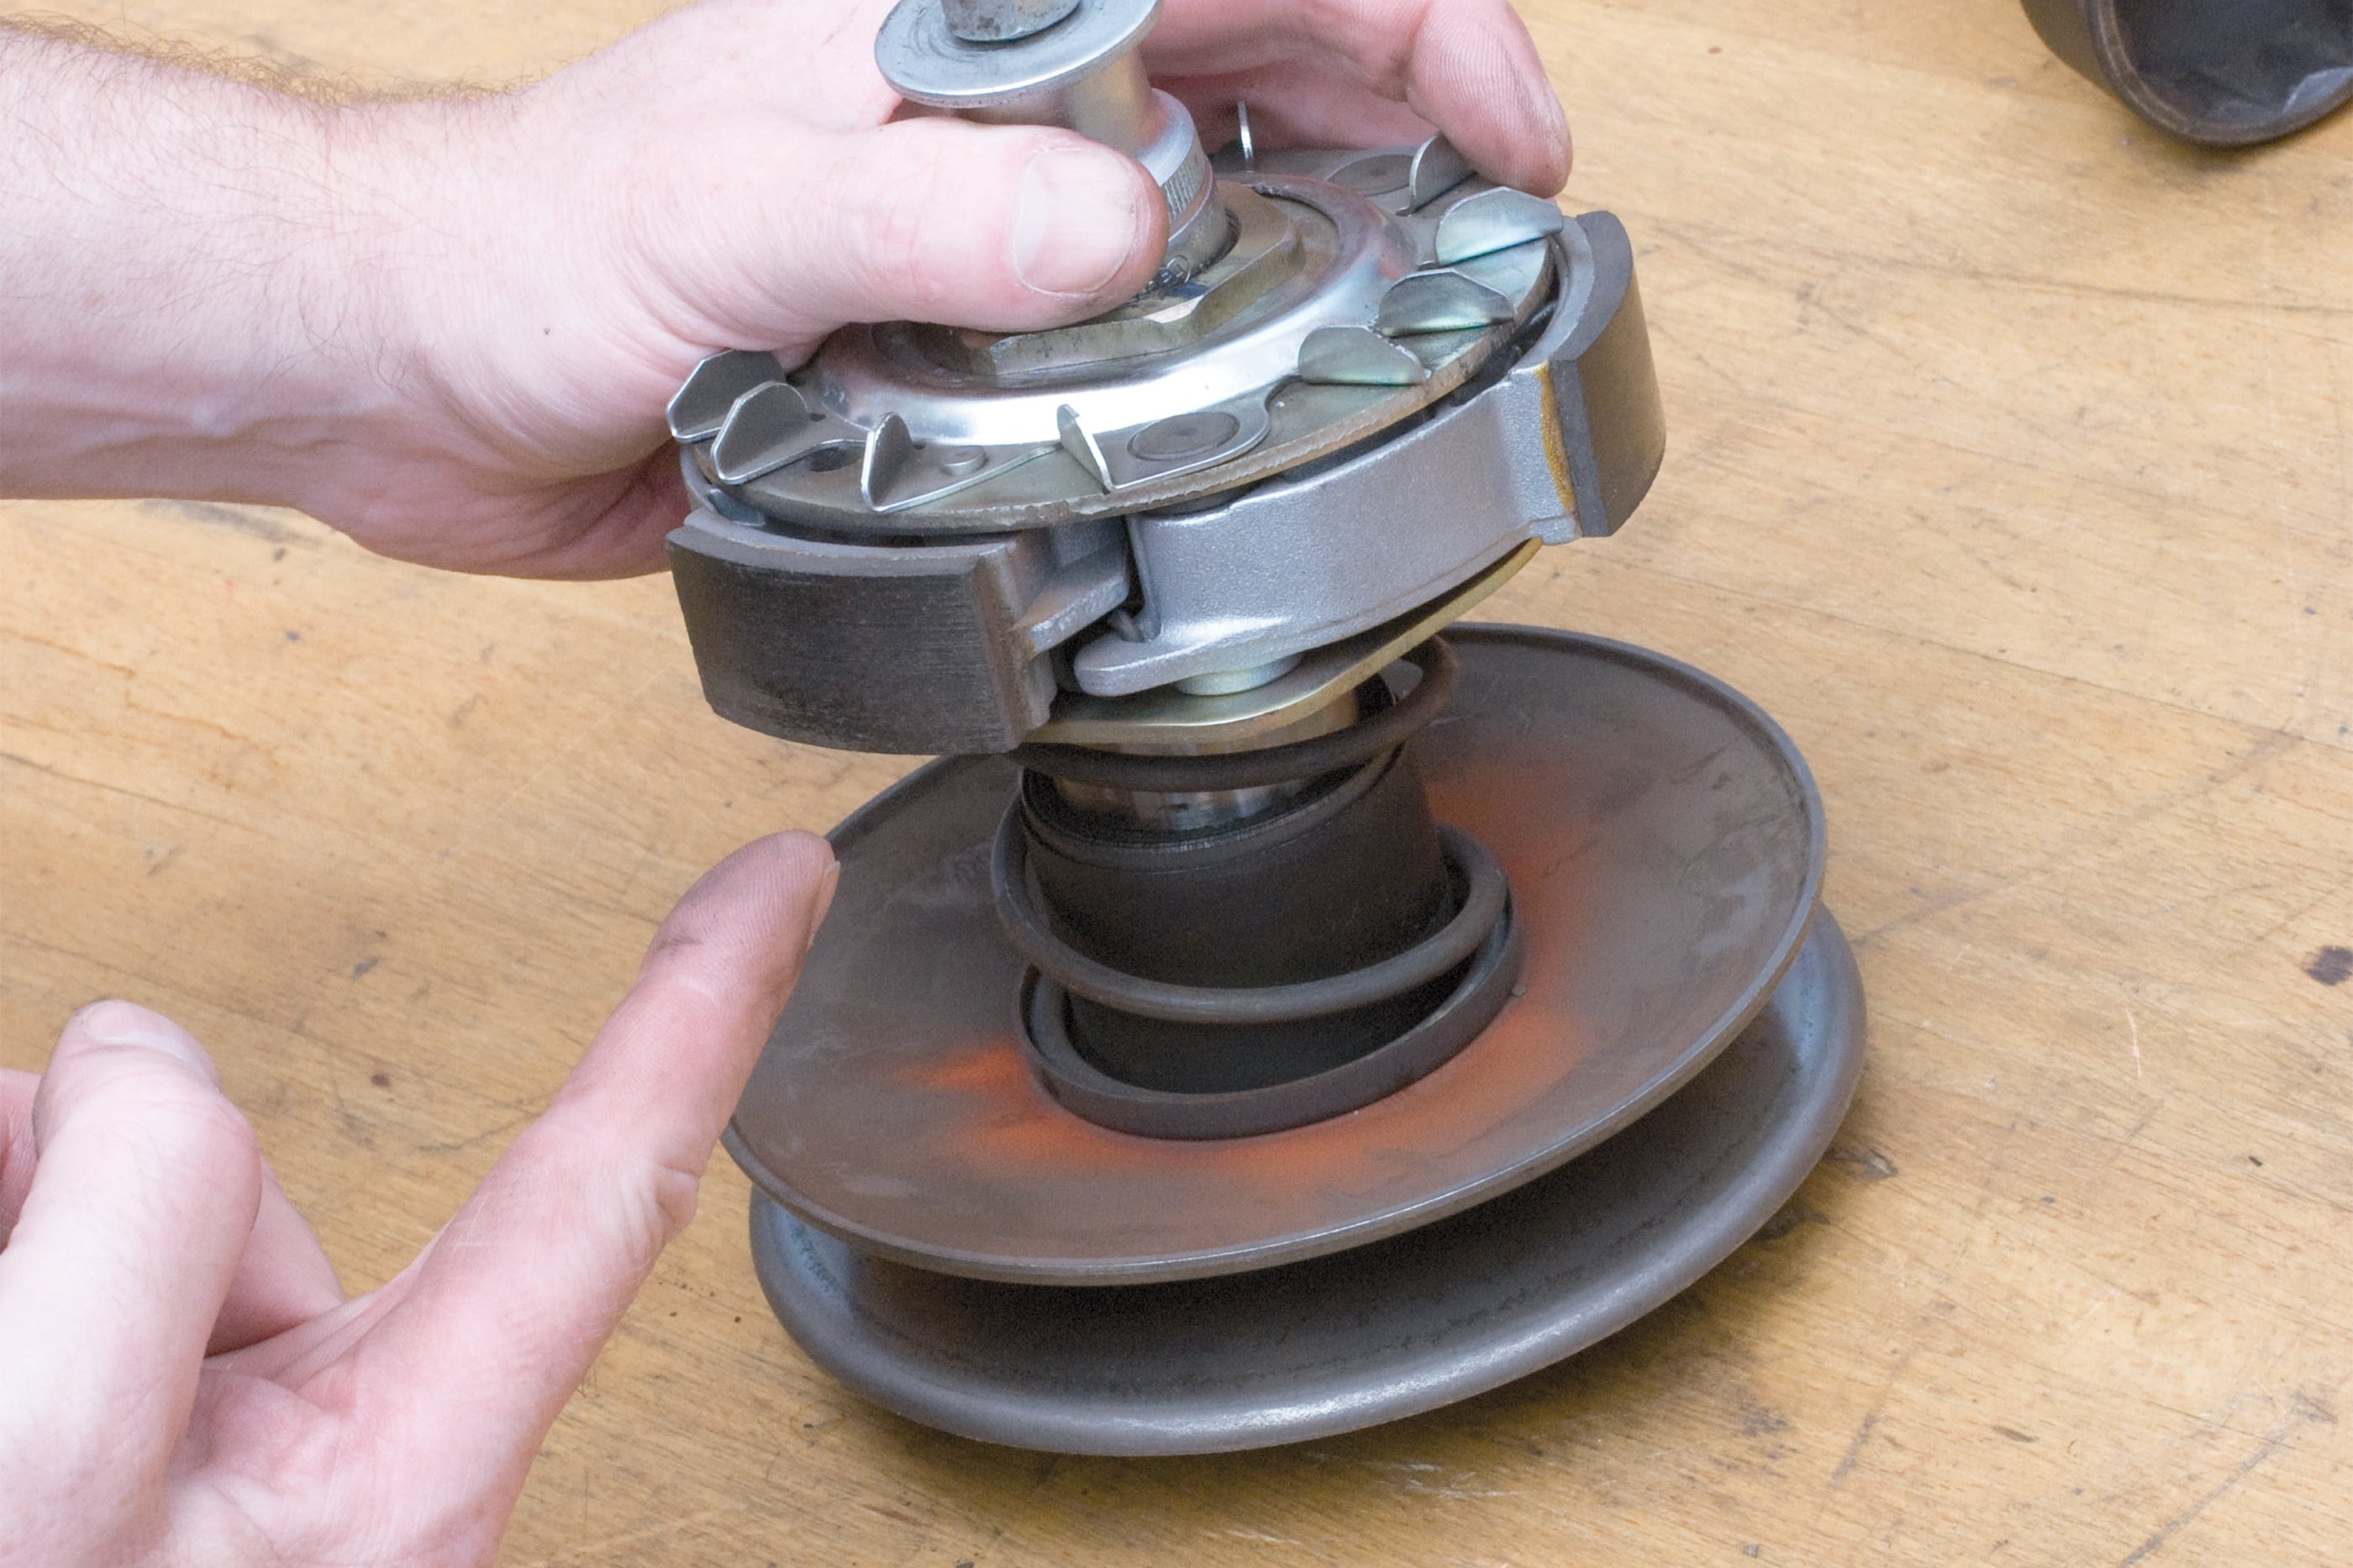
Because the pulley halves are pressed together by an inner contra spring, the unit will jump apart when you loosen the nut – so bear this in mind and press against the unit in order to remove the nut gradually from the shaft.
Be aware that if your scooter's engine is bigger than 100cc, the spring tension is quite strong. In order to hold down the spring, we strongly recommend holding all the components together from the outside using a spindle, and gradually slackening off after you have removed the nut.
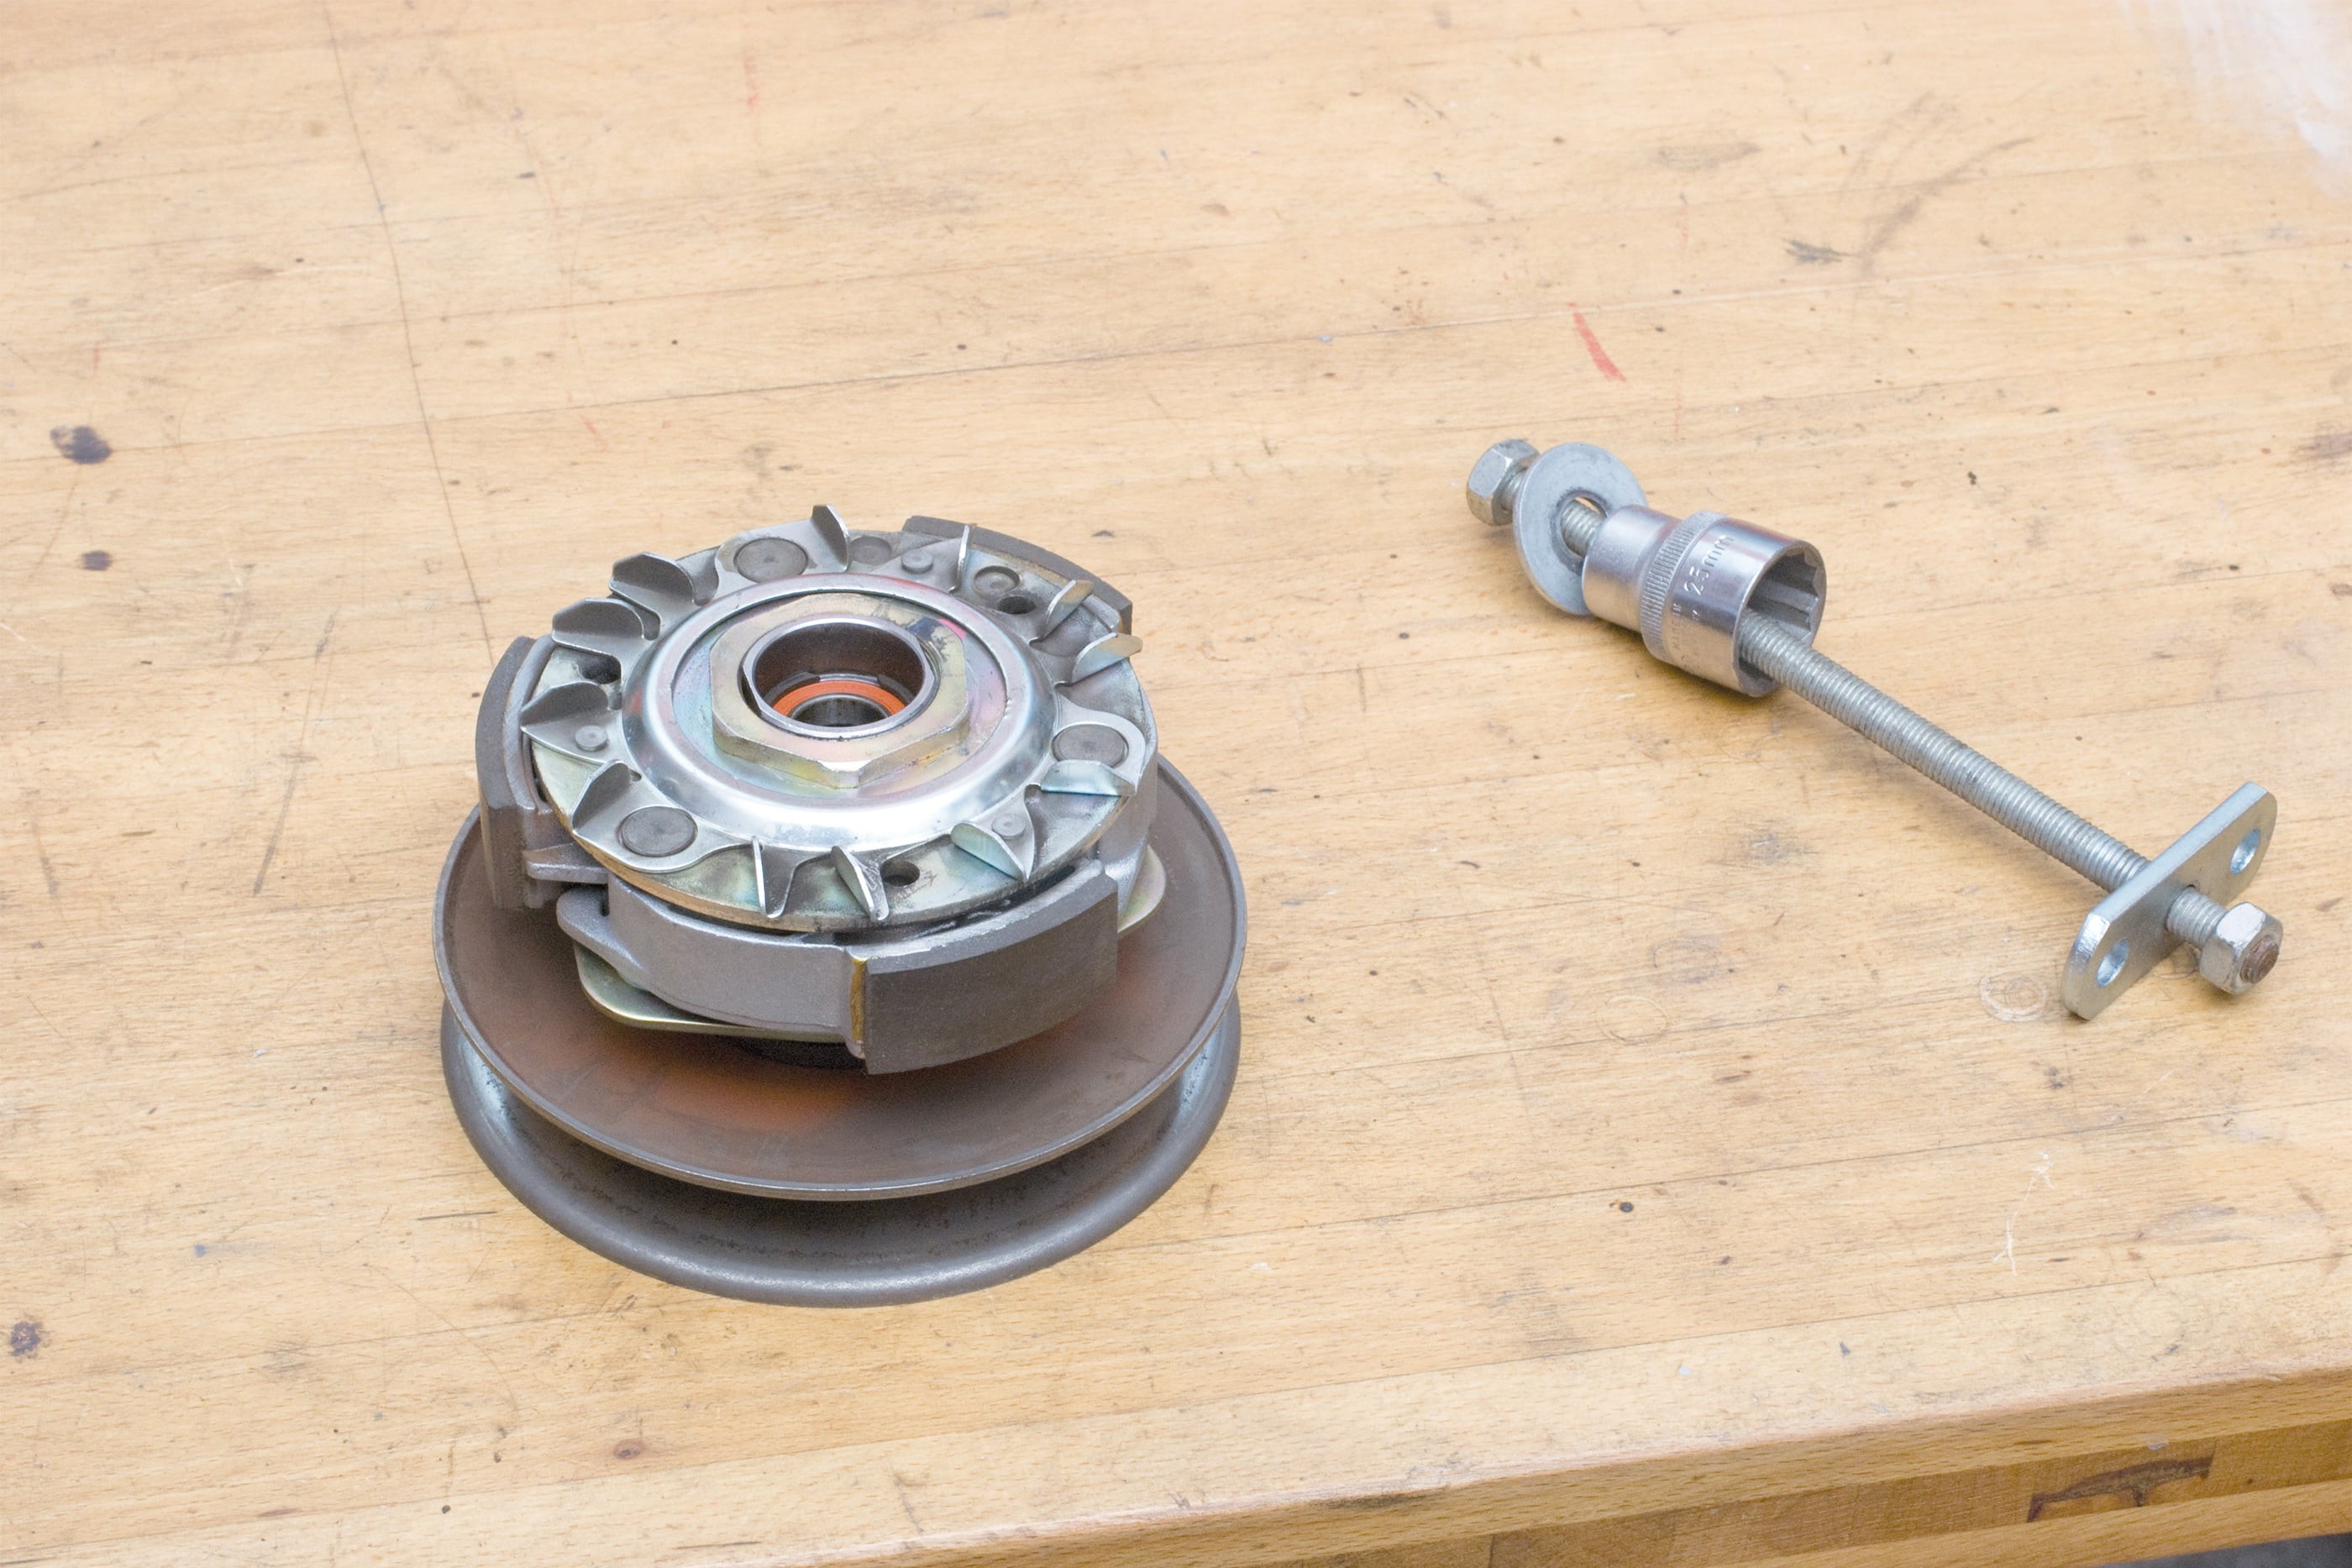
You can create a spindle with a threaded rod →
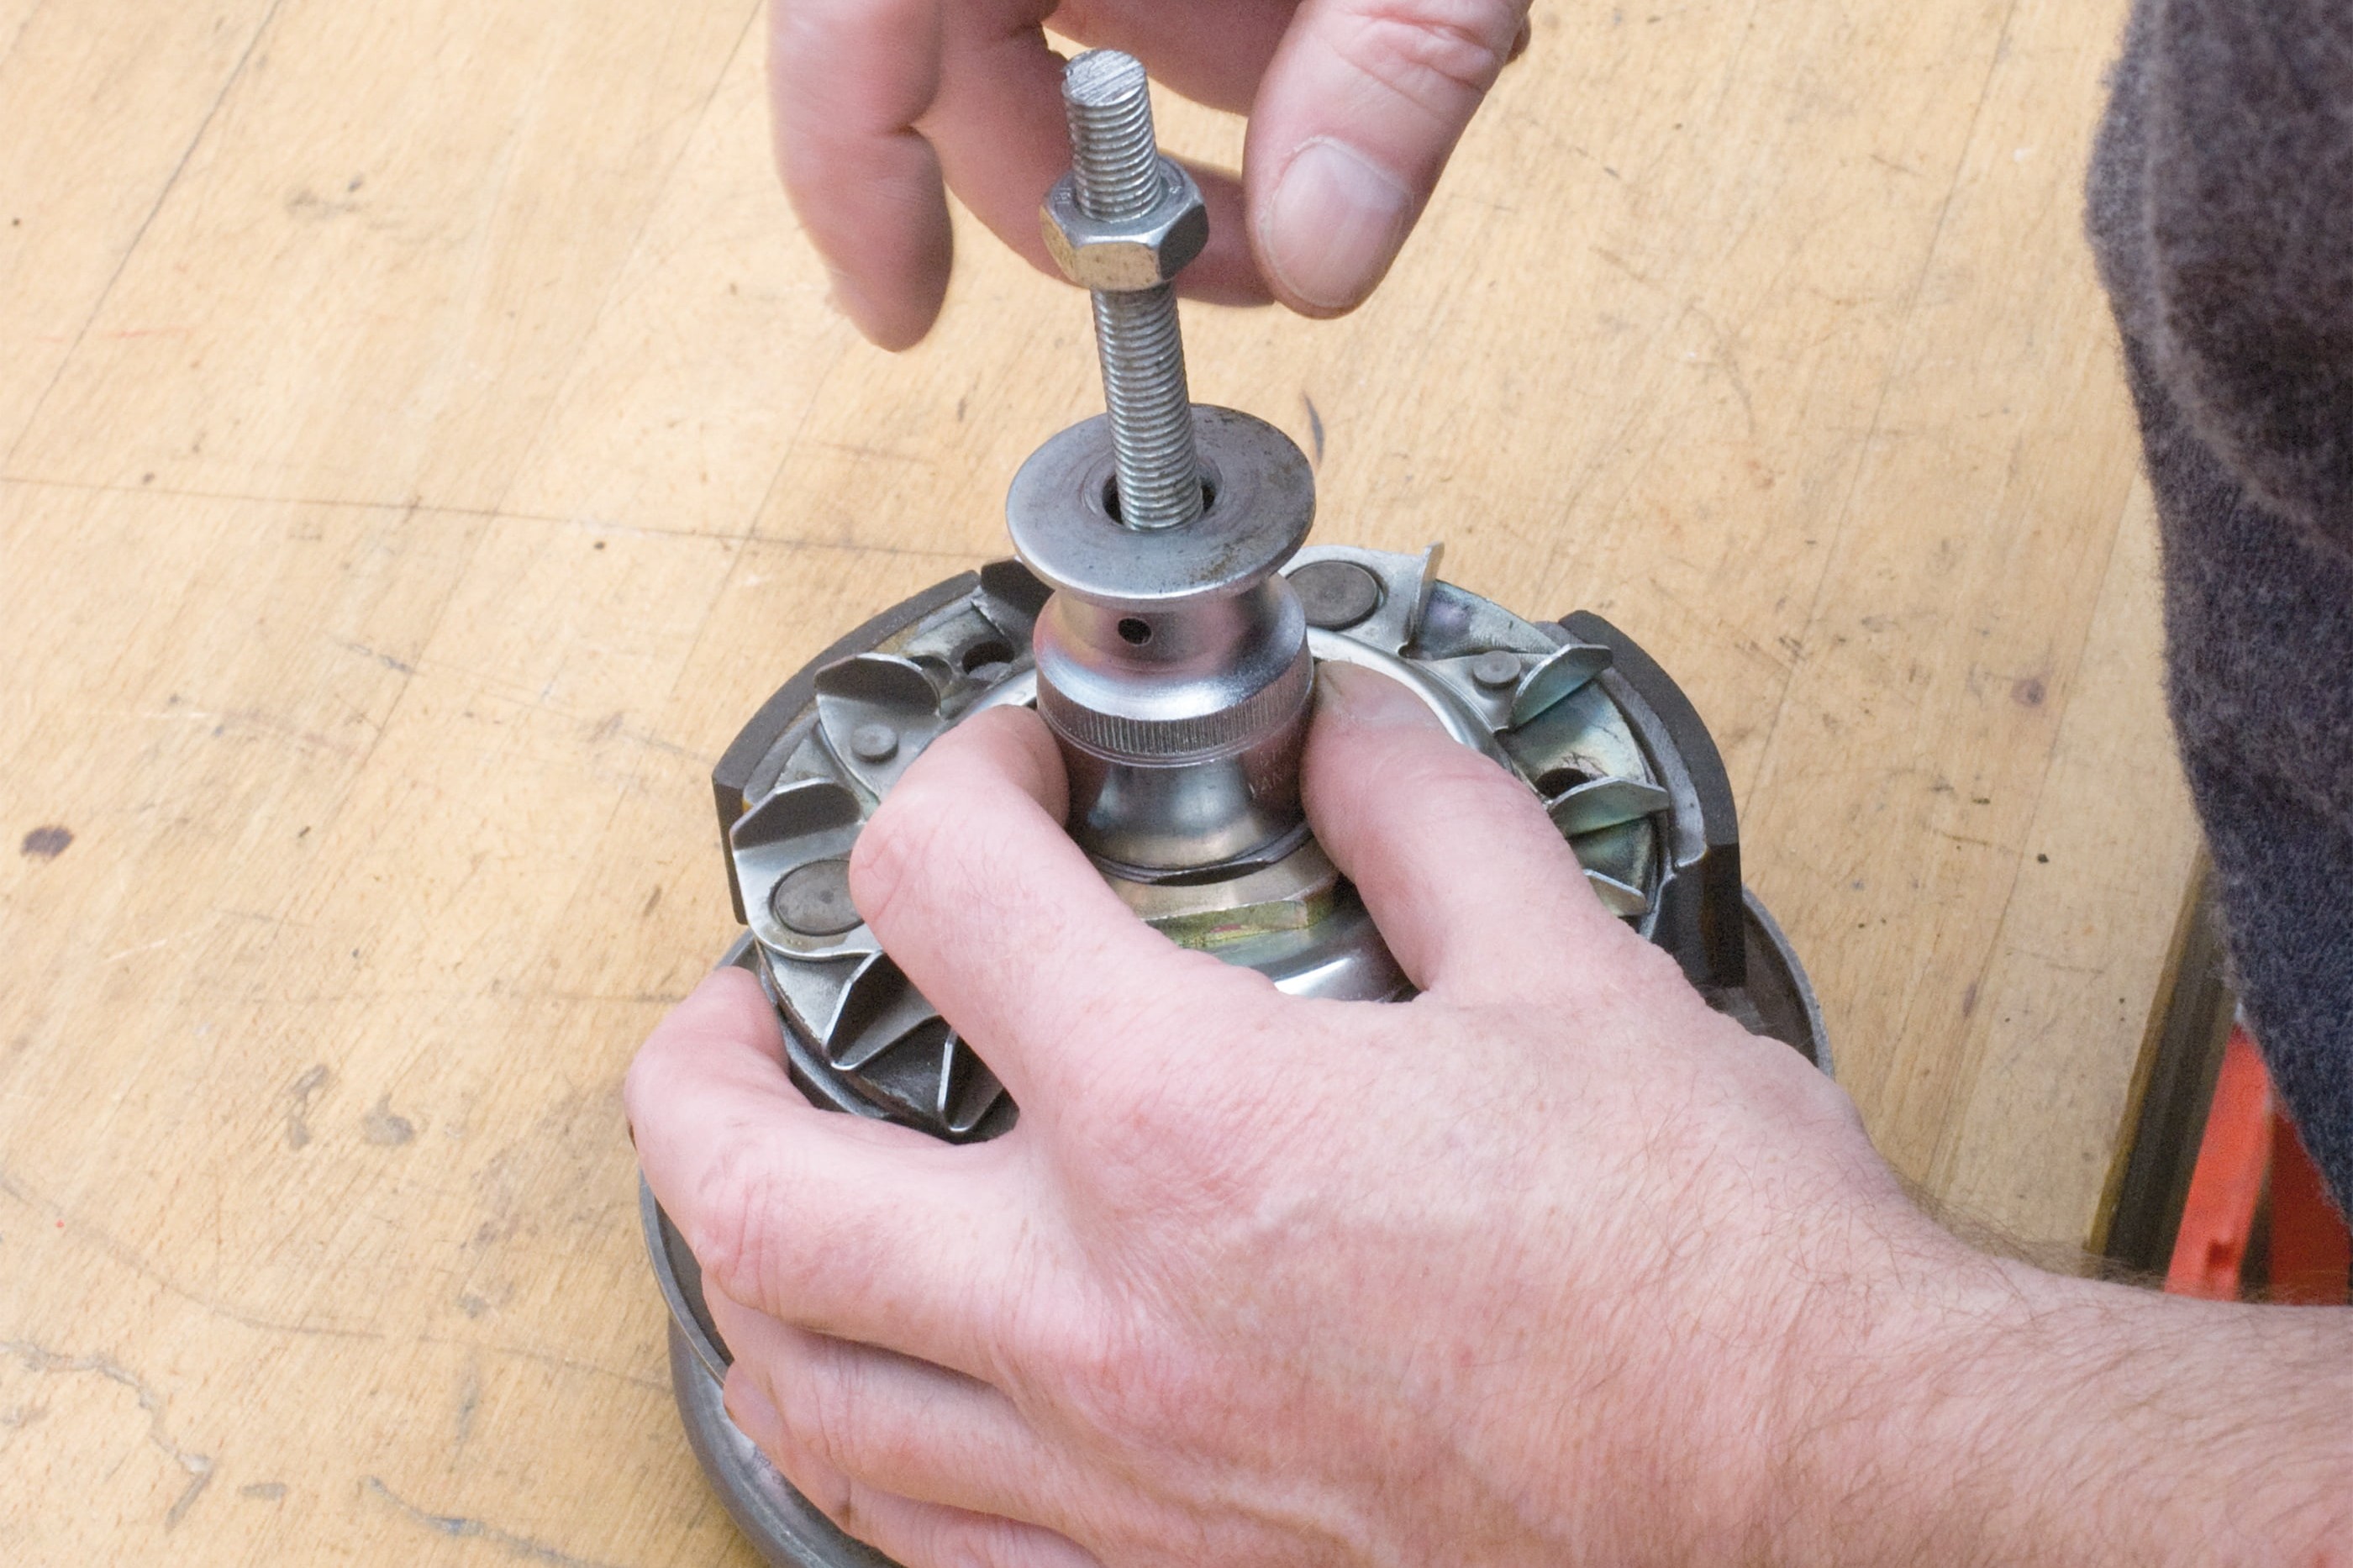
Attach the spindle … →
… Undo the nut … →
… And loosen the clutch assembly using the spindle →
You can now see the tension-free spring →
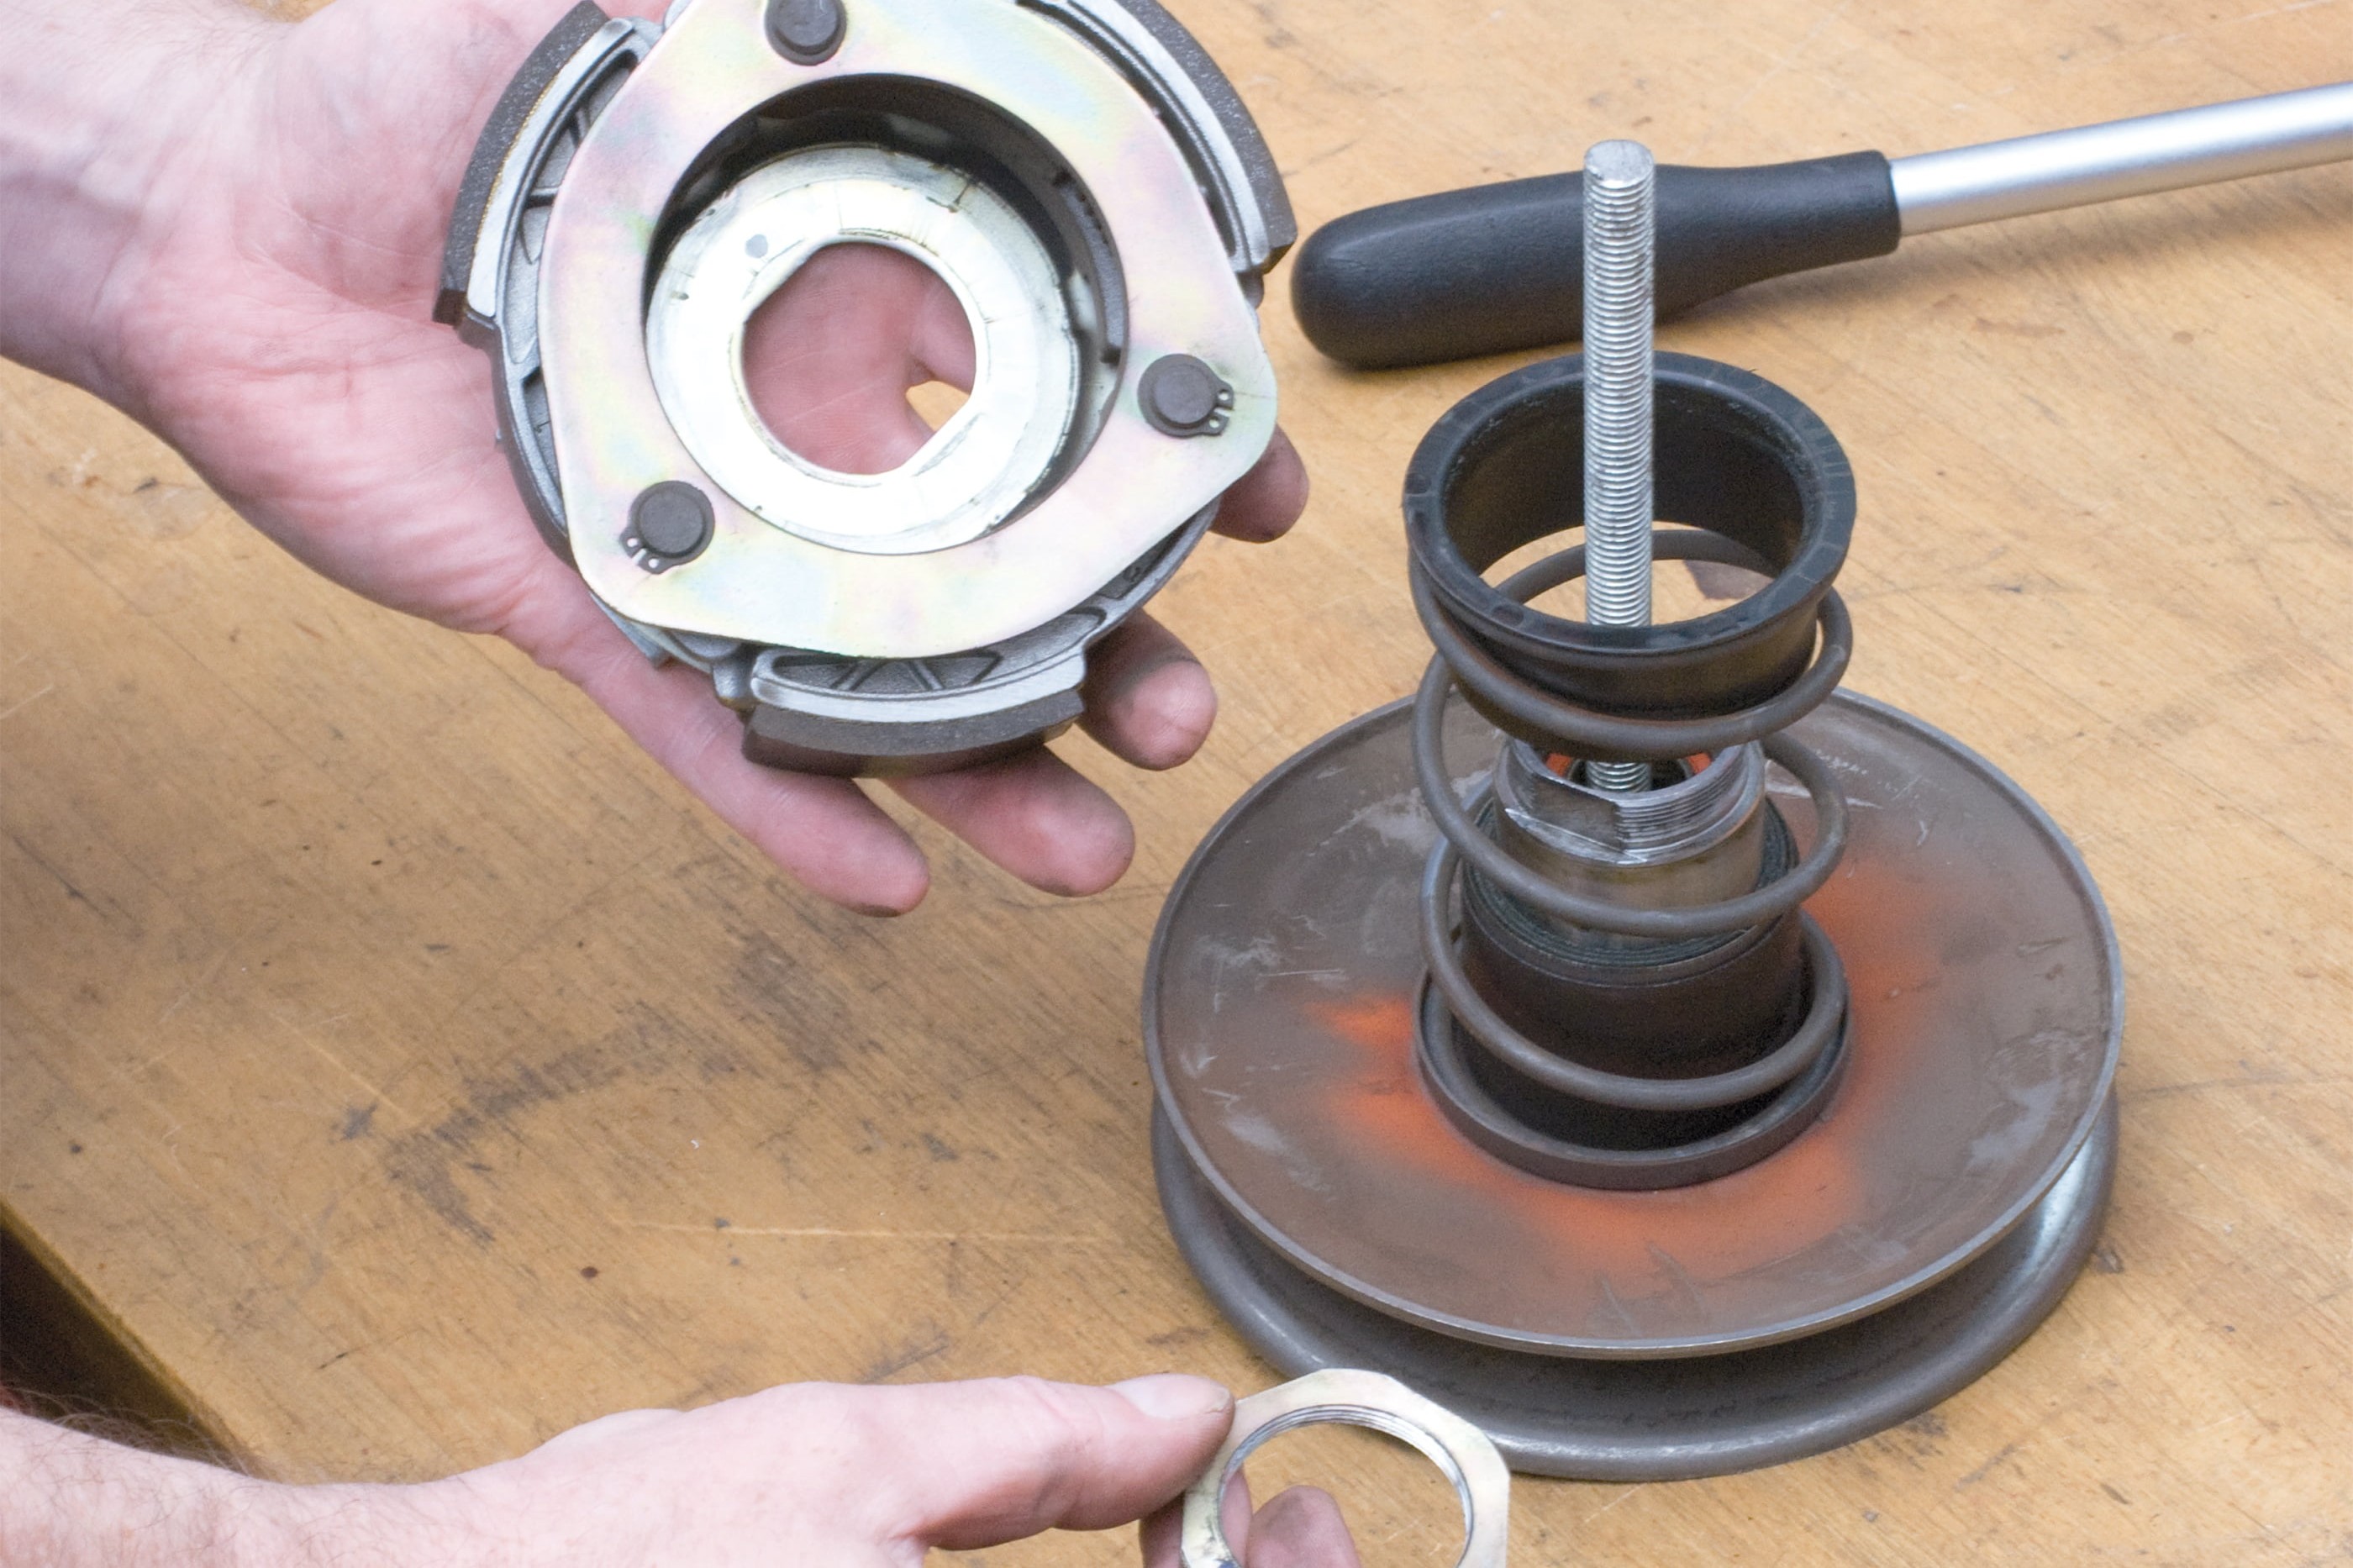
Remove the clutch from the pulley →
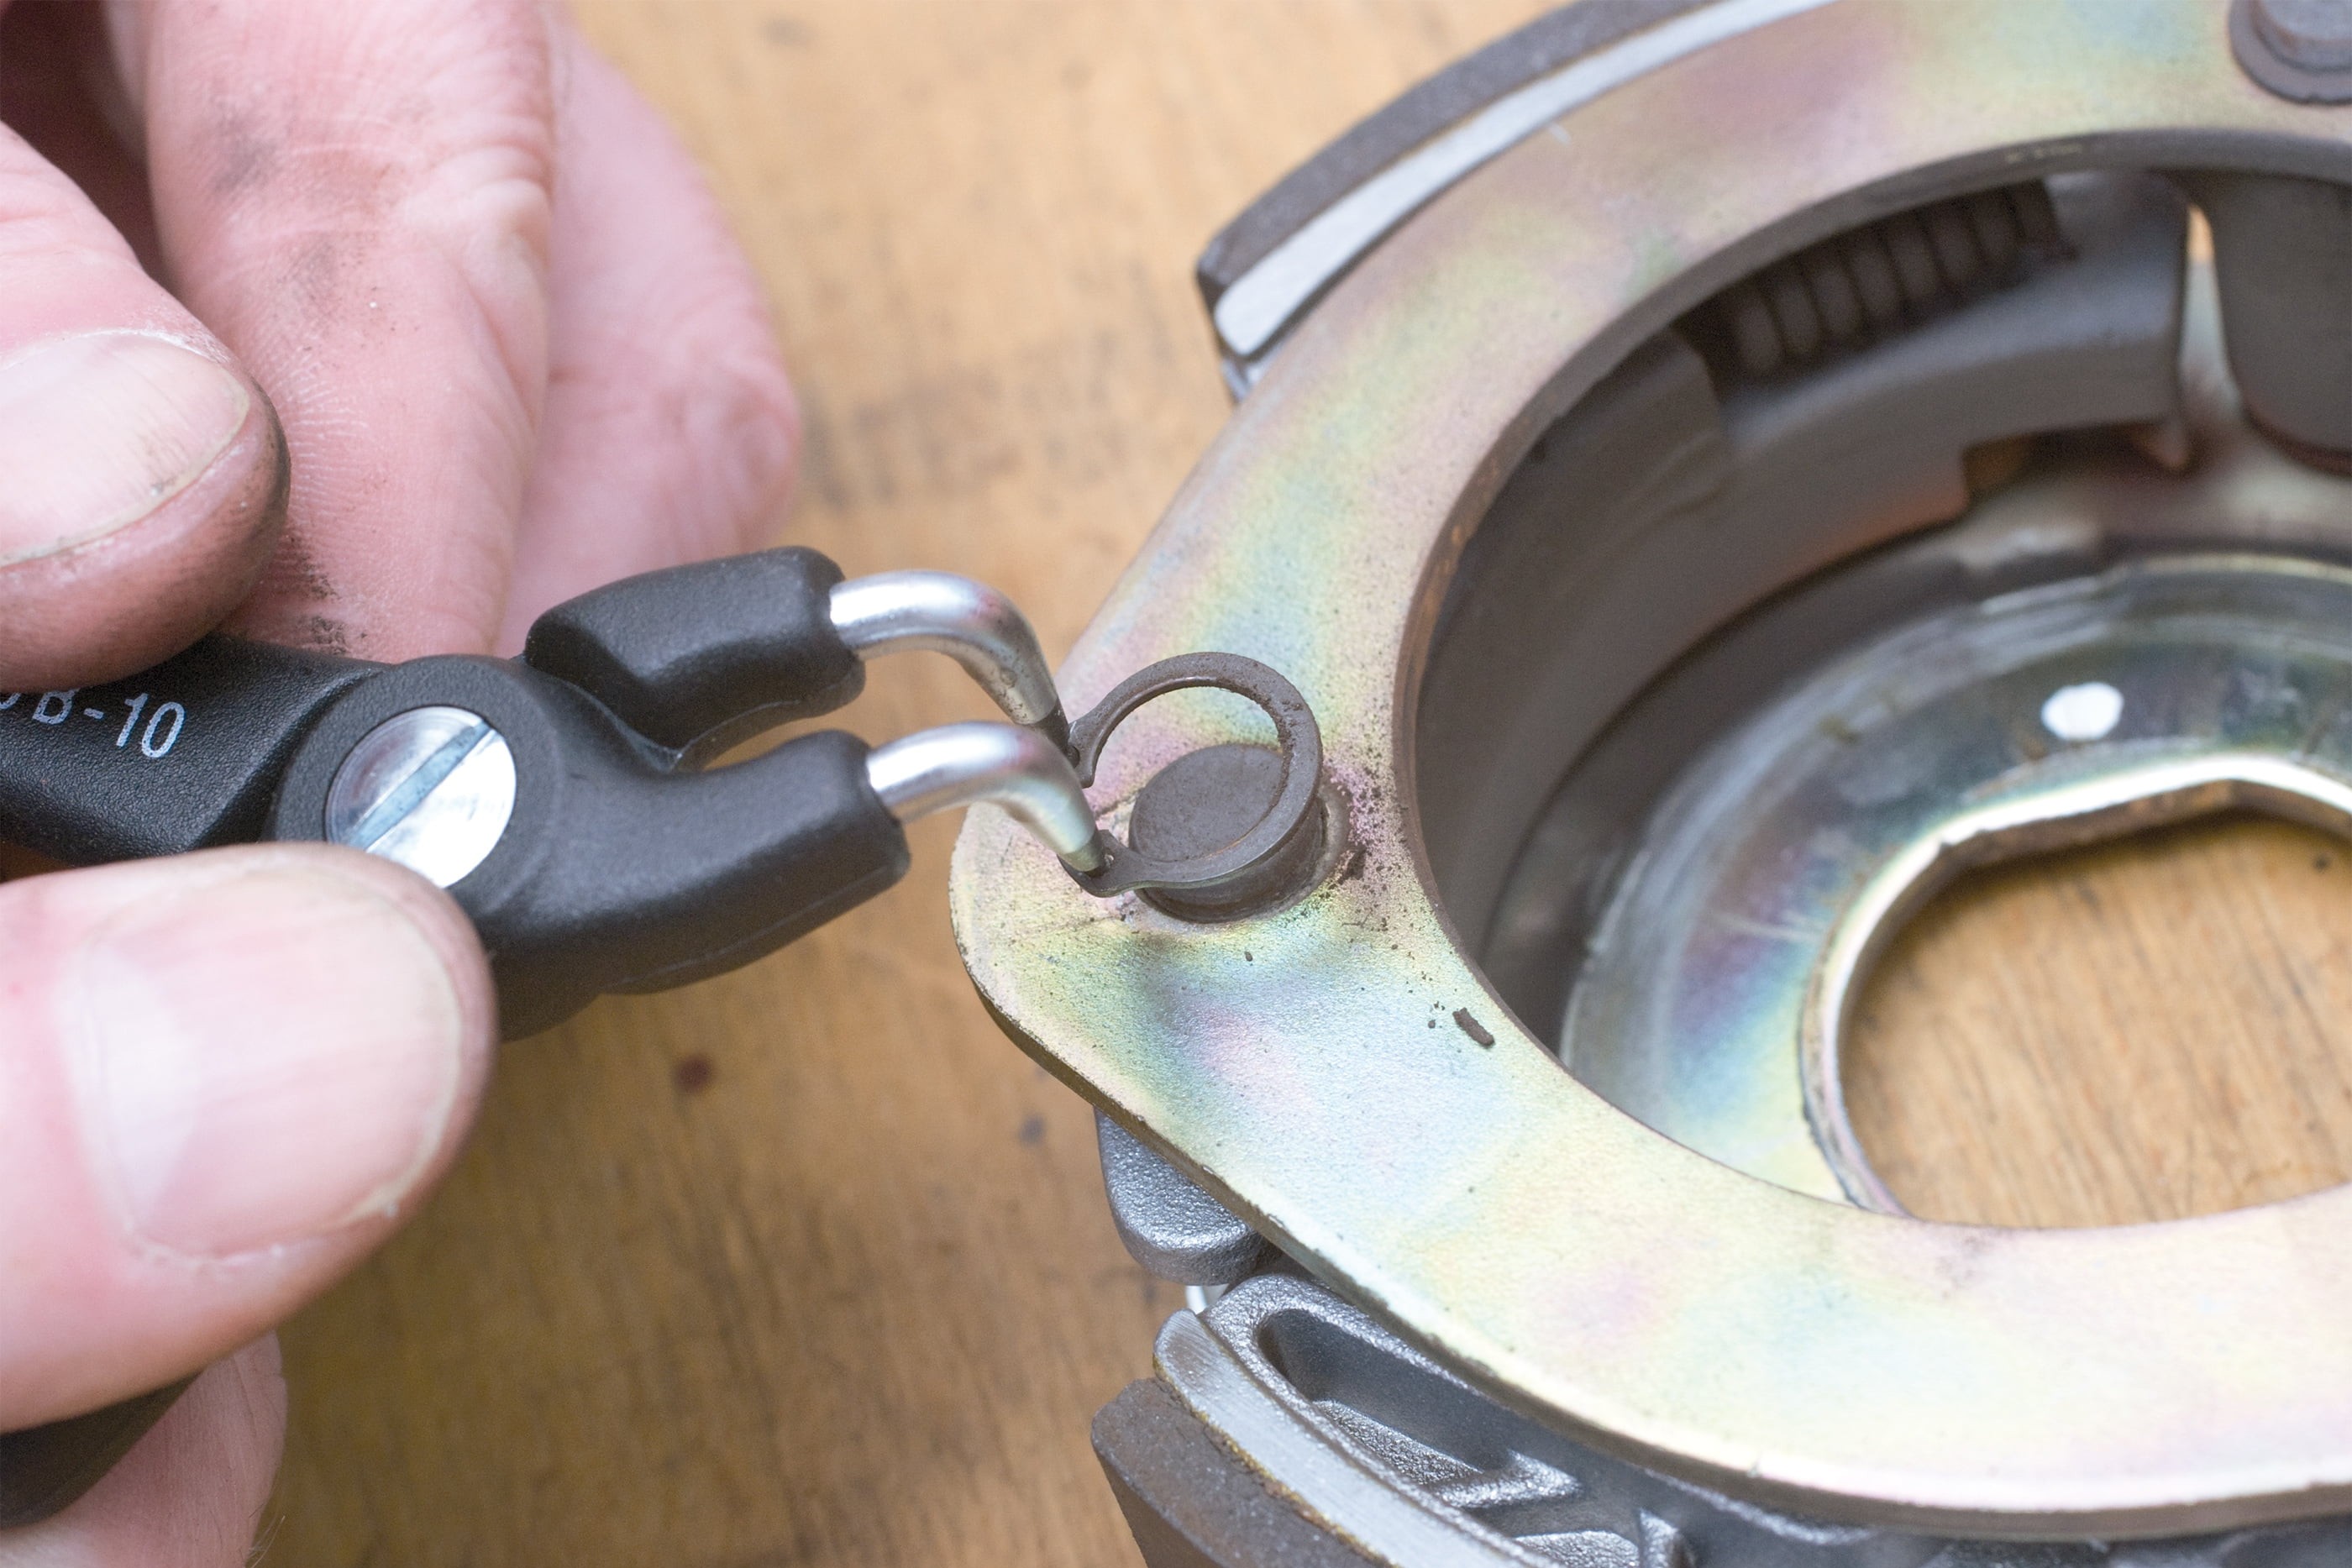
Step 14: Fit new clutch linings with new circlips
14 – Fit new clutch linings with new circlips
This spindle also helps to control the spring during reassembly so that it is easier to put on the nut.
Once you have detached the clutch from the pulley, you can replace the springs and the linings. Always use new circlips when changing the linings and make sure that they are securely seated.
Care of the clutch bearings
The bushing of the pulley unit generally contains needle bearings – it is crucial not to allow any dirt to get into the bearings and to make sure that they are running smoothly and easily. If necessary, clean by spraying out with PROCYCLE Brake Cleaner and re-grease. Check the bearings for leaks – because any grease landing on the drive belt may cause it to slip.
Installing the clutch
To install the clutch, proceed in reverse order. Tighten the outer central nut using a 3/8", 19 – 110 Nm torque wrench – check with your local dealership for the correct torque. Before closing the variator housing again, double-check that all the components are correctly installed and then re-mount all external components back in their original position.
Tuning
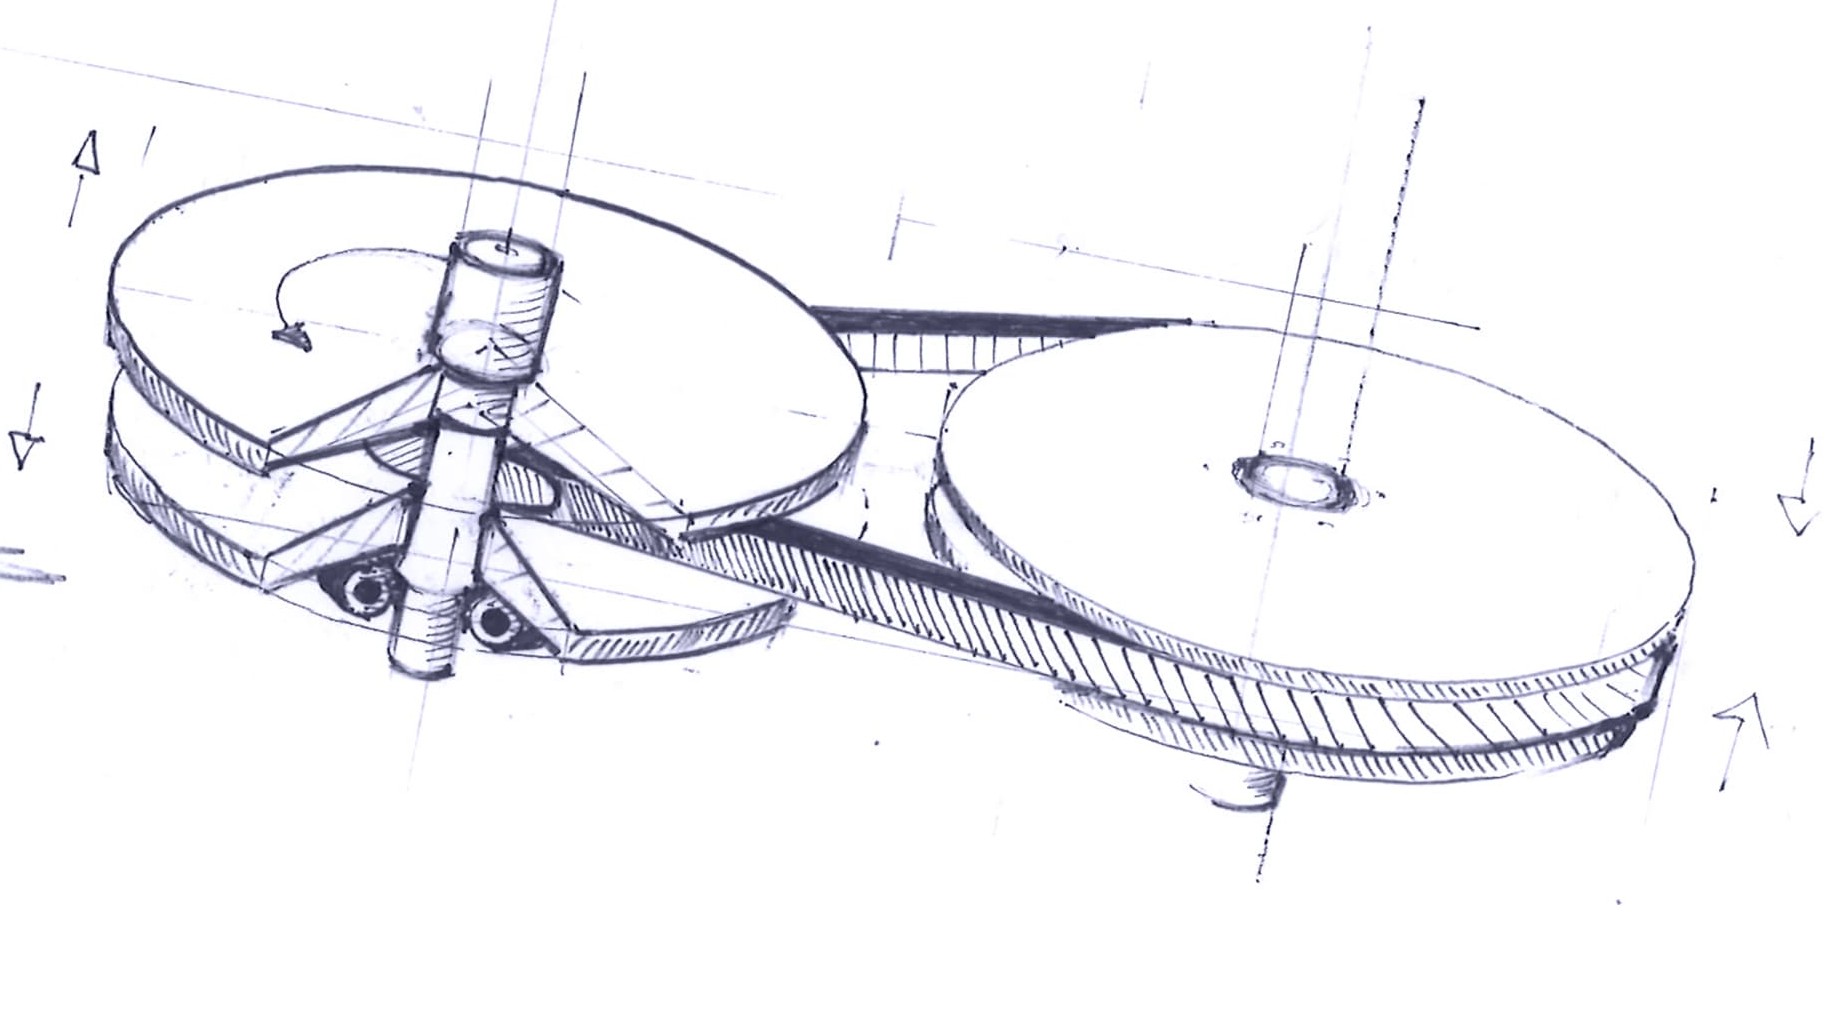
In order to ensure optimum road performance, the weight of the variator rollers must be optimally matched to the engine's rpm range. If the variator rollers are too heavy, the high centrifugal force will push the belt upwards between the pulley halves at the front before the engine reaches its ideal speed – the engine will labour and you will not get good acceleration.
If the weights are too light, the transmission ratio will be constantly too short, the engine overrevs, and you lose power. For example, many standard 50cc engines with their original exhaust have an ideal speed of approx. 6,000 rpm, i.e. this is the level where the engine power is at its highest. The variator is then tuned to this speed – i.e. the "gear shift" will occur at approx. 6,000 rpm. However, if you install an aftermarket exhaust which supports the cylinder charge differently, or if you are using other tuning parts, this ideal speed will not be the same.
The majority of performance exhaust systems will produce a higher ideal speed and will require lighter variator rollers. These are often supplied with the exhaust. If you do not install these at the same time, your "performance" exhaust may well become more of a performance-reducer. You also need to bear in mind the weight of the rider when tuning.
So if you are looking to get the most out of your scooter engine, it will take some trial and error to find out which variator roller weights are best for you. There are tuning kits available on the market for this purpose. Once you have determined the optimum roller weight, you replace the tuning rollers with the rollers for long-term use.
Street-legal
If tuning enables your scooter to exceed the permitted top speed, it will no longer be street legal. Some variators are fitted with a throttle ring (limiter ring) in order to meet German approval guidelines – removal of this ring will also mean that your scooter is no longer street legal. And if you don't yet have a driving license that permits you to drive faster vehicles, you may find yourself in a whole lot of trouble if the police catch you on a public road riding such a tuned up scooter!
The Louis Technical Centre
If you have a technical question about your motorbike, please contact our Technical Centre, where they have endless experience, reference books and contacts.
Please note!
These tips for DIY mechanics contain general recommendations that may not apply to all vehicles or all individual components. As local conditions may vary considerably, we are unable to guarantee the correctness of information in these tips for DIY mechanics.
Thank you for your understanding.


