Synchronising carburettors
If your carburettors are not synchronised, the idle will be lumpy, throttle response rough and the engine will not reach its full power. When this happens, it's time to adjust the carburettors correctly.

- Things to know about carburettor synchronisation
- Requirements
- Why synchronise?
- How is the adjustment done?
- Essential: Synchroniser
- Synchronising carburettors – now let's get started
- 01 – Important – First minimise the air flow
- 02 – Connect synchroniser
- 03 – Calibrating all the gauges
- 04 – Adjust carburettor to same measured values
- Our recommendation
Things to know about carburettor synchronisation
Uneven idling, poor throttle response and more vibration than necessary in multi-cylinder engines can be a sign that the carburettors are not in sync. Imagine a team of horses where one wants to gallop, another is moving at a gentle trot while two others are more inclined to walk. As a result, the galloper strains at the harness in vain, the walkers begin to stumble, the trotter doesn't know if it's coming or going and the driver has had enough.
Requirements
Before you consider synchronising the carburettors, you must ensure that everything else is in order. The ignition and valves must be correctly adjusted, as must the play in the throttle cables. The air filter, intake manifolds and spark plugs should be in good condition.
Why synchronise?
The engine sucks in the air/fuel mixture from the carburettors at each intake stroke. And where there is suction, there is a vacuum. This vacuum must be the same in all the intake tracts of the cylinders so that the combustion chambers are fed at the same rate. This is one of the requirements for smooth engine running. The feed rate is regulated by how far the feed port is opened; or in other words, the position of the throttle valve or slide valve in the individual carburettors.
How is the adjustment done?
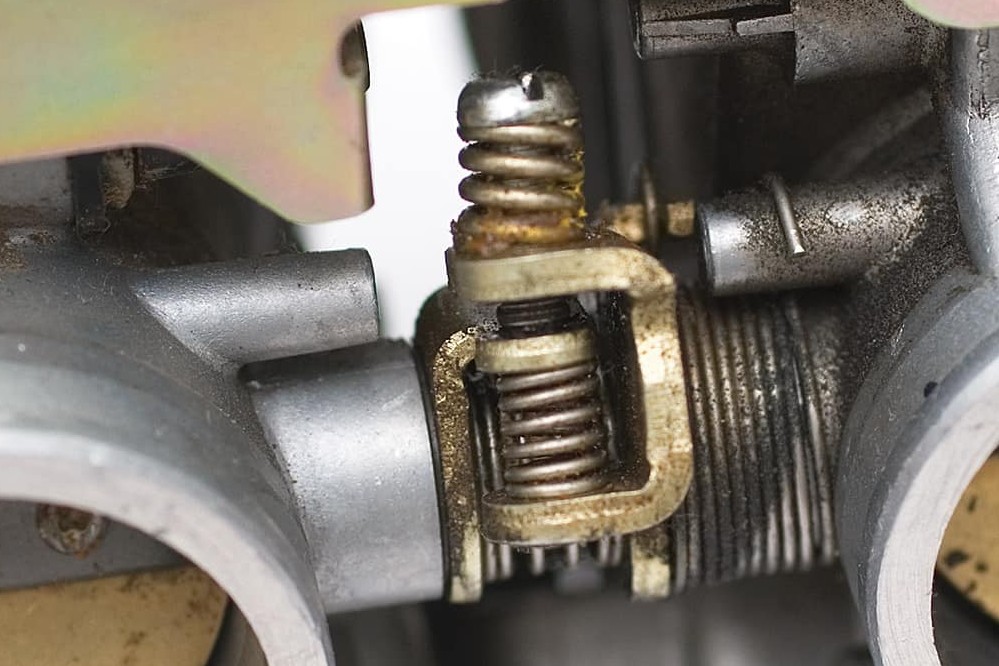
To access the adjustment screws, you often need an extra-long screwdriver. The throttle valves of CV carburettors are usually interconnected by means of a spring-loaded coupling, which has an adjustment screw. In a four-cylinder engine, synchronisation is carried out by turning the screws, as follows: First, synchronise the two right carburettors and the two left carburettors, then sync the two pairs to each other until the vacuum in all four carbs is the same.
In other cases, e.g. slide carburettors, the carburettor bank has one carb that serves as a fixed reference point for synchronising all the others. The adjustment screw is usually located under the top cover.
Essential: Synchroniser
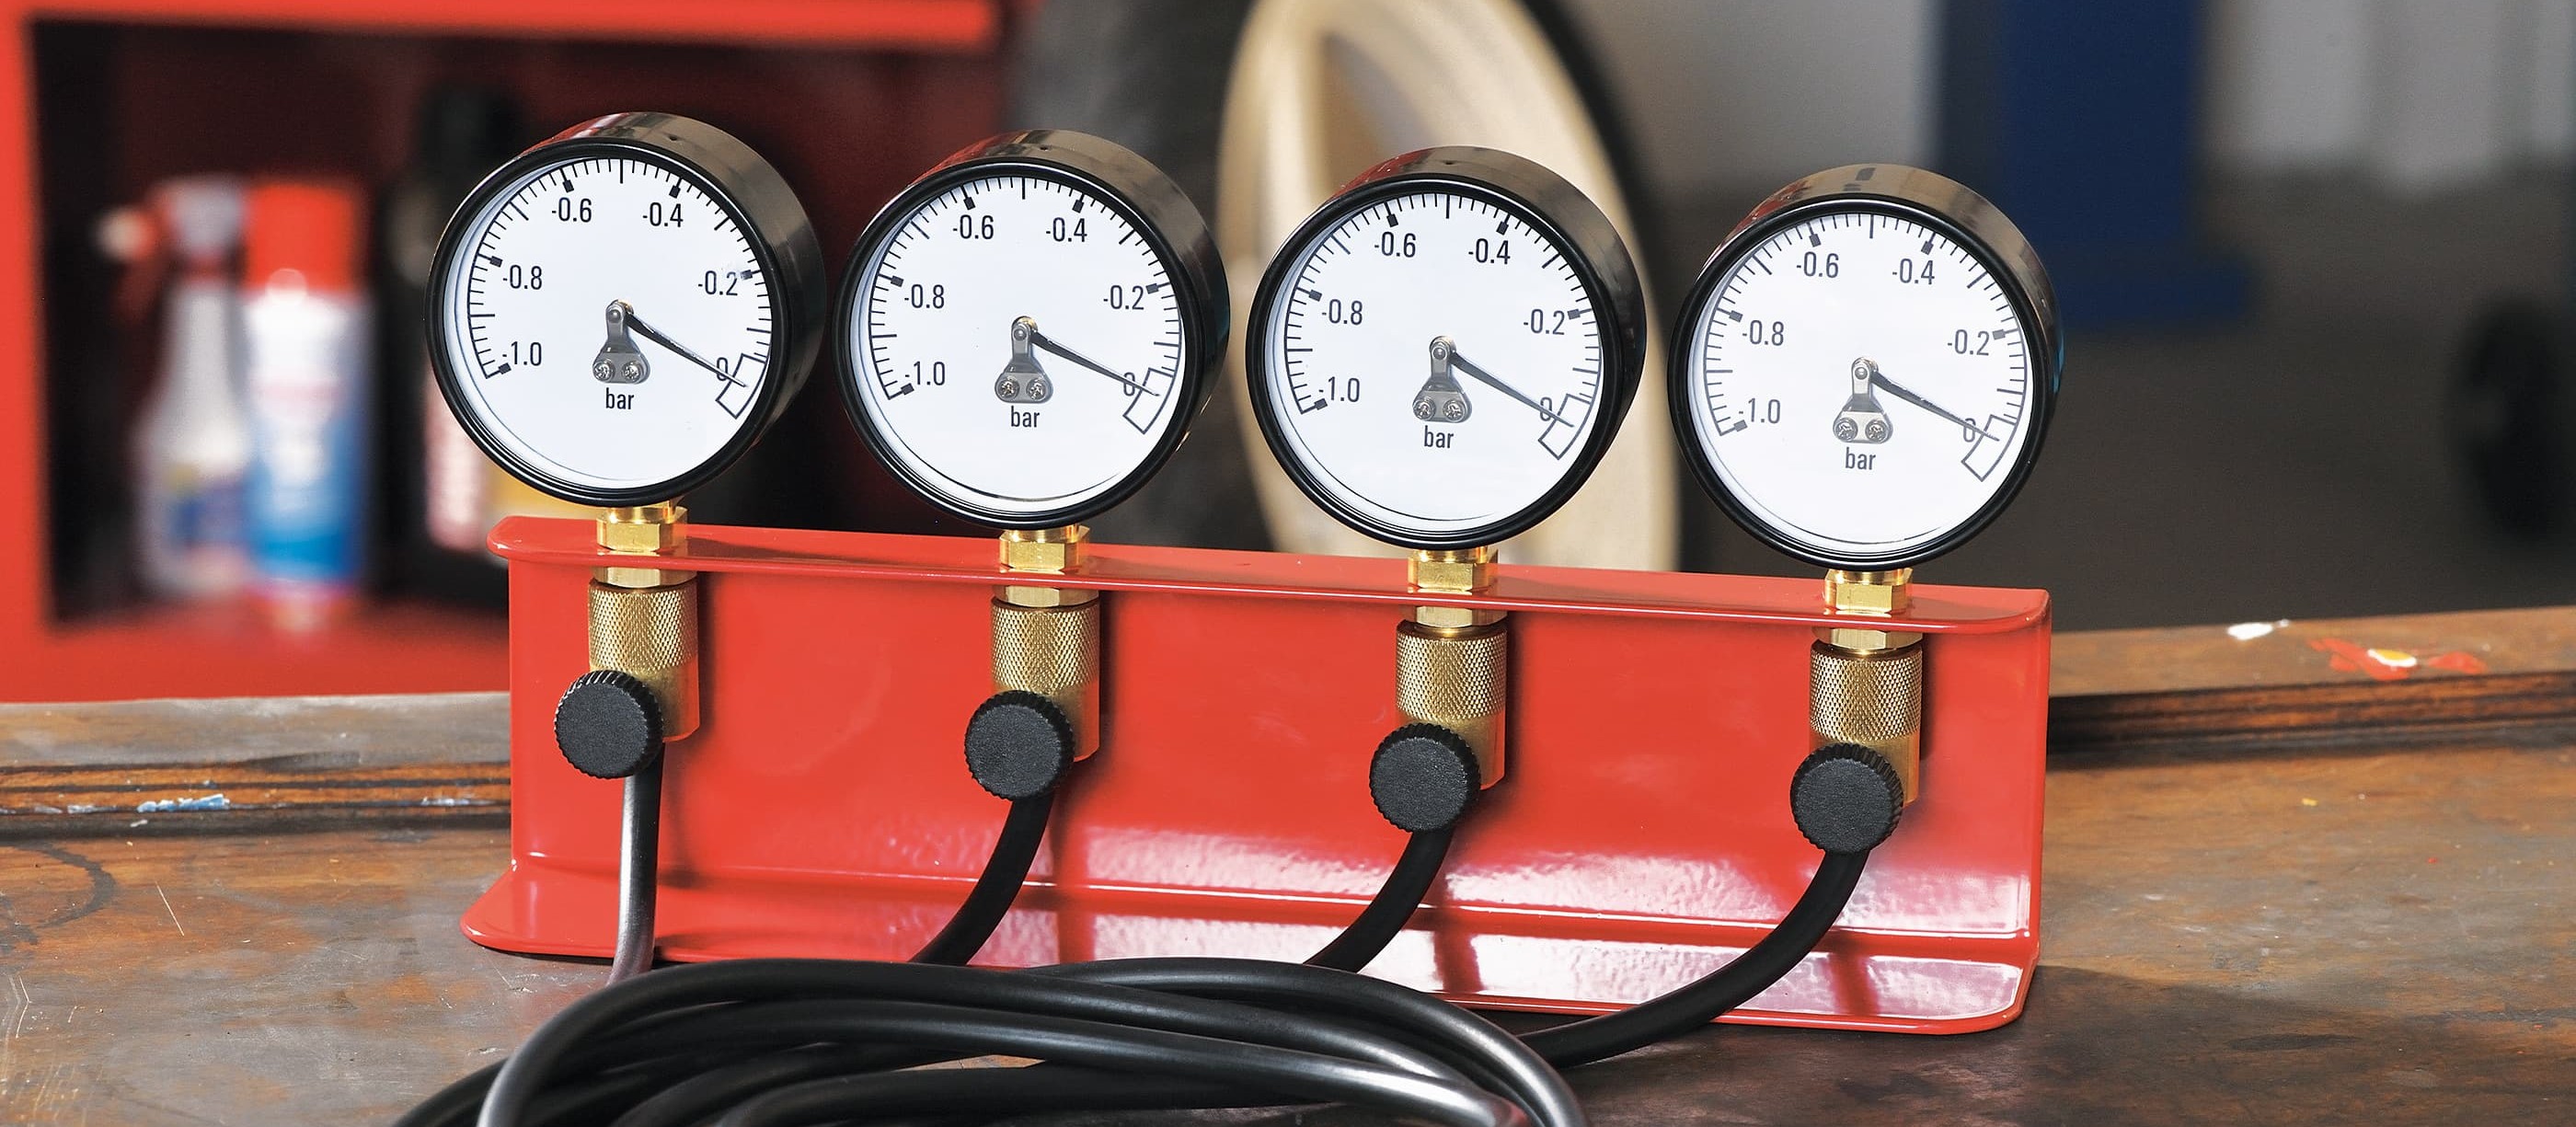
To enable you to set the same air/fuel mixture rate in all intake tracts, you need vacuum gauges, which are essentially the opposite of a pressure gauge for checking the tyre pressure. Unlike with tyres, all the cylinders are measured at the same time, so you need one vacuum gauge per cylinder. They are available in 2- or 4-gauge sets and are then called synchronisers. They also include the tubes and adapters you need. Since in most cases the tank has to be removed but the engine has to be running during adjustment, it is recommended you also get a small fuel bottle to supply the carburettors. You can hang it on the rear-view mirror, for example.
Important: Synchronisation should be done in the open air or an open carport; never in even partially enclosed spaces on account of the running engine. If wind conditions are unfavourable, the exhaust fumes pose a risk of carbon monoxide poisoning, even in an open garage.
Synchronising carburettors – now let's get started

Step 1: Important – First minimise the air flow
01 – Important – First minimise the air flow
First warm up the motorbike, then put it on the centre stand and switch off the engine. Now remove the tank and any covers and fairings that may be in the way. The fuel bottle must always be positioned higher than the carburettors. Next comes the synchroniser. For ease of packaging, synchronisers generally come in parts, but they are easy to assemble – simply follow the instructions. Each time you use the synchroniser, always screw in the knurled screw (which regulates the air flow) hand-tight, but without crushing the hose.
The reason: We are dealing with very low vacuums, so the indicator needles on the gauges react sensitively. If you connect up a gauge with the damping set too low and start the engine, the needle will flick violently from one extreme to the other with each stroke of the engine and the gauge may break.

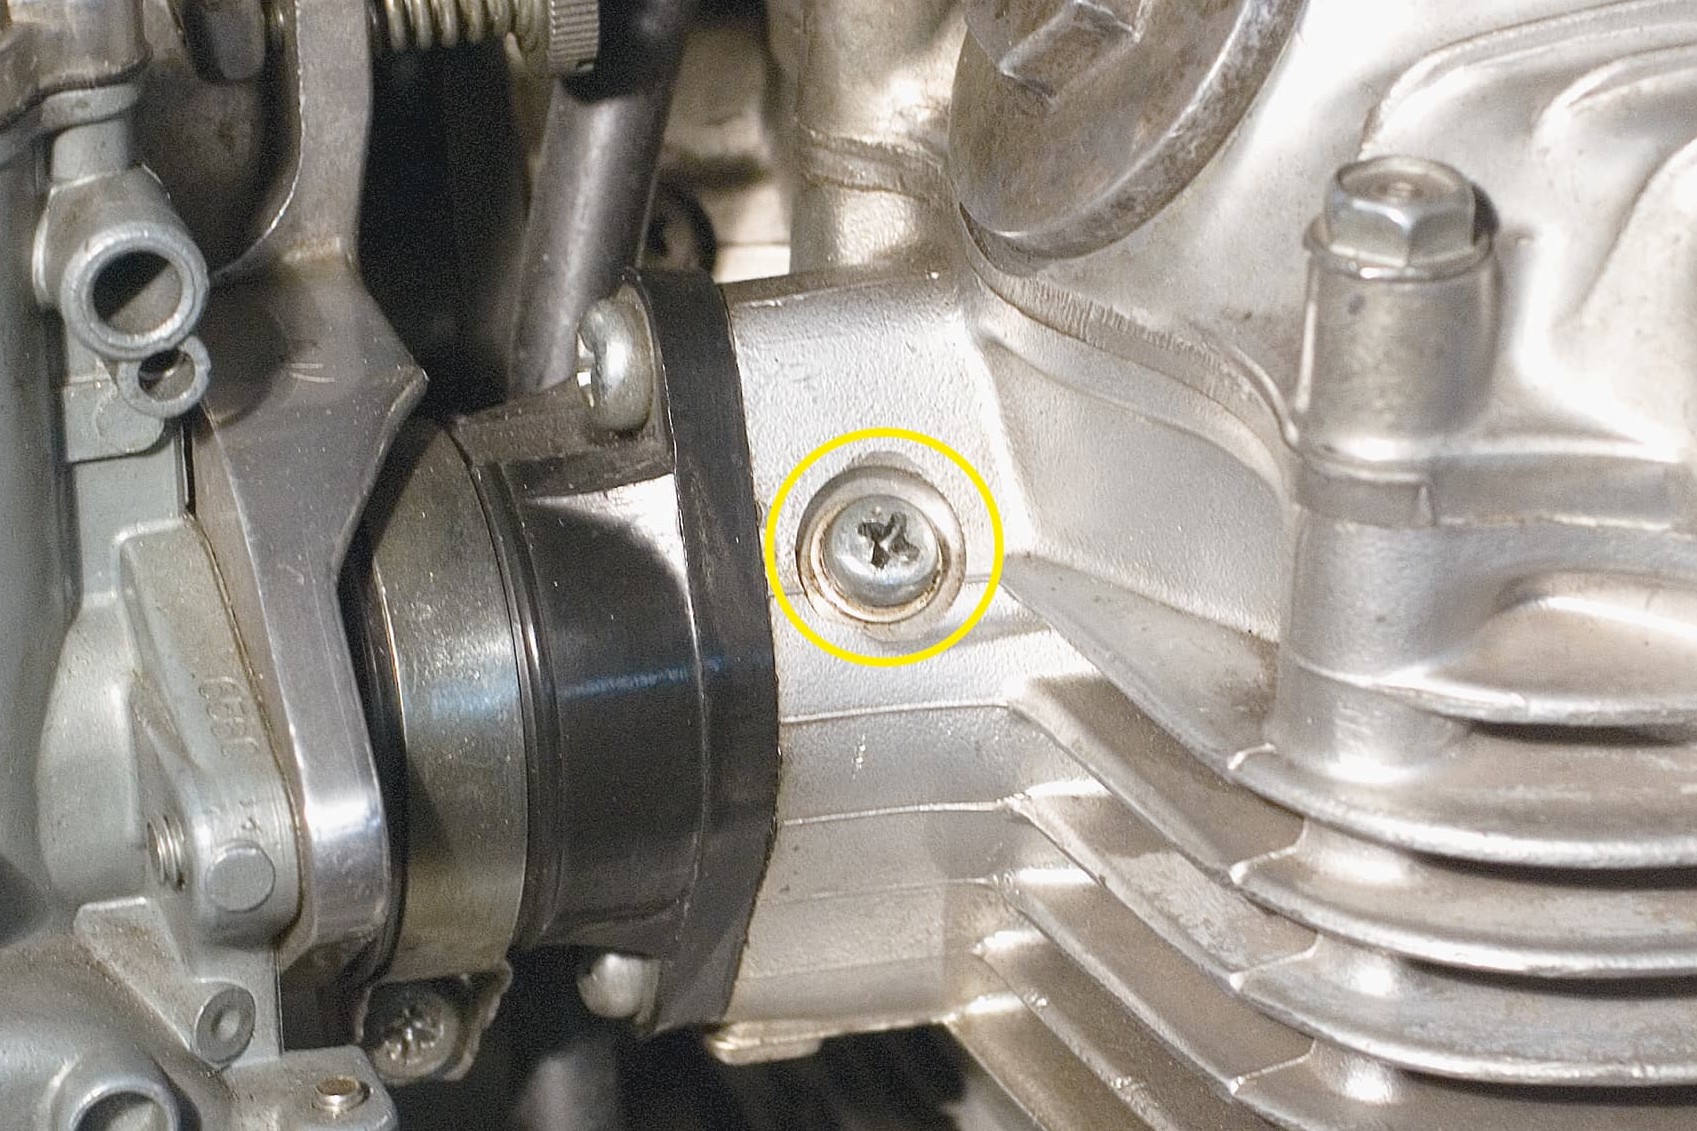
Step 2, Fig. 1: Either screw the tube adapter onto the cylinder head...
02 – Connect synchroniser
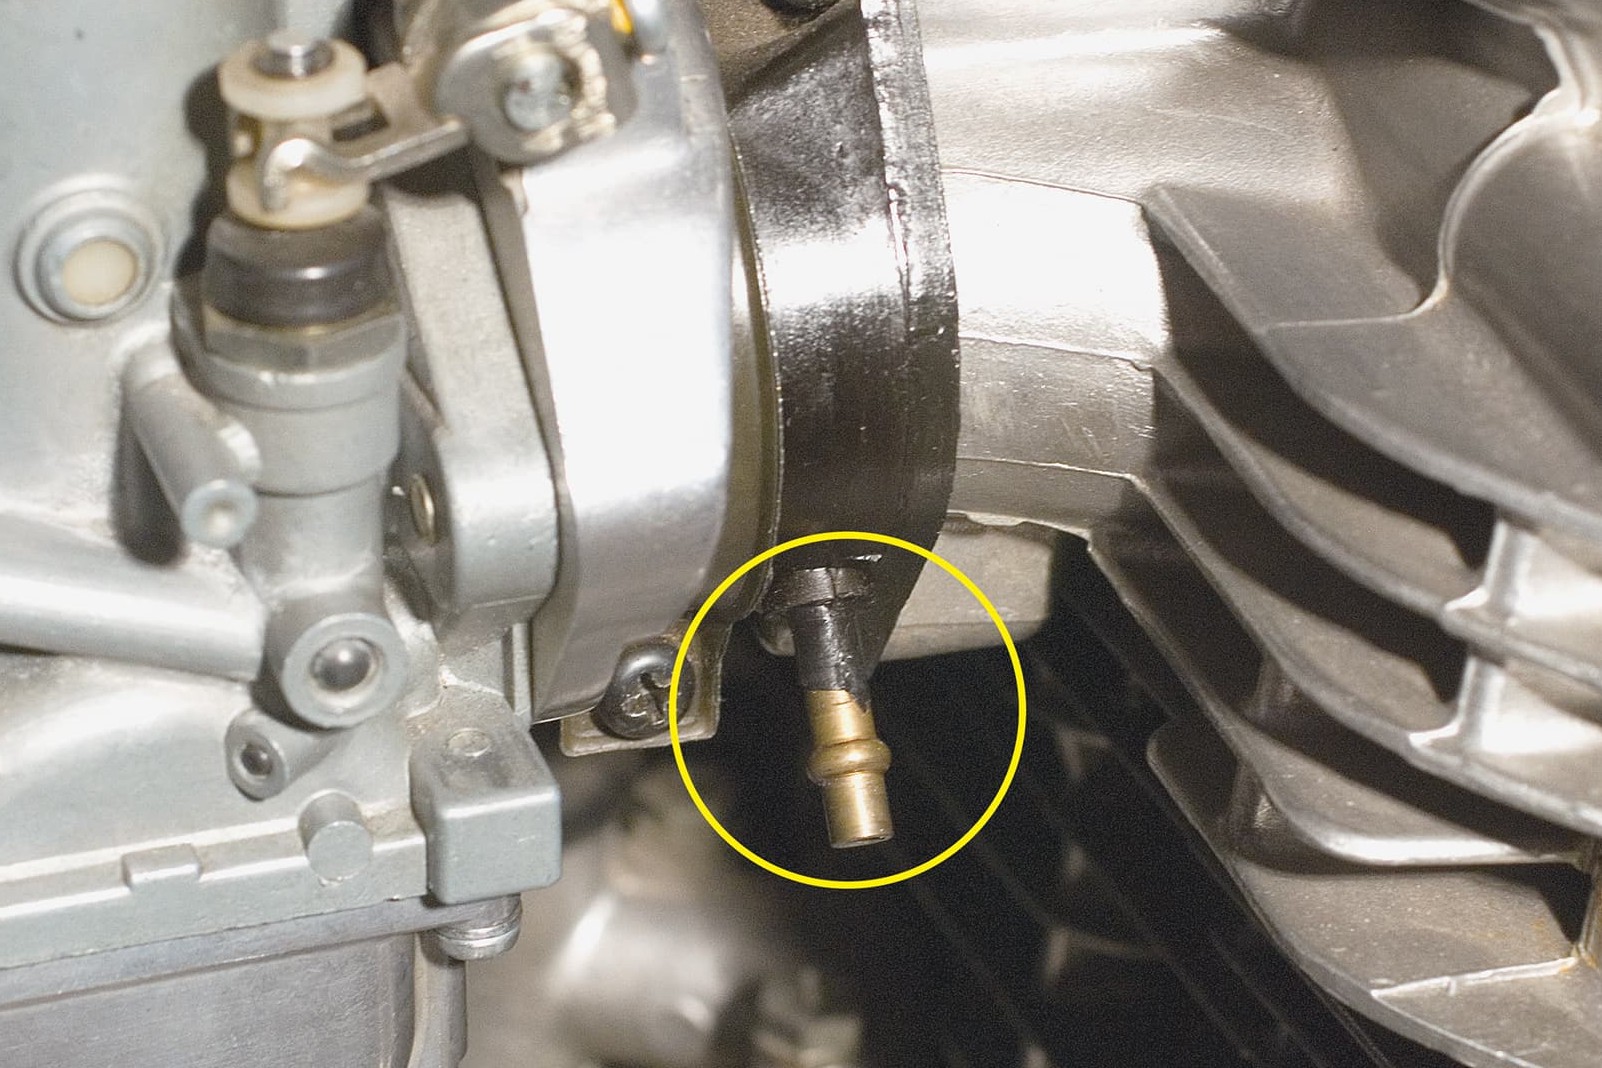
Now connect the tubes of the synchroniser to the motorbike. Depending on what bike you've got, these connection points may be on the cylinder head (see Fig. 1), the carburettors (generally at the top towards the intake manifold) or the intake manifolds (see Fig. 2).

Step 2, Fig. 2: ... Or attach the hose to the intake manifold or to the carburettor itself
The manifolds often have connection nozzles, which are closed off with a rubber cap. On the carburettor or cylinder head, you will need to unscrew small screw plugs and replace them with screw-in nozzle adapters (synchronisers usually come with the most commonly used adapters).

Step 3, Fig. 1: Calibrating all the gauges on a single cylinder is essential
03 – Calibrating all the gauges
Before connecting up the gauges, calibrate them so that they all show the same reading. This will reveal if any gauge is giving inaccurate readings or if any tube connection is leaking. To do this, first connect up all the gauges with T- or Y-adapters (generally also included with the synchroniser) so that they all feed into a single tube. Connect this tube to a carburettor or intake manifold, and leave the other connections closed off.

Step 3, Fig. 2: Any variance needs to be corrected
Now start up the engine and adjust the gauges at the knurled nuts just enough so that the needles are still have "lively" movement, but are sufficiently damped. A pointer that doesn't move at all means a blocked gauge, so undo the knurled nut a little. All gauges should now show the same readings. Switch off the engine. Assuming the gauges are completely intact, you can now attach one gauge to each cylinder and place the gauges somewhere safe on the bike and secure them so that they do not fall off (be careful because the gauges tend to "wander" due to the engine vibrations).
Start up the engine, rev it gently a few times to around 3000 rpm and then let it idle. Check the gauge readings and readjust, if necessary, at the knurled nuts until they are easy enough to read. Most manufacturers tolerate a variance of up to 0.03 bar.

Step 4: Adjustment screws on carburettor linkage
04 – Adjust carburettor to same measured values
Depending on the particular motorbike, either identify the base or master carburettor, and then adjust all the others as accurately as possible to the same setting by means of the adjustment screws or, as already described, first synchronise the right and left carbs, then synchronise the two pairs to each other. From time to time, rev gently to check whether the engine returns to the correct idle speed; if not, readjust with the idle adjustment screw. If synchronisation proves impossible, the carburettors may be taking in air via an intake manifold that is either porous or leaking at the connection to the carb or cylinder head, or the base setting of the carburettors has become completely scrambled. In rare cases, a heavily soiled carburettor may be the cause. You should definitely investigate and remedy these potential faults, or else all further attempts at synchronisation will be pointless. You can find further information on cleaning a carburettor under the DIY tip Carburettor.
However, we will assume it has been a success and congratulate you on a considerably smoother-running bike and more spontaneous throttle response, making for an even more enjoyable ride than before. Now you can disconnect the synchroniser and take the pressure off the tubes by undoing the knurled nuts slightly. Put the rubber plugs back on (take the opportunity to check for porosity) or screw the screw plugs back on with care (soft material!). Then refit and connect up the tank and covers/fairings, and pour any fuel left in the fuel bottle into the tank. Job done!
Our recommendation
The Louis Technical Centre
If you have a technical question about your motorbike, please contact our Technical Centre, where they have endless experience, reference books and contacts.
Please note!
These tips for DIY mechanics contain general recommendations that may not apply to all vehicles or all individual components. As local conditions may vary considerably, we are unable to guarantee the correctness of information in these tips for DIY mechanics.
Thank you for your understanding.


