Painting motorcycle parts
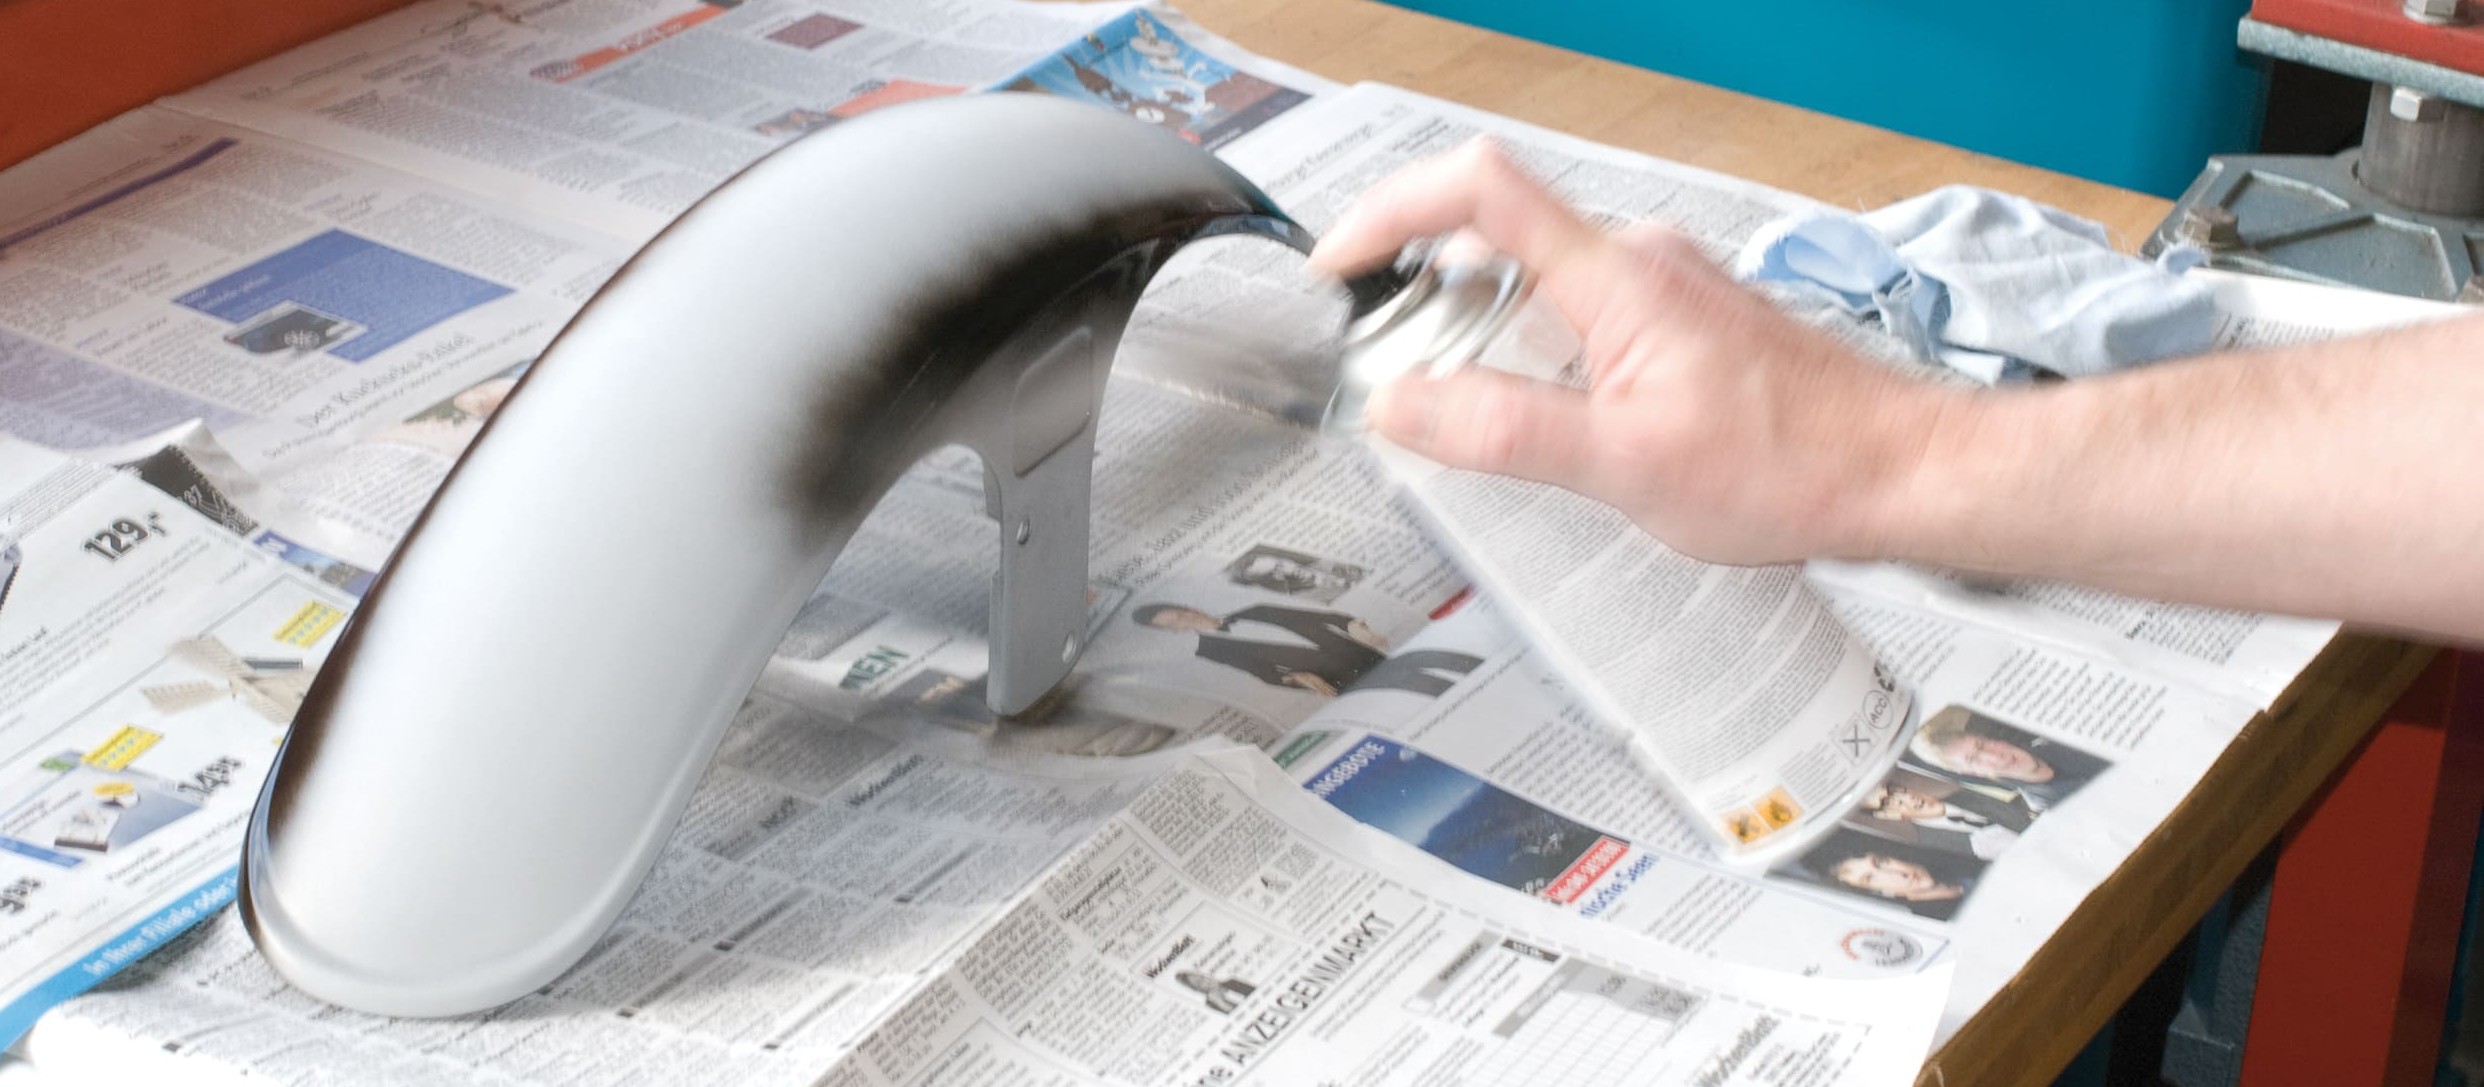
Whether you're just touching up the paintwork on your motorbike or repainting entire parts yourself, spray paints will certainly do a good job. Provided you work carefully and with the necessary preparations, you can get great results that are barely distinguishable from the original paintwork.
- Types of ready-to-use paint
- Acrylic paints
- Synthetic resin paints
- Painting step by step
- Painting motorcycle parts – now let's get started
- 01 – Mudguard with dent and rust spot
- 02 – Reduce the dent
- 03 – Sand in and around the dent and rust spot
- Apply filler
- 04 – Apply primer
- 05 – Sand the primer coat
- 06 – Apply top coat
- 07 – Mask off section for second colour and spray
- 08 – Clear lacquer ensures a mirror finish
- Painting a motorcycle engine
Important: Not all original paintwork is compatible with spray paints; particularly in the case of older US import vehicles, you may run up against problems (wrinkling, etc.). Synthetic resin paints cannot be overcoated with acrylic paint. You MUST use a synthetic resin paint again. And if you're not sure what sort of paint is on your motorbike, it's best to apply a small test patch that is out of sight. If the paint "wrinkles", cracks or turns matt grey, then the new top coat you are using is not compatible with the existing paintwork. In that case, you would need to sand off the old paintwork completely before repainting. If your substrate is thermoplastic (ABS, but not GRP laminates), you will need to use a special plastic primer.
Types of ready-to-use paint
Spray paints that you can buy in the shops are either acrylic or synthetic resin-based. Modern automotive spray paints are almost exclusively acrylic-based, while hobby spray paints (and, of course, brushing paints) from DIY stores may also use a synthetic resin-based formula.
Acrylic paints
(automotive paints) offer the following advantages:
- Quick drying (touch-dry in 10–30 minutes)
- Recoating possible any time (whereas for synthetic resin paints: within 2 hrs or after 24 hrs)
- Better corrosion protection
- Greater resistance to cleaners; harder surface finish
Synthetic resin paints
Synthetic resin paints, however, have better filling properties and often spread more homogeneously over larger areas. They're less expensive than acrylic paints, and are popular for hobby and craft use, but they are less suitable for painting motorbike parts.
As well as the popular single-component paints, two-component paints are also available in spray cans. They are harder wearing. Clear lacquer, for example, is ideal for overcoating normal single-component automotive sprays to create a high-gloss finish with greater resistance to scratching, petrol, and weathering. And if you're after a special shade, automotive paint retailers offer a huge range of original colours, which they will mix for you and put in a spray can. However, we recommend finishing these paints with a top coat of two-component clear lacquer. For further details on the best method of application, ask your local specialist retailer.
Painting step by step
The primary function of paintwork is to protect against corrosion. To achieve this, it's essential to first mechanically eradicate all traces of rust. For this job you can use coarse sandpaper and wire brush attachments for your power drill or angle grinder. Sandpaper is good for removing surface corrosion, and wire brushes for power tools are then able to penetrate deeper into the rust pockets, helping to eradicate them completely. The deeper the rust goes, the harder it is to remove all traces. If you feel you've done all you can with your wire brushes and you can still see rust, apply a rust converter (follow the instructions for use on the packaging). Your only other alternative is to take the part to a specialist workshop that does sand or glass bead blasting – it goes without saying that this method is best of all.
Painting motorcycle parts – now let's get started
Step 1: Mudguard with dent and rust spot
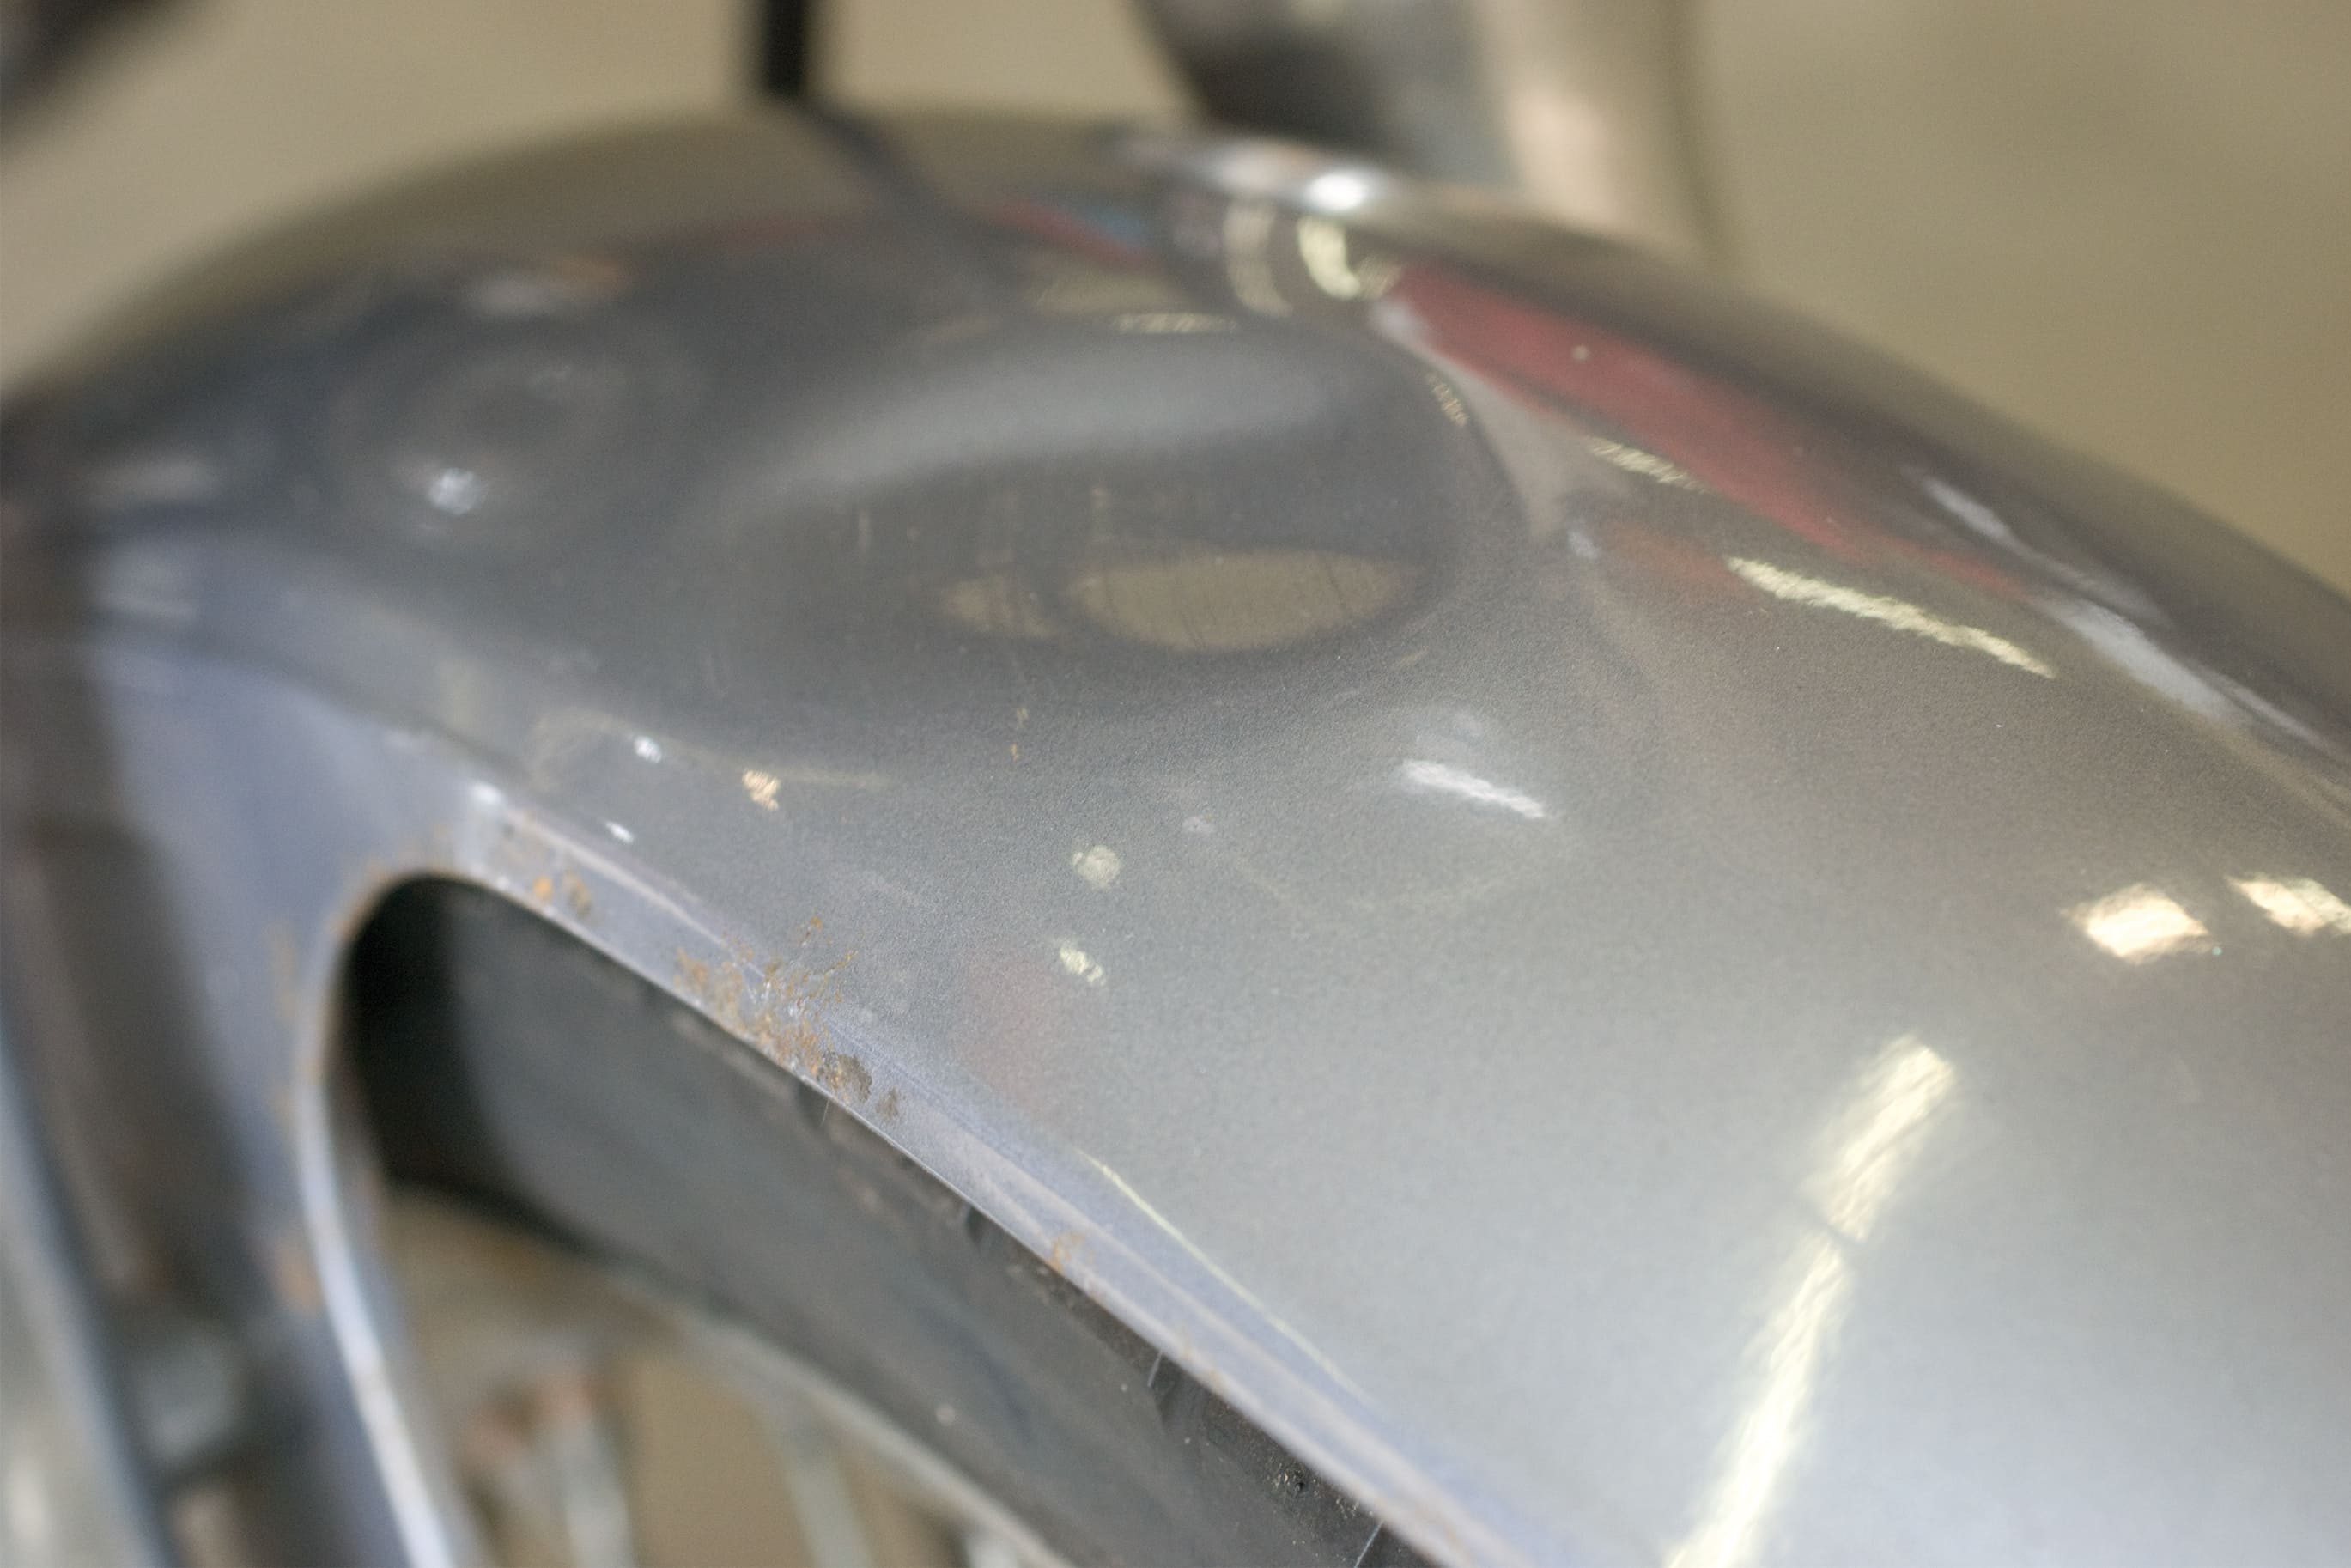
01 – Mudguard with dent and rust spot
Dented, uneven surfaces can be repaired with a two-component filler.
Step 2: Reduce the dent with a rubber mallet
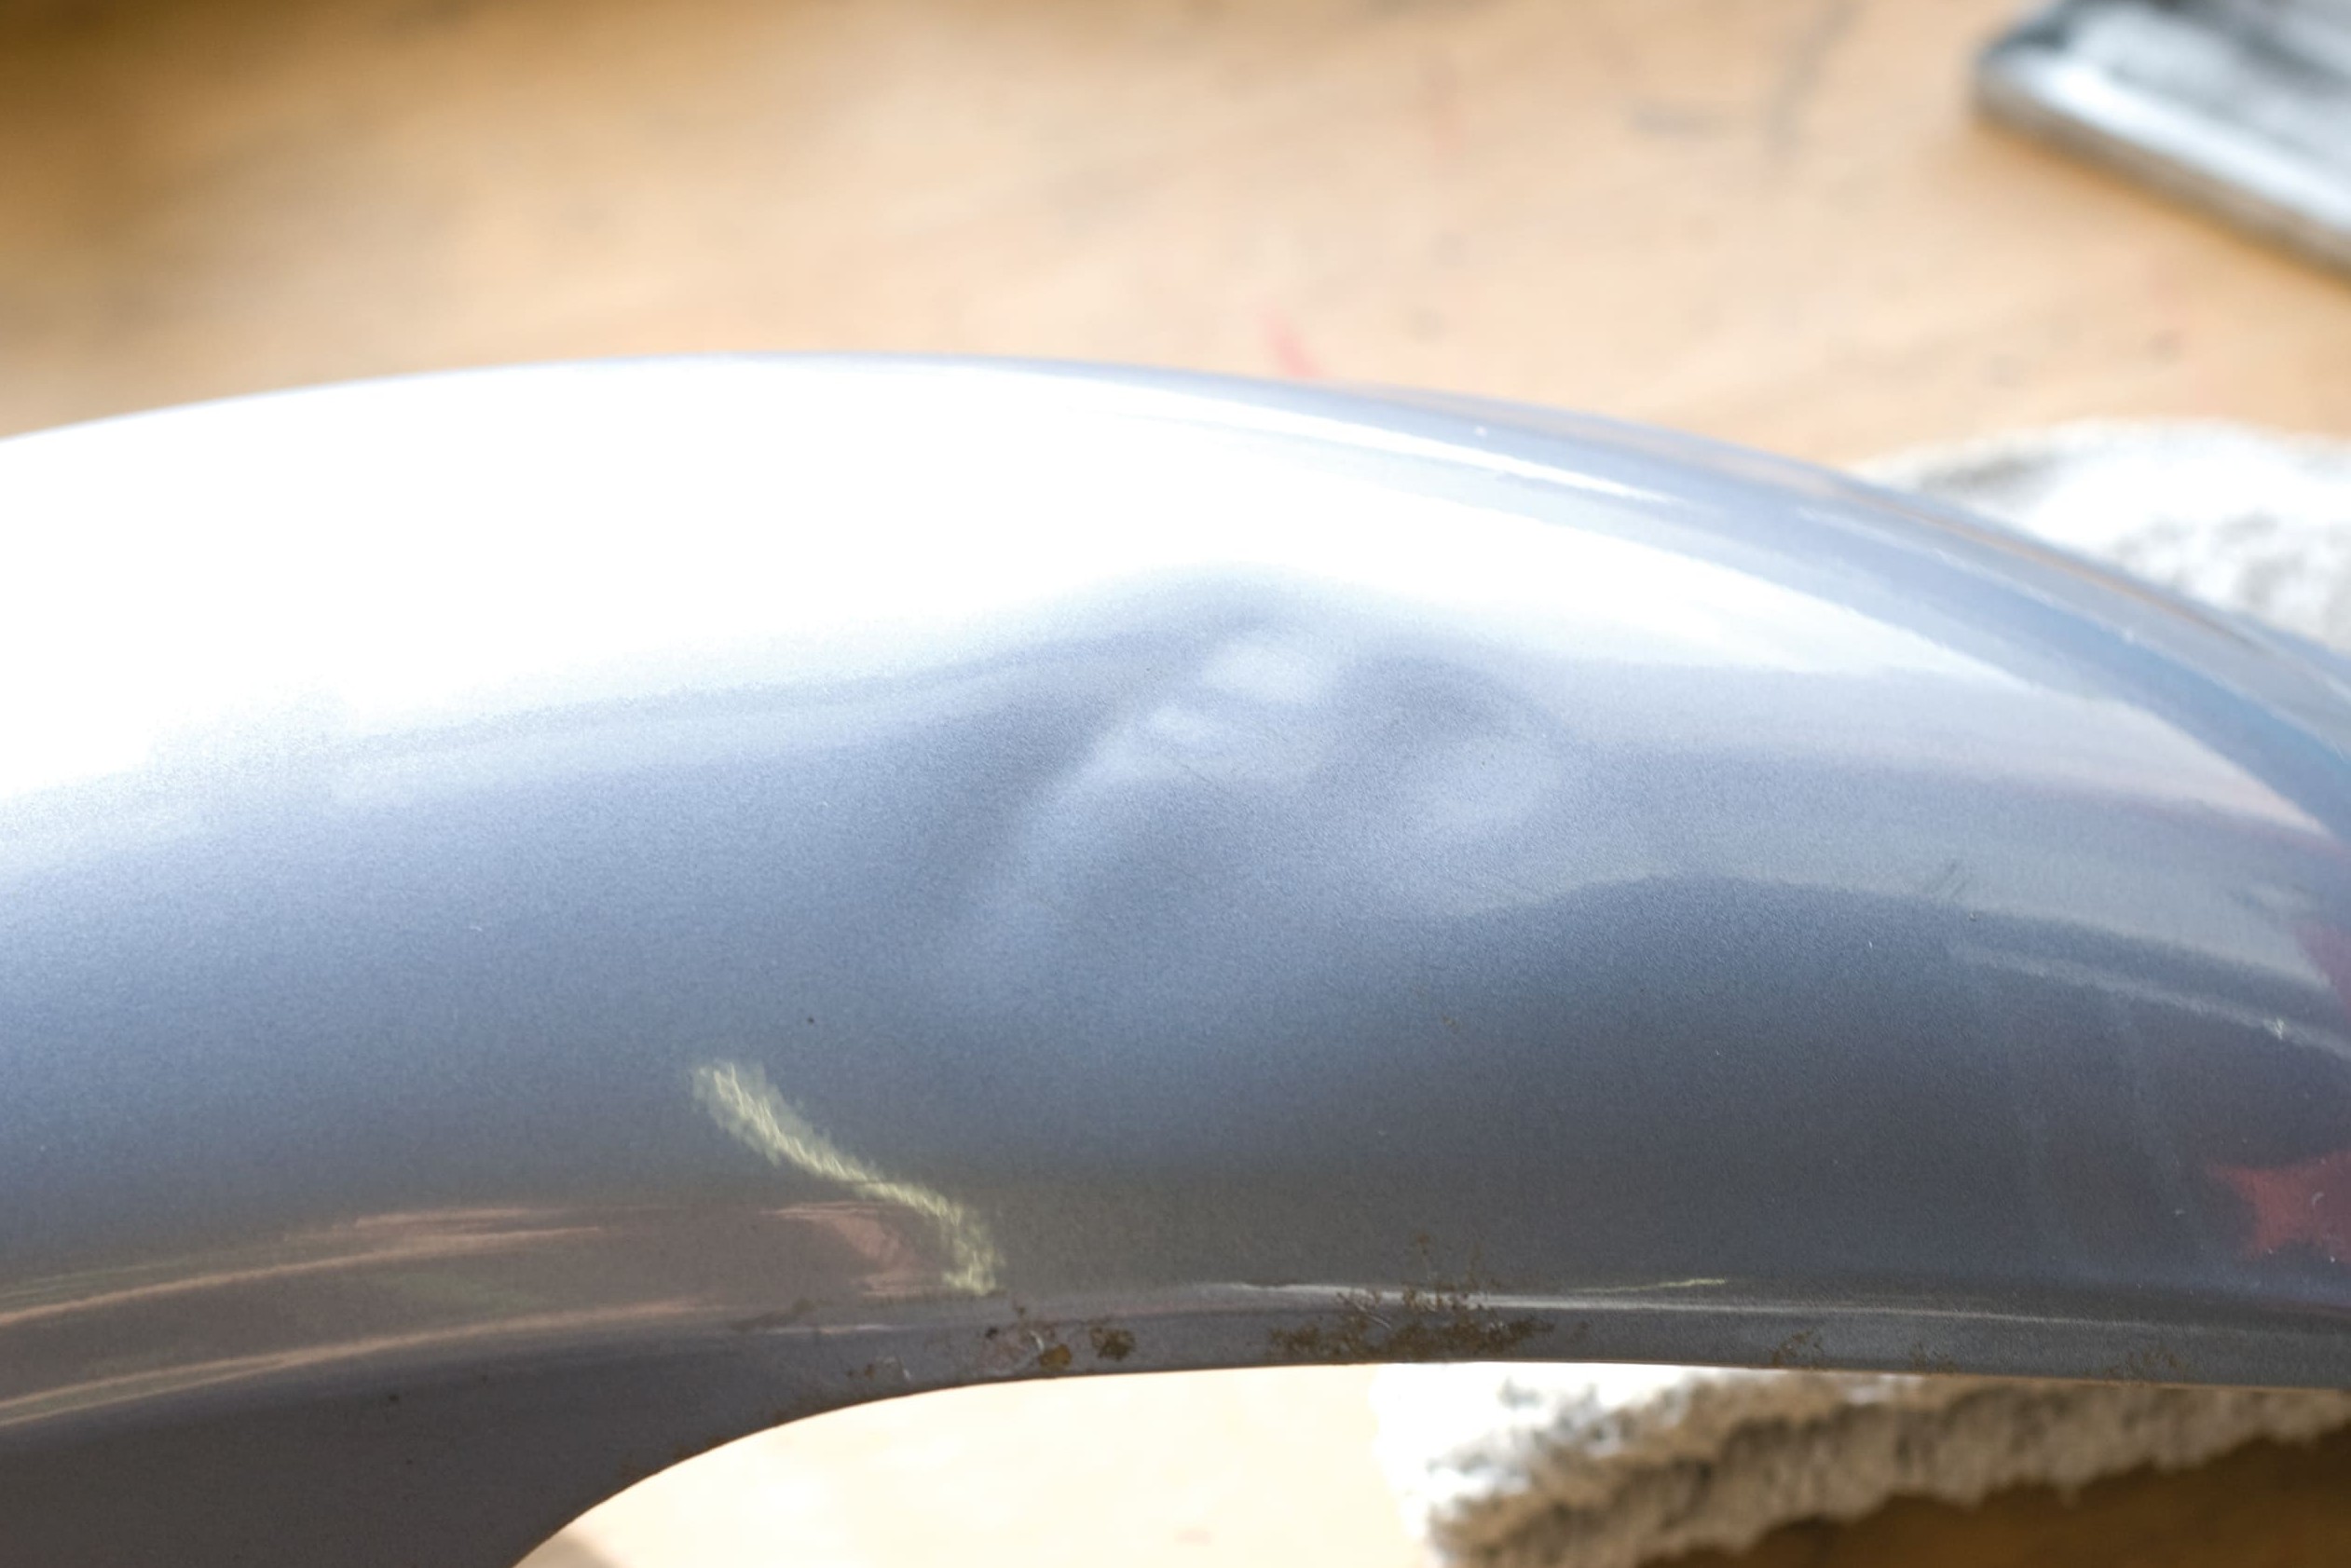
02 – Reduce the dent
Large dents can be gently hammered or pressed out using a rubber mallet so that you don't have to apply the filler too thickly.
Step 3, Fig. 1: Sand in and around the dent and rust spot…
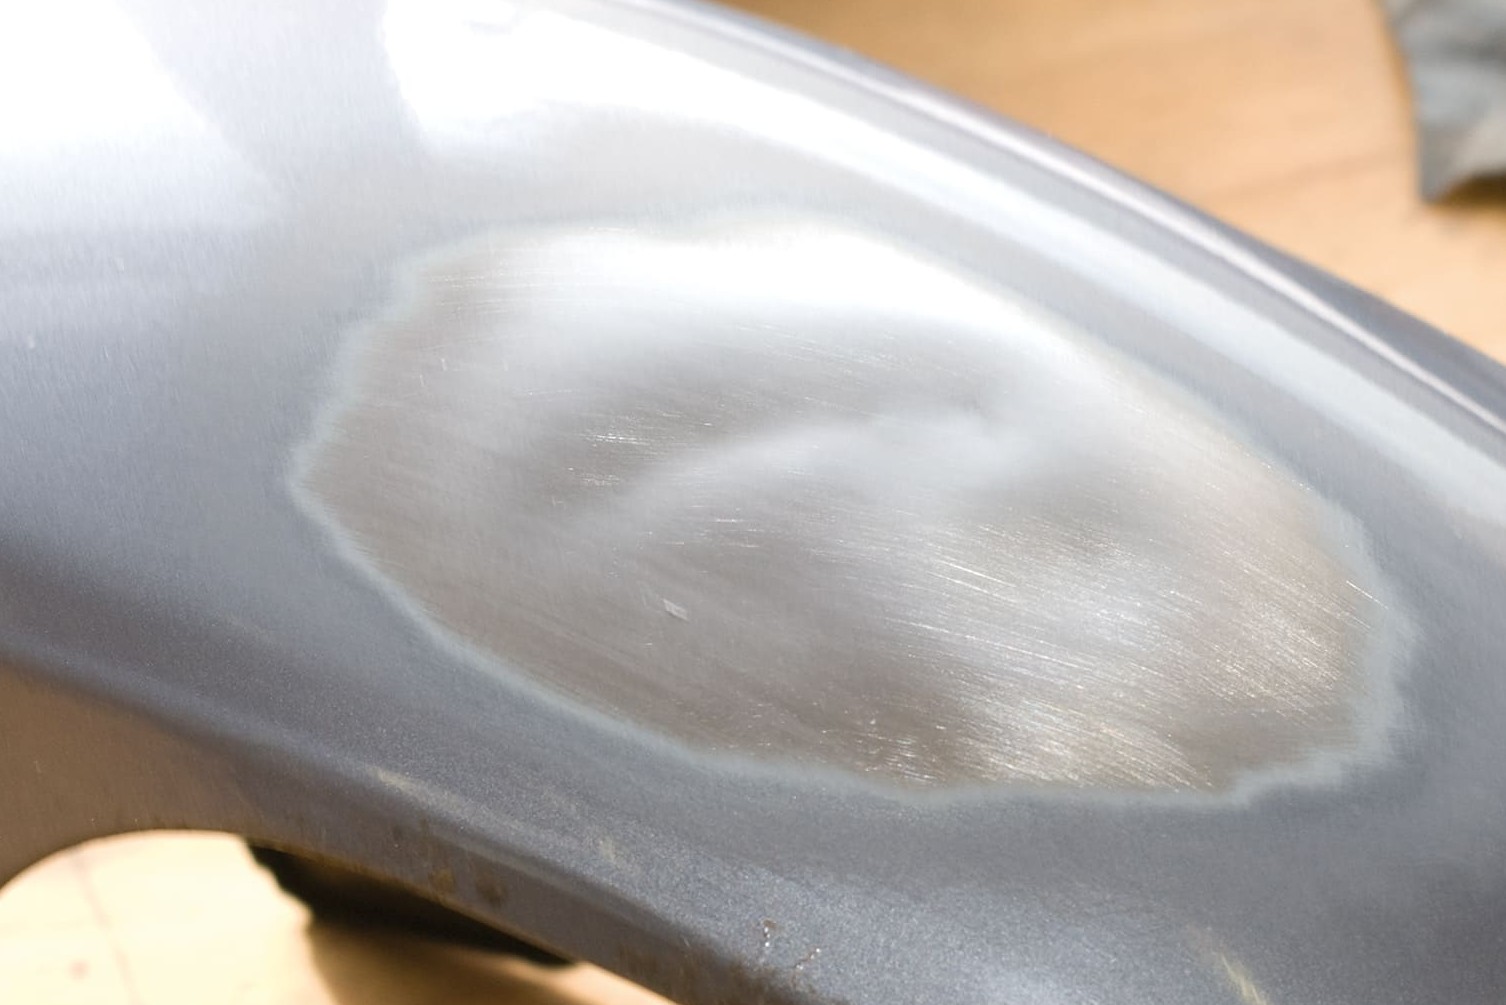
03 – Sand in and around the dent and rust spot
You can repair any rust holes by welding, or by bridging them with glass fibre mats or a two-component product containing glass fibres.
Important: Two-component fillers will only adhere reliably to bare metal (see Figs. 1 + 2)! Sand down a wide area around the actual rust, or strip completely, as the edges of the original paint can sometimes show through the repair paint. It's a good idea to extend the repair as far as a "natural boundary", such as a ridge or trim.
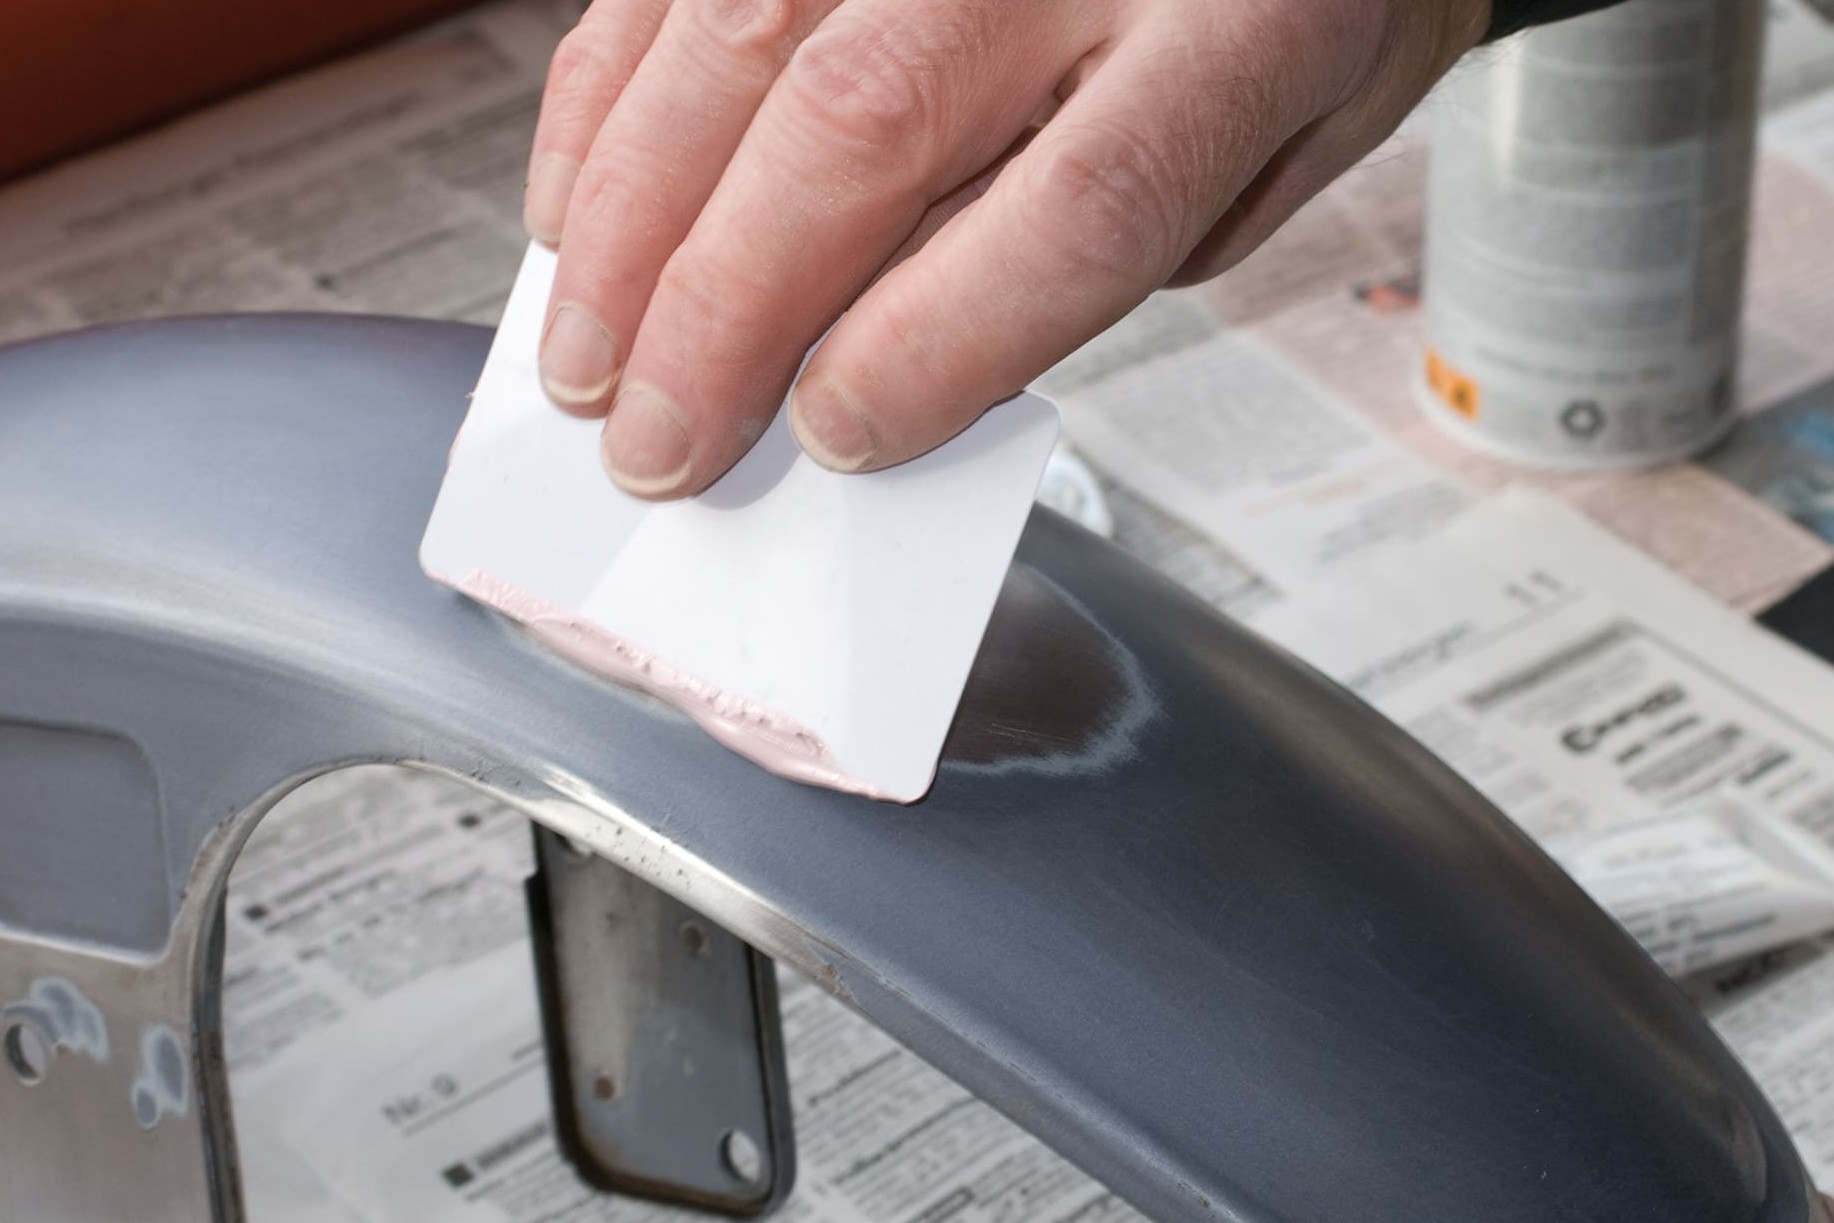
Step 3, Fig. 2: Apply filler and sand smooth
Apply filler
Mix the filler on a largish surface following the instructions on the packaging, and take extra care to avoid air pockets during application, as these would result in bumps in the filled area later, or even cause the filler to come away!
The surface must be absolutely free of grease and dirt, so you should clean the whole area extremely thoroughly using silicone remover, thinners or brake cleaner! Once the filler has hardened, sand it down until you have a smooth finish. To do this, wrap a piece of wet sandpaper (approx. 100–240 grit) around a sanding block or a piece of wood (if you don't use a sanding block you can easily end up with slight depressions on large surfaces). Only small repairs on curved surfaces are best sanded without a block. When sanding curved surfaces, always follow the shape of the part so that you don't end up with flat areas or depressions.
Wet sanding will keep the dust down considerably while you work. After sanding, you should dry and clean the surface, then run your finger tip over it to see if it feels smooth. If it's not 100%, degrease again, apply some more filler and then sand down again. Any remaining fine pores and/or minor grooves can be filled using fine or spray putty.
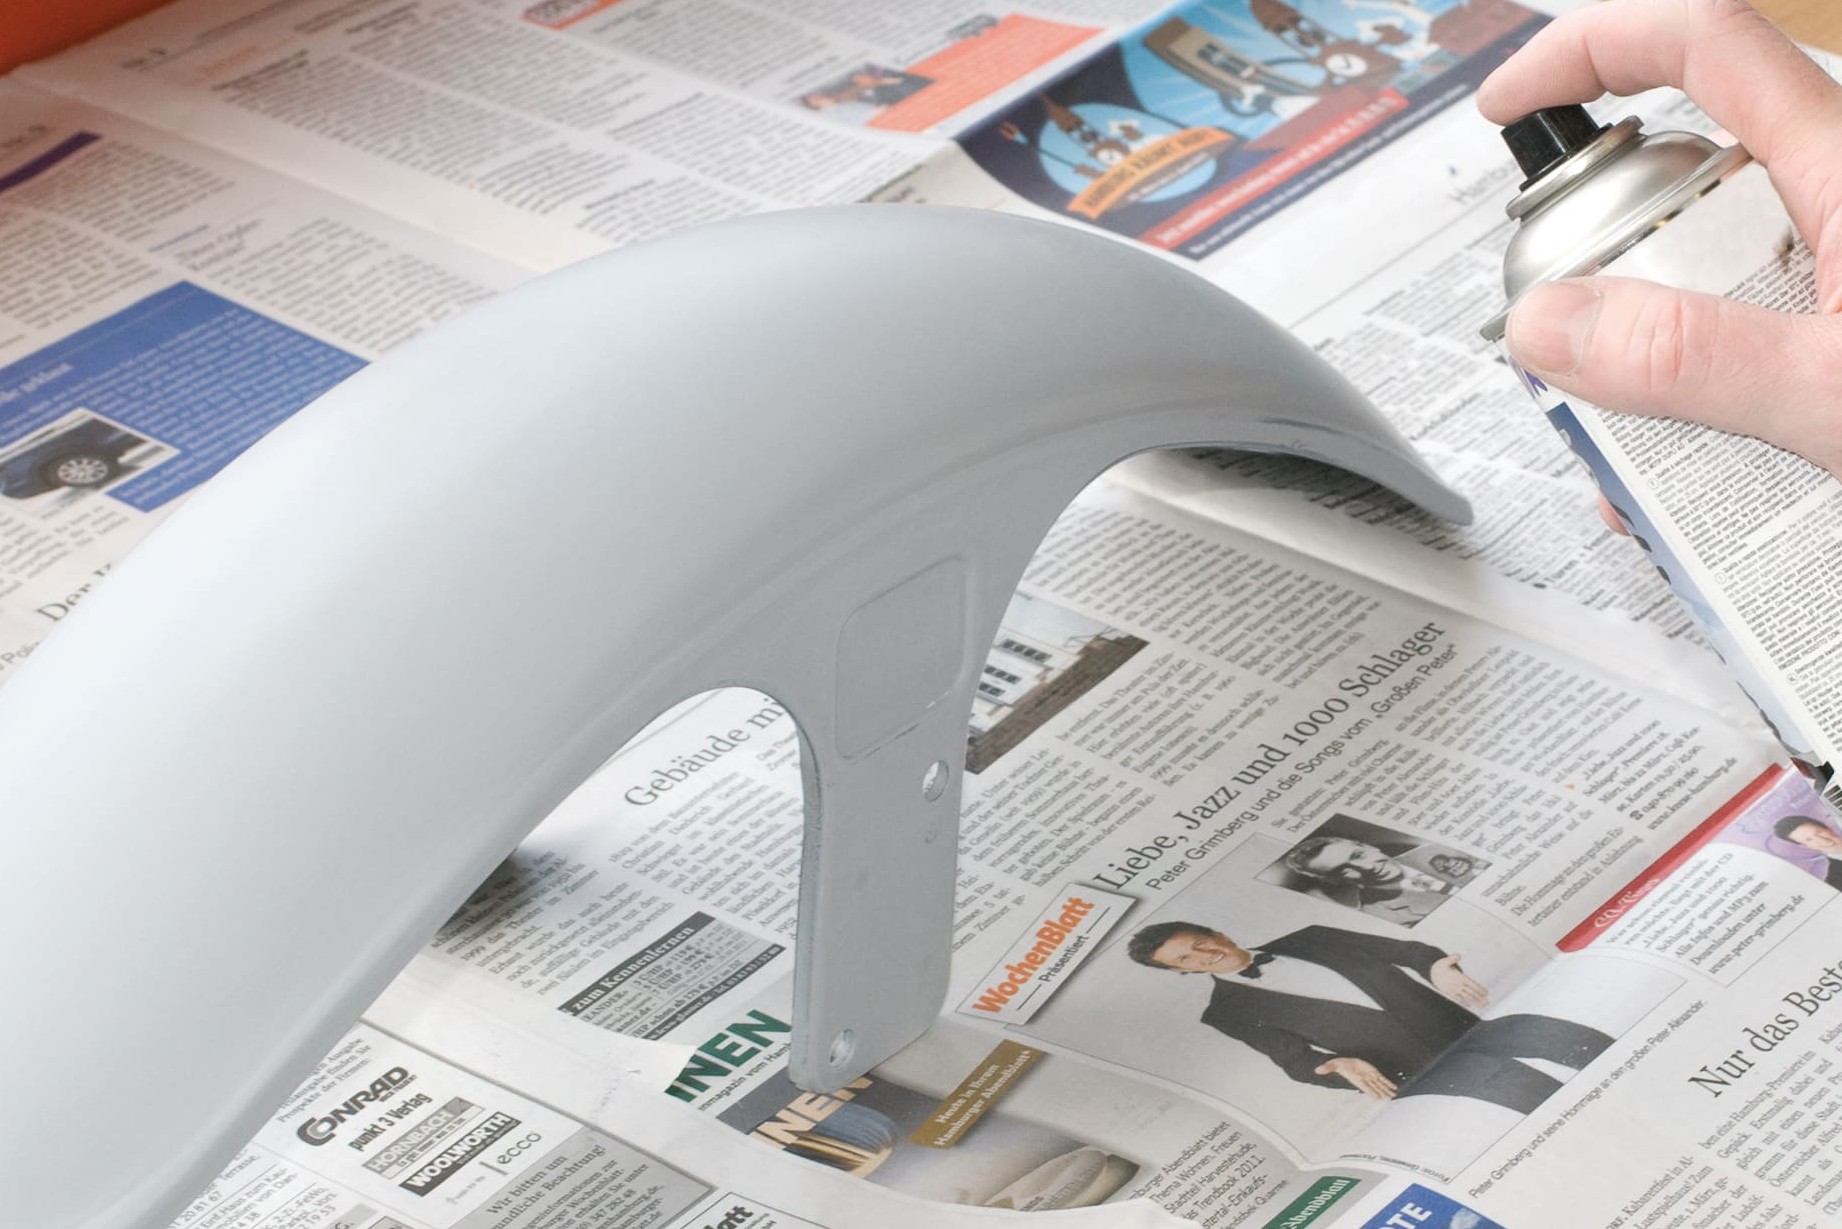
Step 4: Apply primer
04 – Apply primer
Now you can finally start painting. Never apply the top coat straight onto the substrate – nor straight onto the original paintwork (the only exception is if you've already used the same spray top coat before or you're painting an engine with thermal paint), as it would easily peel off. Apart from which, the top coat on its own doesn't offer the required corrosion protection. If you're painting over original paintwork, first sand down with a 400 grit wet sandpaper, clean thoroughly with silicone remover and then spray on a primer or filler.
This promotes adhesion of the top coat and fills any minor sanding marks. High-quality two-component primer fillers produce outstanding adhesion and particularly hard-wearing paintwork. You will have to dig a bit deeper in your pocket but the reward will be a very professional result.
If you've got a slightly uneven substrate that you don't really want to completely cover with filler, you can also apply a layer of spray putty and sand down – this builds a thicker layer than a primer.
However, you will still achieve the best adhesion and resilience on exposed parts using a two-component filler and two-component primer. If you intend to paint plastic, it's essential to first apply a thin coat of plastic primer before applying the base and top coats!
If you're primarily painting on bare metal, a fairly thin coat of zinc spray acts as an excellent rust protection. When it has dried, sand down and apply a primer (if you apply the top coat directly onto the zinc spray, the finish may turn matt). Zinc sprays are generally very heat-resistant (approx. 600°C), so they're also ideal for protecting exhaust systems (in this case, you can overpaint directly with a matt high-temperature top coat).
For bare metal that is not exposed to high temperatures, a two-component primer filler provides the ideal combination of rust protection and adhesion. This petrol-resistant primer is a bit more expensive, but also more scratch-resistant and durable than cheaper single-component primer fillers or rust protection primers. Before application, allow the spray can to reach room temperature (approx. 20–25°C is ideal), then shake it well (approx. 2 minutes). Do not apply the spray in a very cold place. Mask off the surrounding area and parts that you're not painting. Bear in mind that the spray mist will drift quite a long way, so make sure that all shelves and anything else in the room are properly protected! The room should be as clean and dust-free as possible – it's best to give the floor a wipe with a damp cloth or mop. Applying the paint outdoors will only work if there is no wind at all. Make sure the part you're painting is not damp (e.g. from condensation caused by temperature differences). First, test-spray on a piece of newspaper to check that the can is working properly, and so that you can see how strong the spray jet is.
Spray larger items crosswise to ensure even, all-over coverage. Hold the can approx. 20–30 cm from the surface. The distance and speed of application depend on the part you're spraying, the pressure in the spray can and the room temperature. The slower you move the can, the thicker the coat and the more likely you are to have drips (particularly on vertical surfaces). If your paint looks "grainy", it means you're holding the can too far away from the surface, or spraying too fast. Or the room temperature may be very high, so the paint is drying in the air before it reaches the surface. Your first coat should ideally just be a light "mist coat" to provide a key for the next coat. Apply another 2 or 3 thin covering coats, allowing approx. 5 minutes' drying time between coats. If you intend to apply even more coats, allow 24 hours drying time.
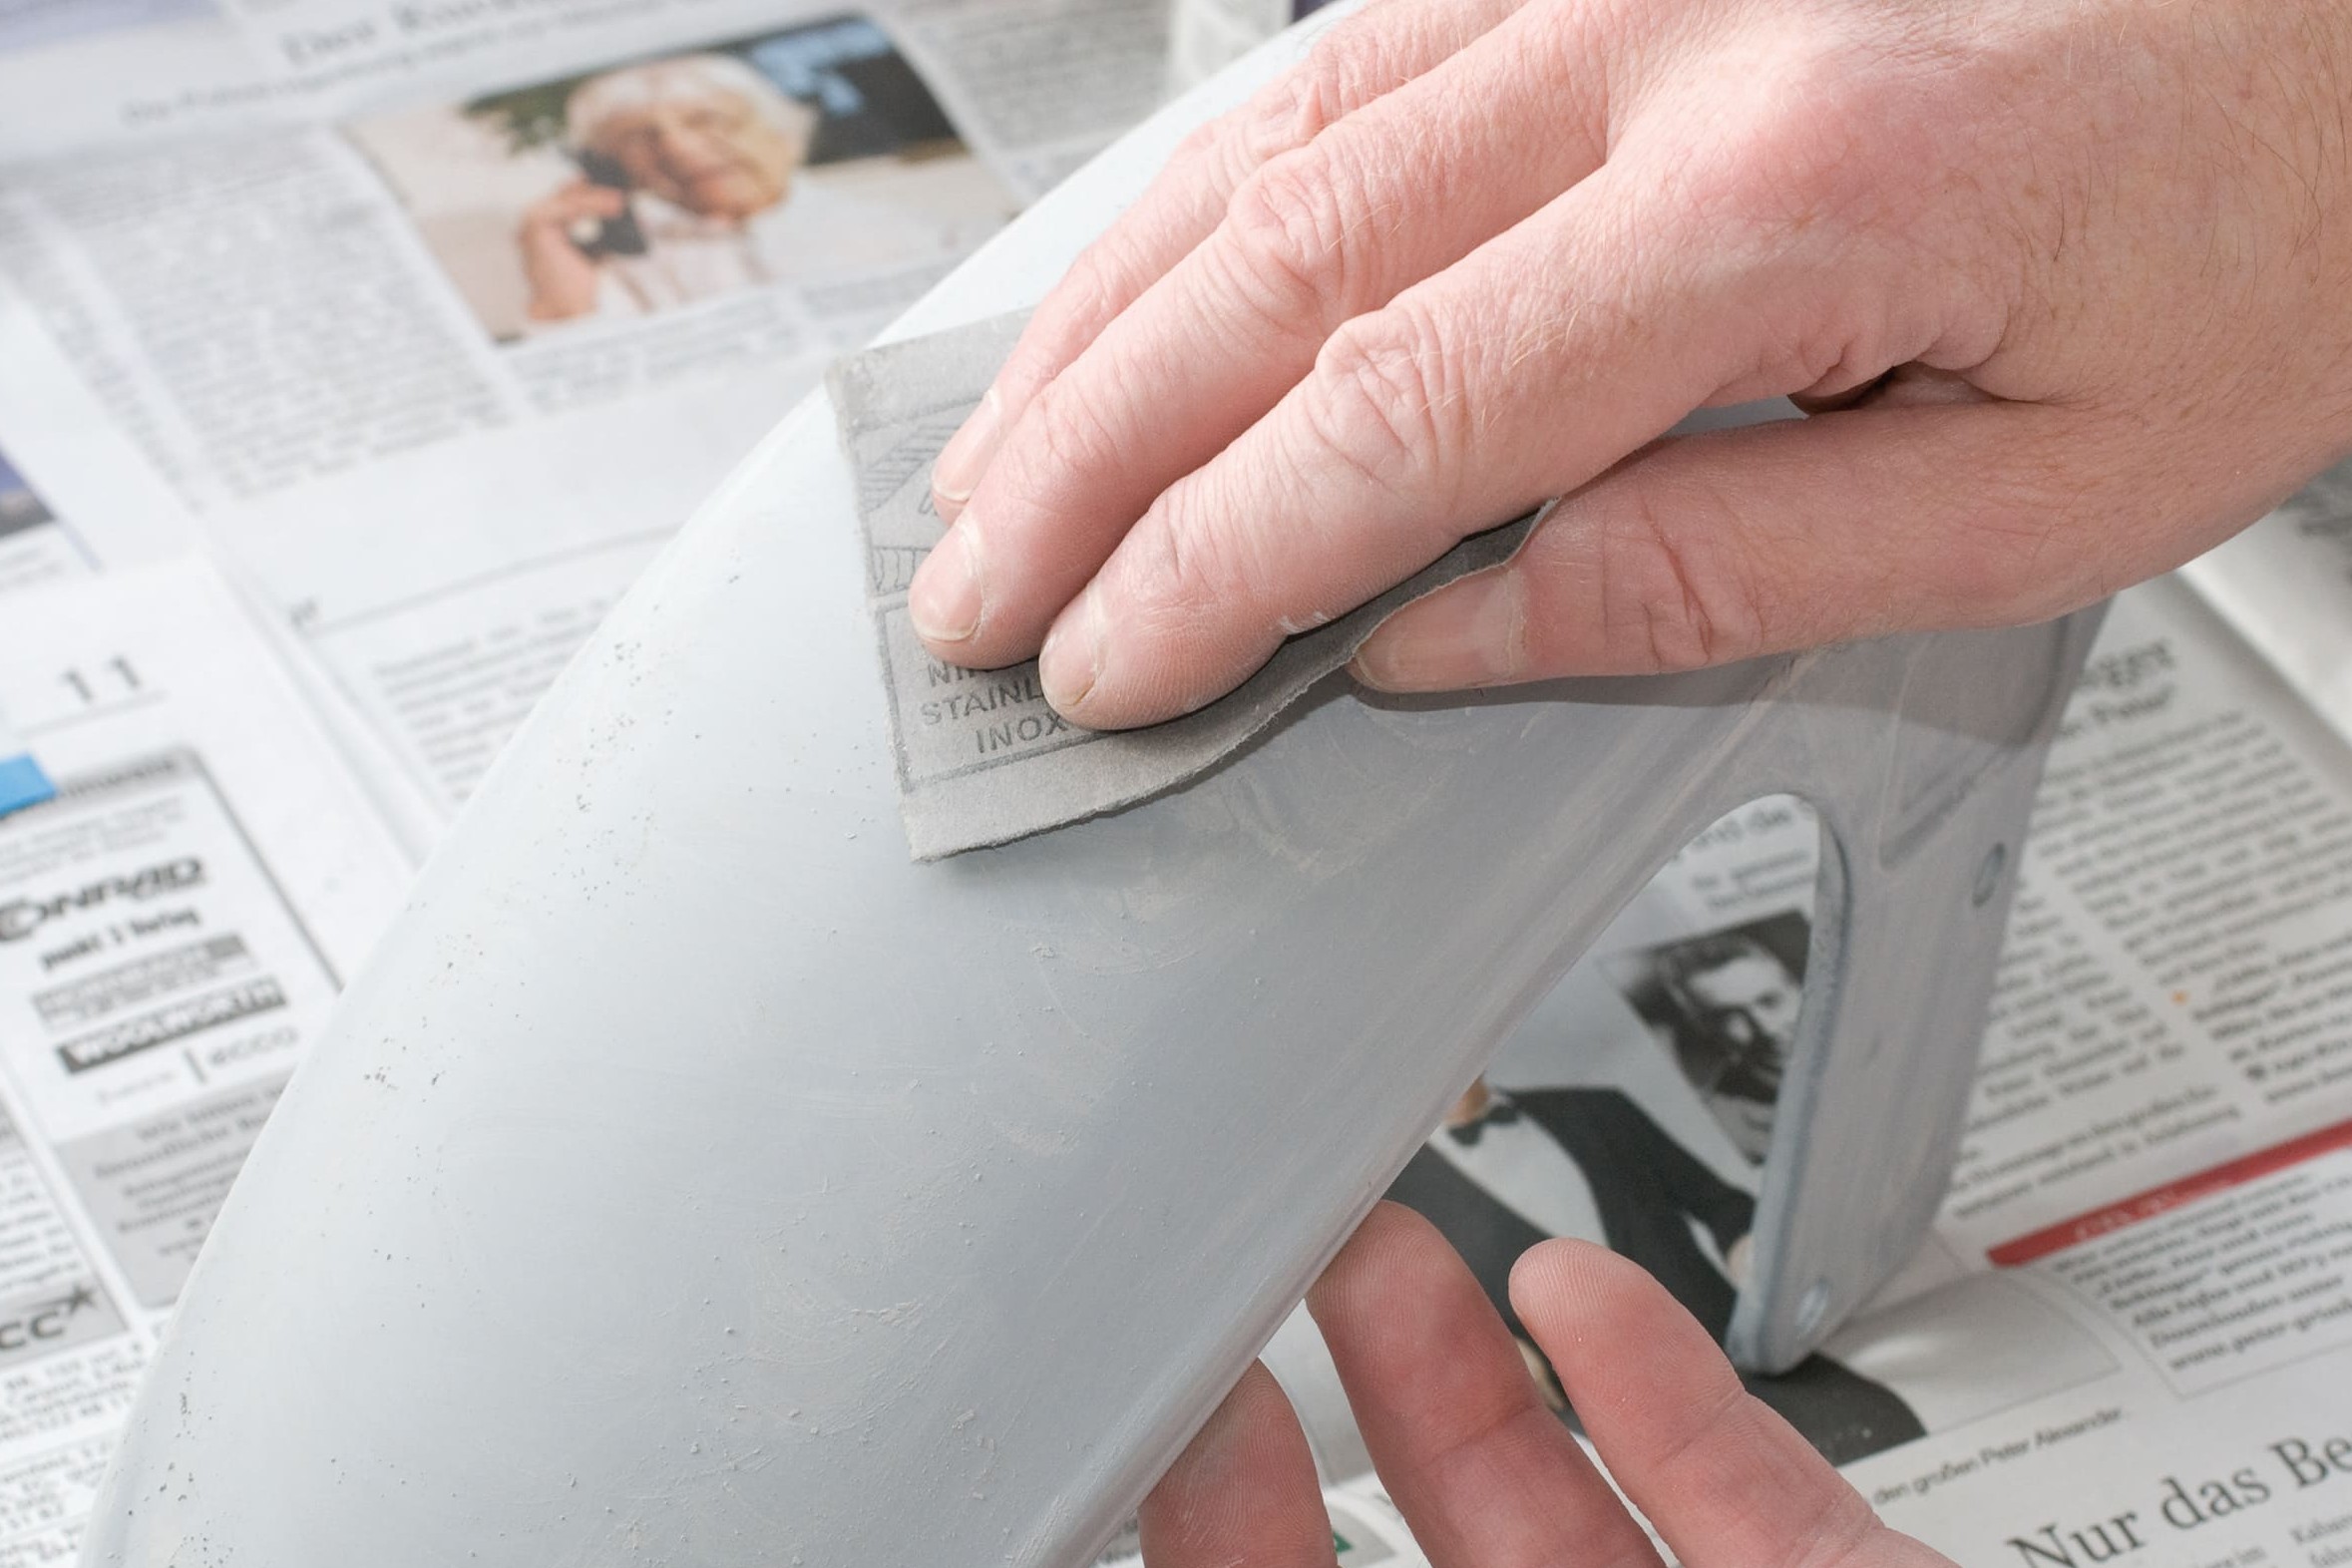
Step 5: Sand down the primer
05 – Sand the primer coat
When the primer has dried properly, smooth down with 600 grit sandpaper, making sure to remove any dust inclusions and imperfections. Carefully remove any loose dust from the surface (using a lint-free cloth or special "tack cloth" from a specialist retailer). Do not touch the surface to avoid leaving traces of grease from your skin!! If necessary, degrease by wiping with silicone remover, but do not use thinners, which would dissolve the base coat.
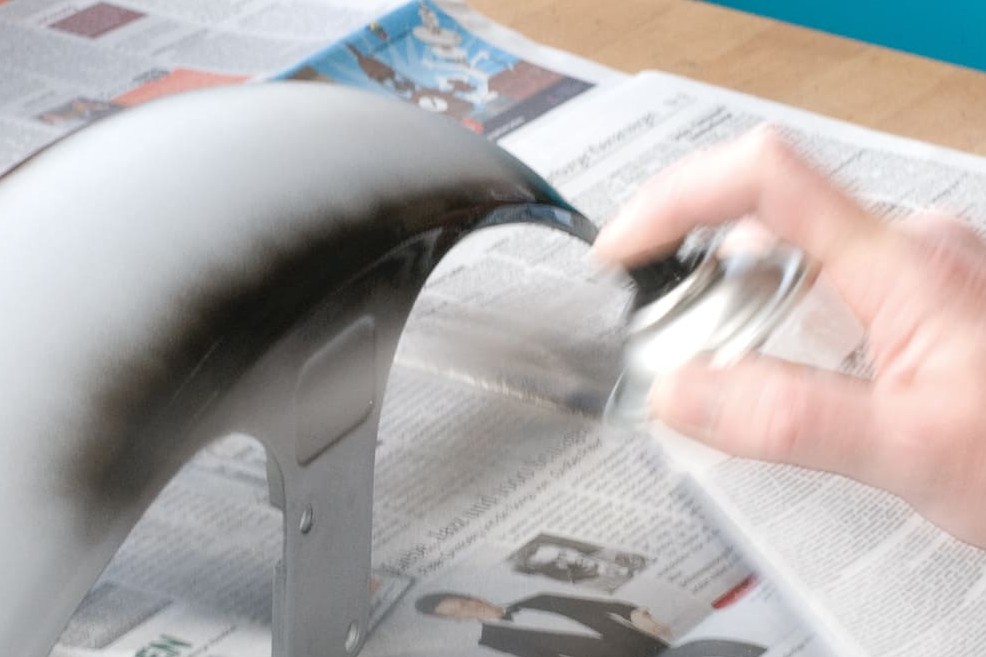
Step 6: Apply top coat…
06 – Apply top coat
Now apply the top coat. As previously described, apply a mist coat and then 2 or 3 crosswise covering coats, avoiding drips (see Step 4). If you see a drip forming, you may with a bit of luck be able to smooth it out by turning the part around.
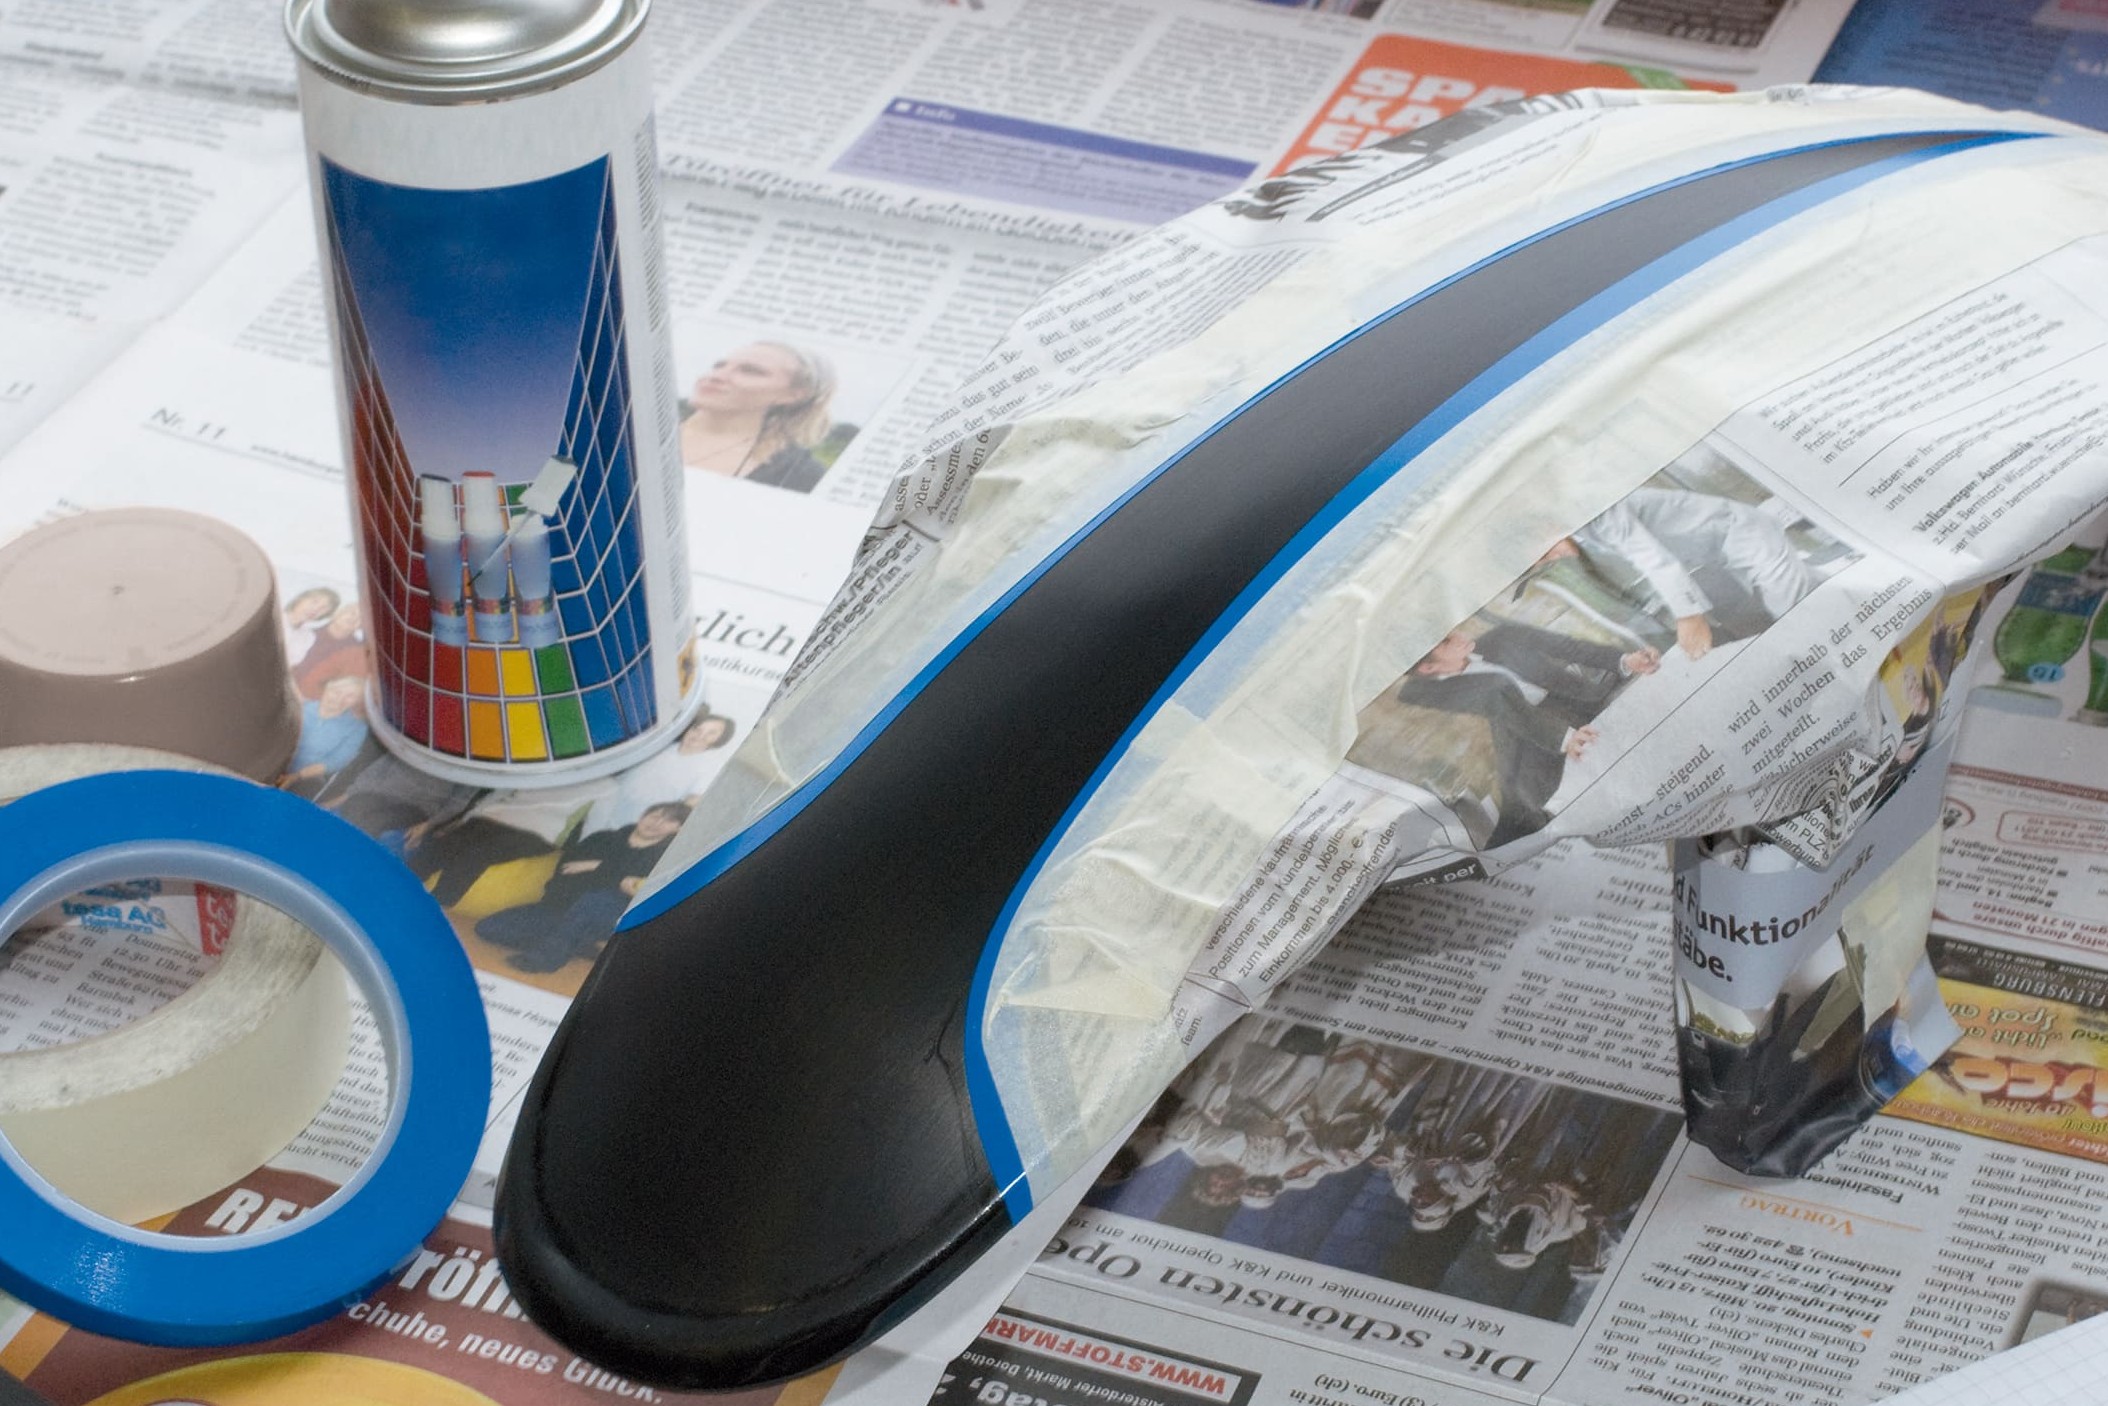
Step 7, Fig. 1: Mask off for the second colour…
07 – Mask off section for second colour and spray
If you're doing a two-tone paint job (see Step 7, Fig. 2), allow the first top coat to dry at least overnight, then mask it off ready for the second colour using a special curve masking tape from a specialist paint supplier (see Step 7, Fig.1). This tape is ideal for applying around curved surfaces on your bike's bodywork. On removal, it gives a clean edge and doesn't leave any adhesive residue on the surface. Do not use normal masking tape, as you will end up with rough edges! Fine-sand the surface and remove any spray mist that lands on the first top coat.
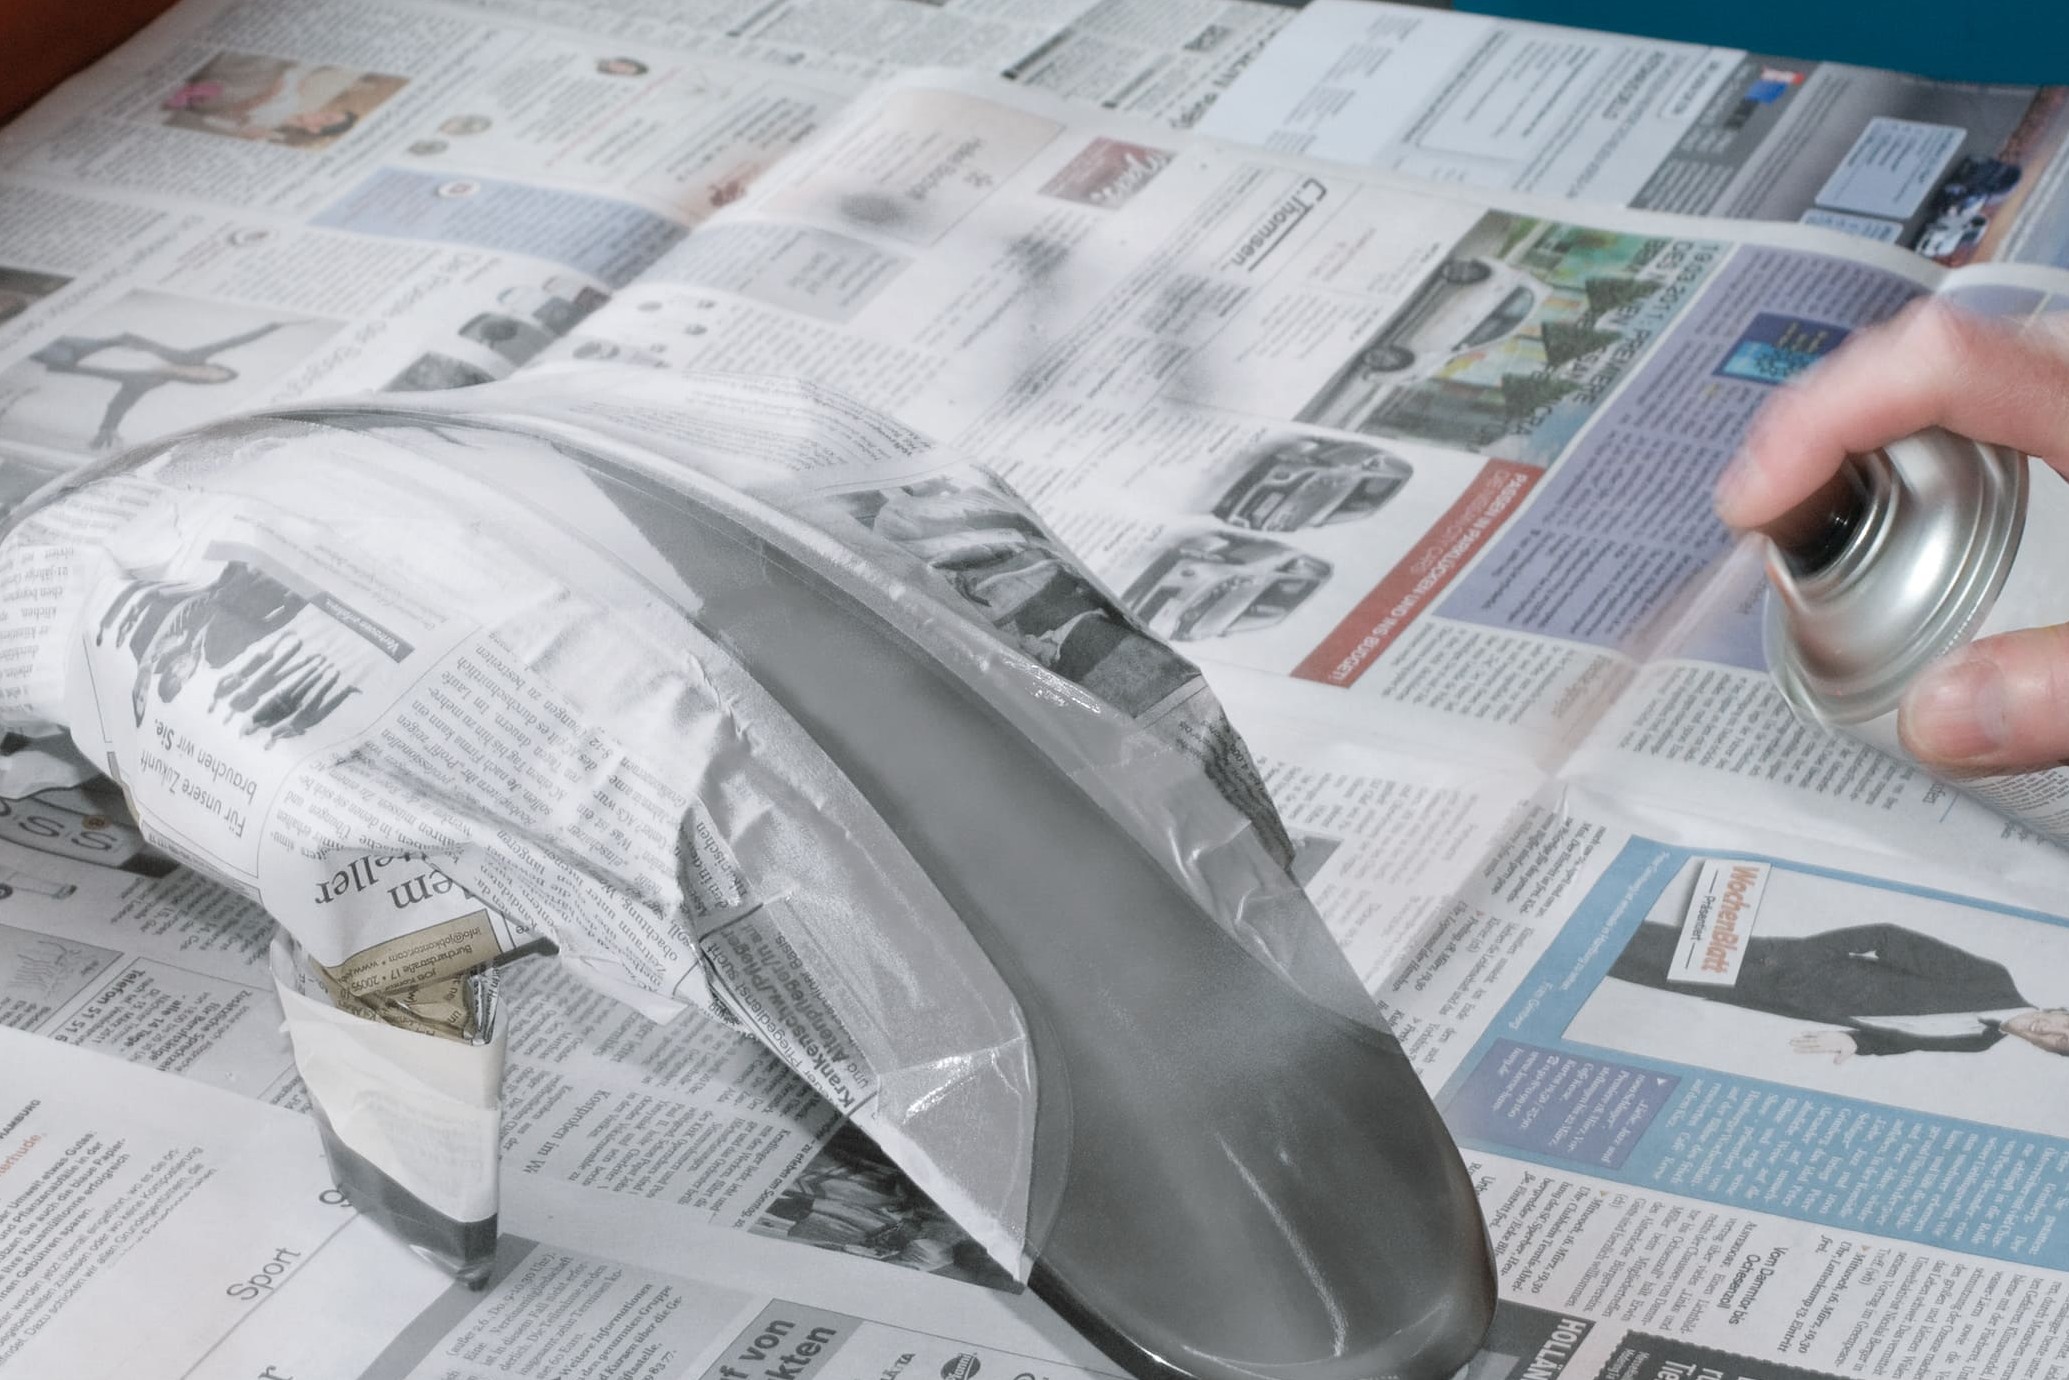
Step 7, Fig. 2: ... and spray

Step 8: Clear lacquer gives a mirror finish
08 – Clear lacquer ensures a mirror finish
If you're using a metallic paint, let it dry for approx. 30 mins (or longer) and then apply a clear lacquer to protect it against weathering and to achieve a mirror finish. Non-metallic paints also have a more attractive high-gloss appearance and better protection if you apply a final clear coat, preferably a two-component lacquer.
If the paint surface is not completely smooth and free of spray mist, give it a final finish after a few days' drying time. Smooth away any larger imperfections using 1000 grit wet sandpaper. Fine spray mist and the sanded area are then fine-polished with a special polishing paste. This will produce a beautiful, smooth finish that looks as good as the original paintwork. However, single-component paint is always slightly less hard-wearing – so try to avoid scratches and always avoid dripping any DOT 4 brake fluid. The paint is theoretically petrol-resistant, but petrol spillage does tend to leave the paintwork matt, so it will need to be buffed up again. Finally, protect the paint by applying a layer of hard wax to seal it and ensure a lasting shine.
Important: You will need to be extra-careful with the clear lacquer, as it tends to form drips easily, so don't spray too thickly. Once mixed, two-component lacquer will not keep for much longer than a day – so gather together as many parts as possible for painting so as not to waste any of your can.
Painting a motorcycle engine
Heat-resistant spray paints are highly durable and specially formulated for freshening up engine parts. However, it's essential to ensure that the surface is absolutely clean, grease-free and slightly roughened. Individual parts, such as a valve cover (rocker box), can be removed and carefully degreased using silicone remover, thinners or brake cleaner and then lightly sanded down (600 grit). "Rust bloom" must be thoroughly removed before painting, as otherwise it will very quickly show through again. The many nooks and crannies on cylinders and cylinder blocks make them quite hard to prepare for painting – nevertheless it's crucial to be very thorough! You can clean up a rusty engine case by bead blasting.
If you want to freshen up the paintwork on your engine, it's best to stick with the original colour. An excellent option is silver-coloured thermal paint, which is particularly durable and also best for camouflaging any rust spots. You must not use a primer. Clean, degrease and lightly roughen the bare metal surface and simply spray direct with the heat-resistant paint. The thinner the layer of thermal paint, the more heat-resistant it is.
And if you feel so inclined, you can also bake individual parts in the oven to harden the thermal paint even before the engine has warmed up when you take your motorbike out on the road.
Important: Do not allow blasting material to get into the engine, as it will irreparably damage the bearings, and the resulting friction will slowly but surely wear out the engine. So if you're planning to bead-blast the entire engine, you need to dismantle it first, rebuild the empty case with the gaskets, and seal off all openings. After blasting, wash all the individual parts very thoroughly, from the inside out, in a parts washer! That's the only safe way to ensure that you don't cause any engine damage! Alternatively, some specialist workshops nowadays offer blasting with dry ice. As there is no risk of damage to the engine with this method, you can use it to blast the whole engine clean.
The Louis Technical Centre
If you have a technical question about your motorbike, please contact our Technical Centre, where they have endless experience, reference books and contacts.
Please note!
These tips for DIY mechanics contain general recommendations that may not apply to all vehicles or all individual components. As local conditions may vary considerably, we are unable to guarantee the correctness of information in these tips for DIY mechanics.
Thank you for your understanding.


